Search This Blog

PUTTARISI/PUTARISI SWEET " INDIAN STICKY RICE PUDDING "


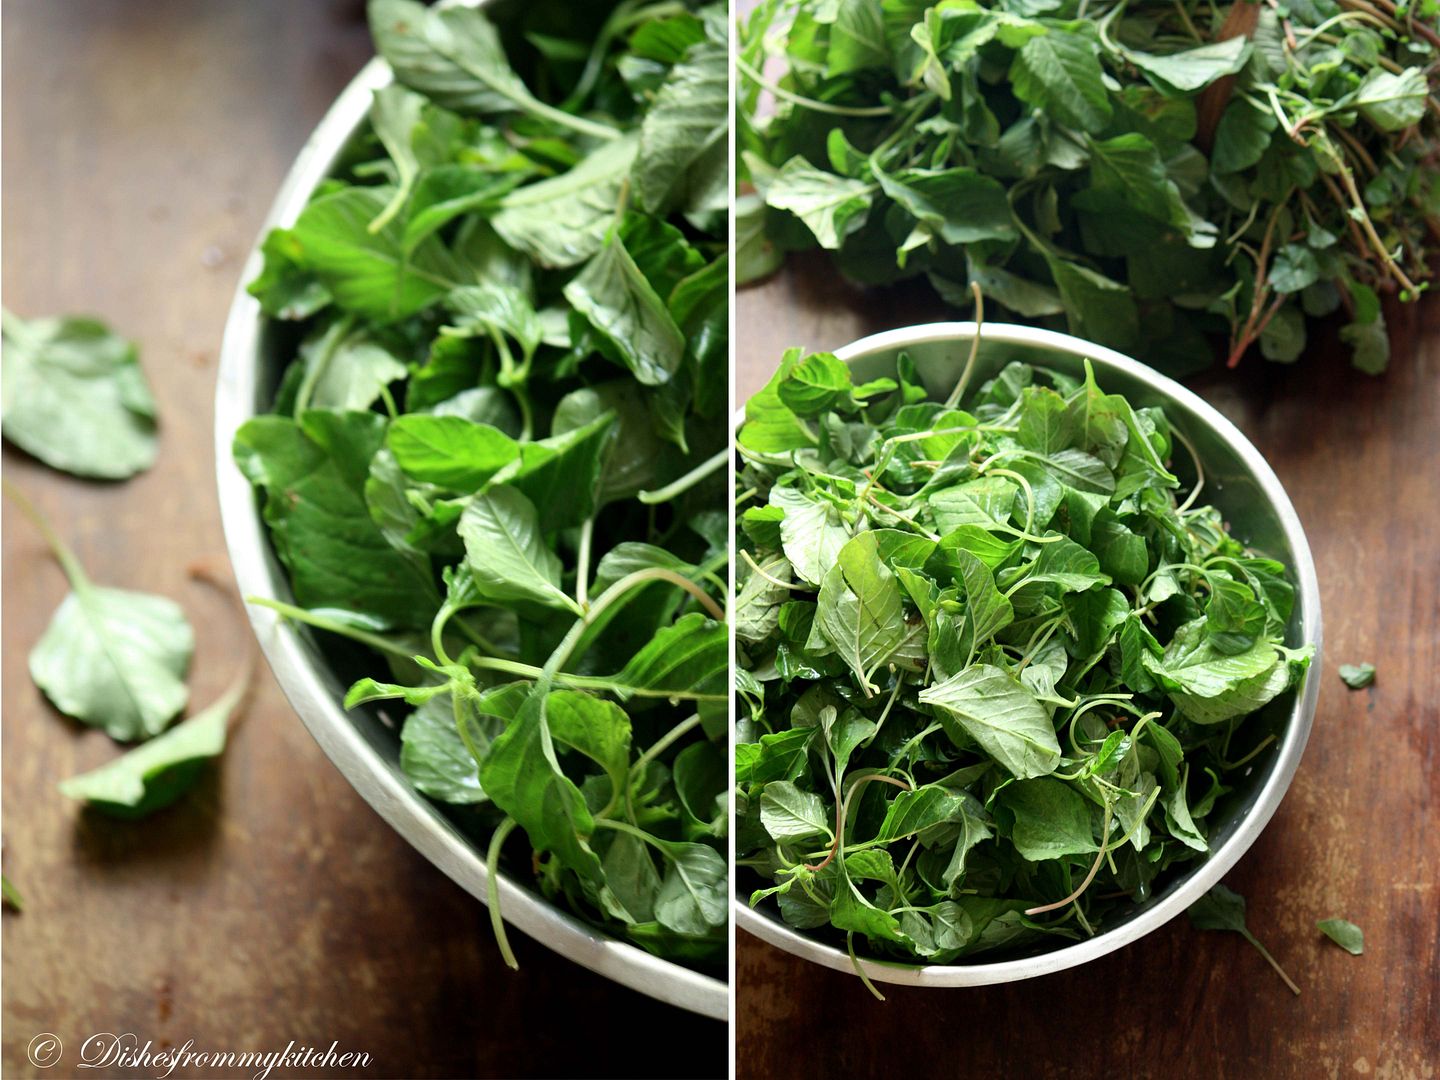
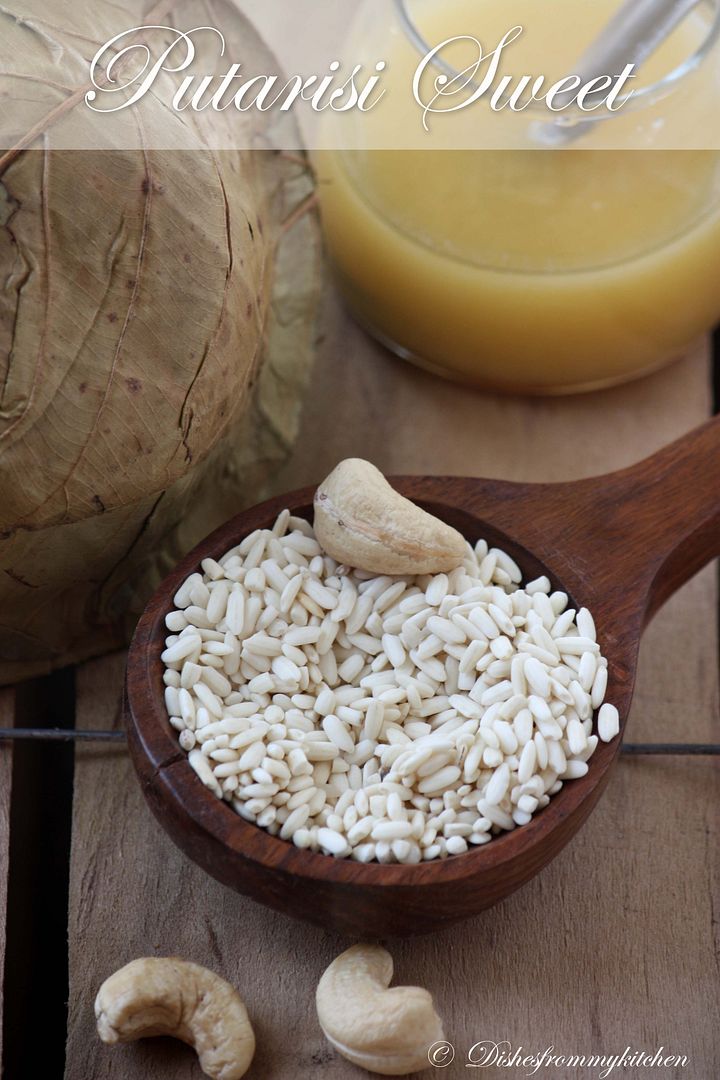
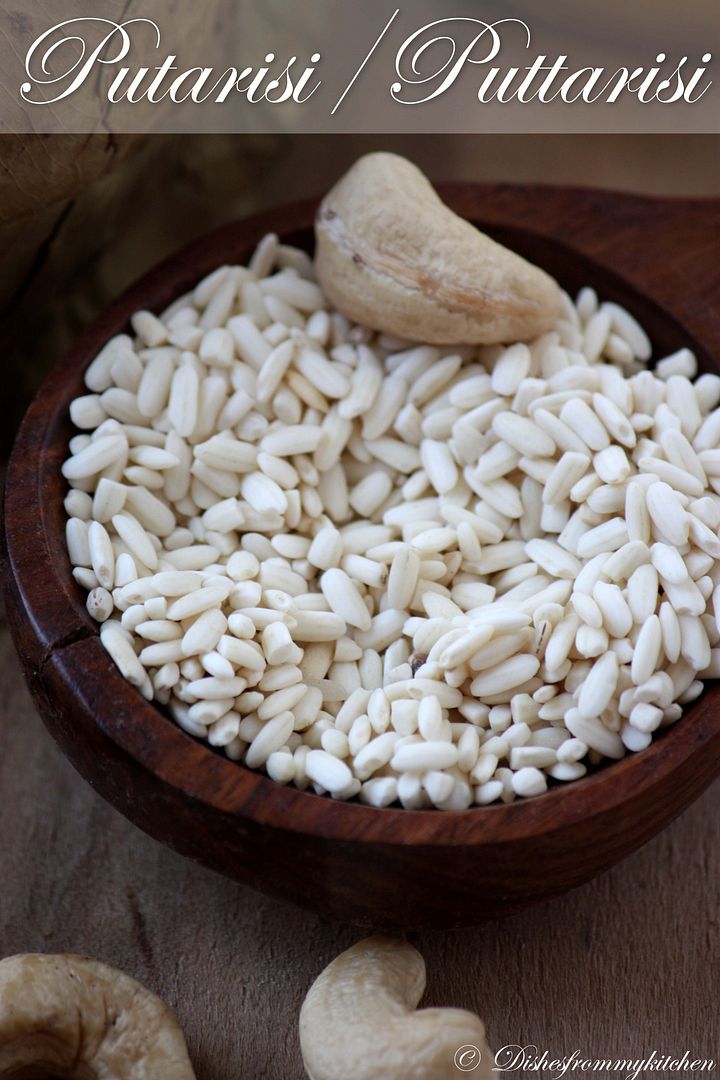
Puttarisi/putarisi which is called as sticky rice is used throughout Asia.  It is also called with different names such as glutinous rice, sweet rice, pearl rice, mochi etc.  This kind of rice is sticky when cooked.  There are also black and purple varieties.

The puttarisi/putarisi sweet which I am posting is our family favorite, being made in our family for a long time by my paternal grand mother and then my mom.  This is our family recipe too. We love this a lot for its texture and pleasant fragrance, so no extra flavoring/fragrance like saffron or cardamom is needed.   This is so easy to make and unique in taste.  Seriously I feel like eating some more when I was drafting this post :)  Will also post another recipe with black sticky rice soon..


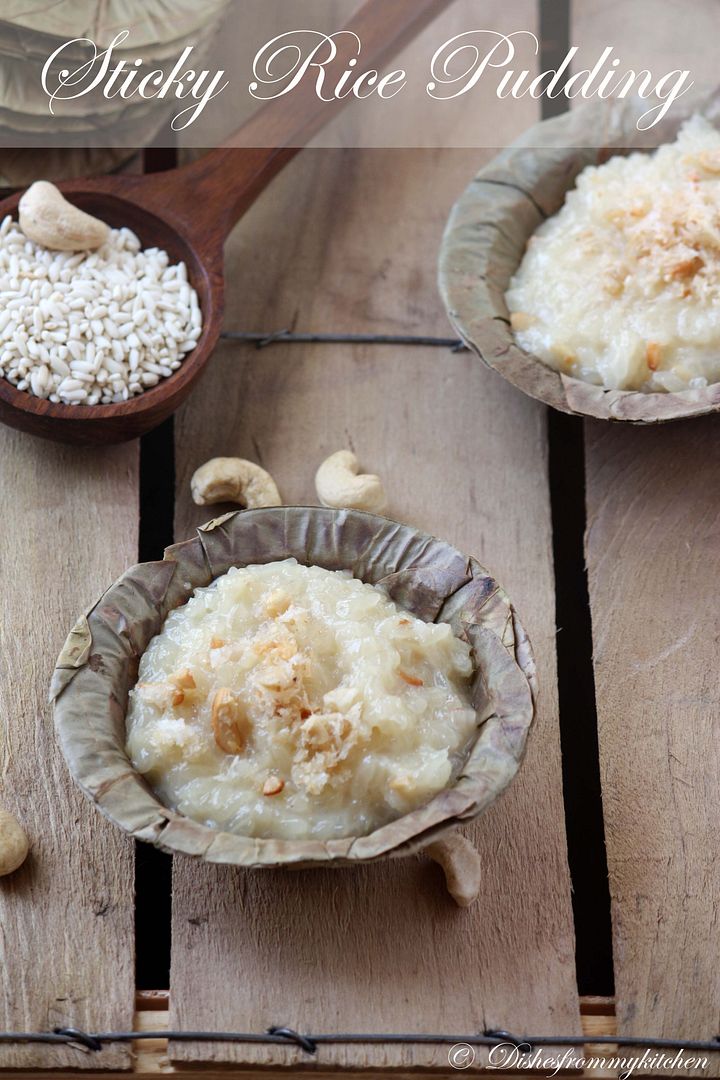
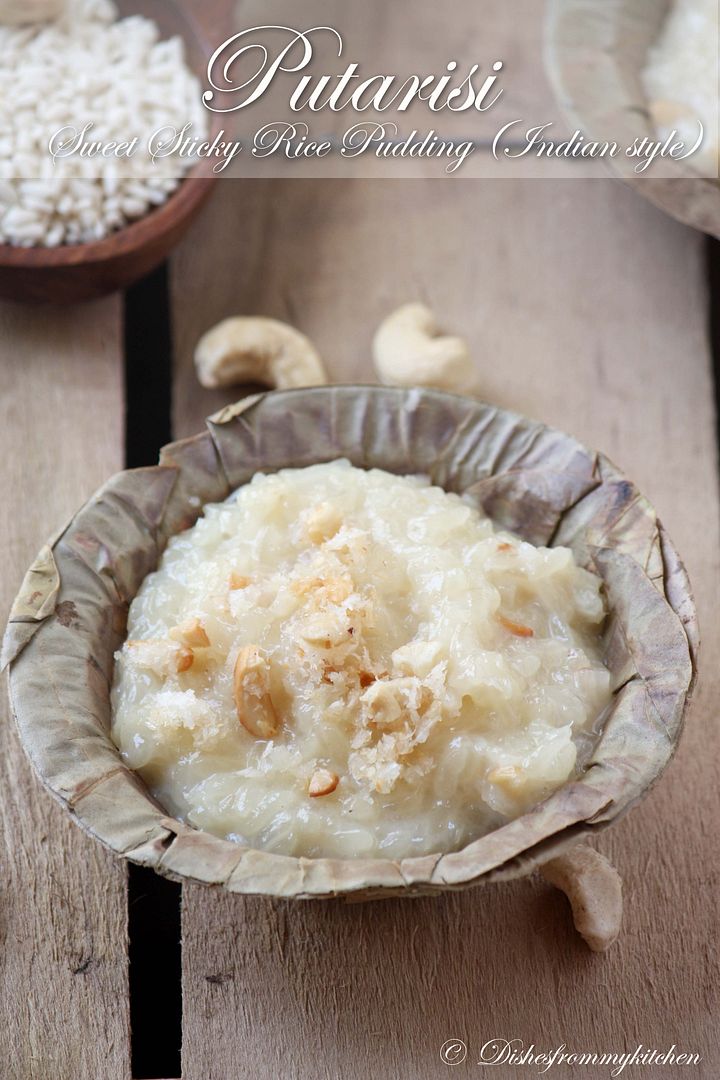
PUTTARISI/PUTARISI SWEET (INDIAN STICKY RICE PUDDING)

Ingredients:

Puttarisi/sticky rice - 1/2 cup
Milk - 1 cup
Sugar -3/4 cup
Ghee - 1 1/2 tbsp + 1/2 tbsp (while serving)
Coconut - 2 tbsp (scrapped/grated)
Cashews - 10 to 12 chopped finely


Method:

1. Wash the rice just once with tap water.
2. Drain the water.
3. To the drained rice, add a cup of milk.
4. Pressure cook for 3 to 4 whistles in medium flame.
5. One the pressure is released.
6. Transfer the cooked rice in a pan add the sugar stir them until the sugar is melted and well blended with the rice and milk mixture. (Do this in low flame)
7. Now fry the coconut and cashews in ghee add to the pudding now. Mix everything until well blended.
8. Serve hot with 1/2 tbsp of ghee.


Note:

1. Just wash the rice once to retain the pleasant aroma.
2. It tastes so good when served hot.
3. If you don't have pressure cooker you can follow this way.

Soak the washed rice in water for 1/2 hr then cook with 1 1/2 milk by stirring once in a while until all the milk is absorbed and the rice is cooked.  Once this is done follow the above steps from 6 to 8.

Hope you all enjoyed our favorite puttarisi pudding!!!

Read more...

CROISSANTS (PLAIN AND SOME SPRINKLED WITH ZATAR) - DARING CHALLENGE FOR SEPTEMBER 2011

The Daring Bakers go retro this month! Thanks to one of our very talented non-blogging members, Sarah, the Daring Bakers were challenged to make Croissants using a recipe from the Queen of French Cooking, none other than Julia Child!


A croissant is a buttery flaky bread named for its distinctive crescent shape. It is also sometimes called a Crescent. Croissants are made of a leavened variant of puff pastry. The yeast dough is layered with butter, rolled and folded several times in succession, then rolled into a sheet, a technique called laminating.


The most difficult part of making croissants is that they take a veeeeery long time. About 12 hours total, with resting and rising periods. I made few plain croissants and other sprinkled with Za'atar(Zatar) middle eastern spice...yummm... here you go for virtual treat.


PLAIN BUTTERY CROISSANTS & WITH ZATAR

Recipe source : Mastering the Art of French Cooking, Volume Two. Julia Child and Simone Beck
Ingredients :

¼ oz (7 gm) of fresh yeast, or 1¼ teaspoon (6¼ ml/4 gm) of dry-active yeast (about ½ sachet)
3 tablespoons (45 ml) warm water (less than 100°F/38°C)
1 teaspoon (5 ml/4½ gm) sugar
1 3/4 cups (225 gm/½ lb) of strong plain flour (I used  Bread flour)
2 teaspoons (10 ml/9 gm) sugar
1½ teaspoon (7½ ml/9 gm) salt
½ cup (120 ml/¼ pint) milk
2 tablespoons (30 ml) tasteless oil ( vegetable oil)
½ cup (120 ml/1 stick/115 gm/¼ lb) chilled, unsalted butter
1 egg, for egg wash


Directions:

1. Mix the yeast, warm water, and first teaspoon of sugar in a small bowl. Leave aside for the yeast and sugar to dissolve and the yeast to foam up a little.
2. Measure out the other ingredients.
3. Heat the milk until tepid (either in the microwave or a saucepan), and dissolve in the salt and remaining sugar.
4. Place the flour in a large bowl.
5. Add the oil, yeast mixture, and milk mixture to the flour
6. Mix all the ingredients together using the rubber spatula, just until all the flour is incorporated
7. Turn the dough out onto a floured surface, and let it rest a minute while you wash out the bowl
8. Knead the dough eight to ten times only. The best way is as Julia Child does it in the video (see below). It’s a little difficult to explain, but essentially involves smacking the dough on the counter (lots of fun if you are mad at someone) and removing it from the counter using the pastry scraper.
9. Place the dough back in the bowl, and place the bowl in the plastic bag.
10. Leave the bowl at approximately 75°F/24°C for three hours, or until the dough has tripled in size. 


11. After the dough has tripled in size, remove it gently from the bowl, pulling it away from the sides of the bowl with your fingertips.
12. Place the dough on a lightly floured board or countertop, and use your hands to press it out into a rectangle about 8 by 12 inches (20cm by 30cm).
13. Fold the dough rectangle in three, like a letter (fold the top third down, and then the bottom third up).
14. Place the dough letter back in the bowl, and the bowl back in the plastic bag.
15. Leave the dough to rise for another 1.5 hours, or until it has doubled in size. This second rise can be done overnight in the fridge.
16. Place the double-risen dough onto a plate and cover tightly with plastic wrap. Place the plate in the fridge while you prepare the butter.
17. Once the dough has doubled, it’s time to incorporate the butter.
18. Place the block of chilled butter on a chopping board.
19. Using the rolling pin, beat the butter down a little, till it is quite flat.
20. Use the heel of your hand to continue to spread the butter until it is smooth. You want the butter to stay cool, but spread easily.


21. Remove the dough from the fridge and place it on a lightly floured board or counter. Let it rest for a minute or two.
22. Spread the dough using your hands into a rectangle about 14 by 8 inches (35 cm by 20 cm).
23. Remove the butter from the board, and place it on the top half of the dough rectangle.
24. Spread the butter all across the top two-thirds of the dough rectangle, but keep it ¼ inch (6 mm) across from all the edges.
25. Fold the top third of the dough down, and the bottom third of the dough up.
26. Turn the dough package 90 degrees, so that the top flap is to your right (like a book).
27. Roll out the dough package (gently, so you don’t push the butter out of the dough) until it is again about 14 by 8 inches (35 cm by 20 cm).
28. Again, fold the top third down and the bottom third up.
29. Wrap the dough package in plastic wrap, and place it in the fridge for 2 hours.
30. After two hours have passed, take the dough out of the fridge and place it again on the lightly floured board or counter.


31. Tap the dough with the rolling pin, to deflate it a little.
32. Let the dough rest for 8 to 10 minutes.
33. Roll the dough package out till it is 14 by 8 inches (35 cm by 20 cm).
34. Fold in three, as before.
35. Turn 90 degrees, and roll out again to 14 by 8 inches (35 cm by 20 cm).
36. Fold in three for the last time, wrap in plastic, and return the dough package to the fridge for two more hours (or overnight, with something heavy on top to stop it from rising).
37. It’s now time to cut the dough and shape the croissants.
38. First, lightly butter your baking sheet so that it is ready.
39. Take the dough out of the fridge and let it rest for ten minutes on the lightly floured board or counter.
40. Roll the dough out into a 20 by 5 inch rectangle (51 cm by 12½ cm).


41. Cut the dough into two rectangles (each 10 by 5 inches (25½ cm by 12½ cm)).
42. Place one of the rectangles in the fridge, to keep the butter cold.
43. Roll the second rectangle out until it is 15 by 5 inches (38 cm by 12½ cm).
44. Cut the rectangle into three squares (each 5 by 5 inches (12½ cm by 12½ cm)).
45. Place two of the squares in the fridge.
46. The remaining square may have shrunk up a little bit in the meantime. Roll it out again till it is nearly square.
47. Cut the square diagonally into two triangles.
48. Stretch the triangle out a little, so it is not a right-angle triangle, but more of an isosceles.
49. Starting at the wide end, roll the triangle up towards the point, and curve into a crescent shape.
50. Place the unbaked croissant on the baking sheet.
51. Repeat the process with the remaining squares of dough, creating 12 croissants in total.
52. Leave the tray of croissants, covered lightly with plastic wrap, to rise for 1 hour
53. Preheat the oven to very hot 475°F/240°C/gas mark 9.
54. Mix the egg with a teaspoon of water.
55. Spread the egg wash across the tops of the croissants.
56. Put the croissants in the oven for 12 to 15 minutes, until the tops are browned nicely.
57. Take the croissants out of the oven, and place them on a rack to cool for 10 minutes before serving.

Read more...

Roasted Small Bitter Gourd and Sambar with Freshly Ground Spices - A hearty meal !!!


Small bitter gourd (Midhi Pavakai in Tamil) is very tender ones which are much tastier and healthier than the big variety.  They are not much bitter and when it is roasted, it tastes awesome.  This kind of bitter gourd is not available in Tamil Nadu throughout the year.  Whenever it is in season we never miss making them often.  There are few dishes we can make with these small bitter gourd similar too big ones.   Roasted small bitter gourd is perfect pair with rice and ghee, dhal, sambar (spicy lentil soup), curd rice...

Another recipe is Sambar made with freshly ground spices which in Tamil called as Arachuvitta sambar. Freshly ground spices when cooked with lentil (dhal) and any greens or vegetables gives a spicy soup is called Sambar. This is generally served with rice and some south Indian delicacies.

Hope you will enjoy this hearty meal.  


Roasted Small Bitter Gourd

Ingredients:

Small Bitter gourd - 2 cups
Shallots (really small ones) - 1 cup (remove the skin and slice horizontally to 3 pieces each)
Tomato - 1 small
Tamarind pulp - 1 tbsp (thick)
Chilli powder/ Sambar powder - as needed (We love little spicy)
Curry leaves - few
Oil - 2 tbsp
Salt as needed

For Tempering:

Mustard - 1/4 tsp
Urad dhal - 1/2 tsp


Method:

1. Remove the two sharp edges of the bitter gourds. Slit each one horizontally so that it looks like it is slitted. Don't cut fully.  If you find it is too big then cut into two horizontally.
2. Wash them in cold water drain and keep it aside.
3. In a pan boil 1 cup of water add the cleaned bitter gourd.  Cook till done. Don't overcook it.
4. Now heat oil in the pan, add the seasoning ingredients mustard followed by urad dhal.
5. Add the onion and Curry leaves sauté till golden brown.
6. Add the chopped tomato, sauté till they are mushy and oil starts coming out. 
7. Now add the boiled bitter gourd, tamarind pulp, and salt and chilli powder.
8. Now keep the flame in medium to low, sauté them once in a while until roasted well.
9. The roasting part takes time, but I am telling you the waiting time is really worth it :)

Note:

While boiling bitter gourd takes care not too over cook it, 1 cup of water is approximate you can add more or less depends on the vegetable it varies, use as required. It is enough if you boil it 3/4th since we are roasting it again.


Arachuvitta(ground spices) Sambar 


Ingredients:

Any greens or Vegetables - 2 cups
Shallots - 1 cup (Just remove skin and don't chop them)
Tomato - 1 small (chopped)
Toor dhal - 1/2 cup
Tamarind pulp - 1 1/2  tbsp (small lemon sized ball, mash and extract the pulp)
Gingelly oil f0r tempering - 1 to 2 tsp
Mustard seeds - 1/4 tsp
Asafoetida - 2 pinch
Turmeric powder - 2 pinches
Salt to taste
Coriander leaves - few
Curry leaves - few

For grinding spices:

Coriander seeds - 1 tbsp
Cummin seeds - 1/2 tsp
Pepper - 3 to 4 
Asafoetida - little
Red chillies - 6 to 8
Channa dhal - 2 tbsp
Fenugreek - 1/2 tsp
Coconut - 2 tbsp

Roast (dry fry in a pan) the above ingredients and grind them to paste.


Method:

1. Wash the toor dhal; add the turmeric and pressure cooked for 2 to 3 whistles.
2. Remove from the cooker and mash them slightly.
3. Boil the vegetables/greens, shallots and tomato with enough water.
4. Once they are done add the tamarind pulp, ground spice paste, Cooked dhal.
5. Add 1 cup water and let them boil for few more minutes until they are little thick in consistency.(not so thick)
6. Temper them with mustard, asafoetida and curry leaves.
7. Add the chopped coriander leaves.

Vegetable suggestions:

Drumstick, radish, brinjal, mixed vegetables (carrot, beans, and potato), pumpkin, ash gourd, chayote, cauliflower, greens of your choice etc can be made in same way.

Note:

1. Don't over cook the vegetables.
2. When adding different vegetables it gives different taste of sambar
3. Add the redchillies and tamarind according to your taste; it depends on your spice and sourness level.  
Enjoy this hearty meal !!!

Read more...

BEETS RICE - AN AWESOME LUNCH BOX MENU !!!

Beets and Green peas are wonderful combination for making Curries and Rice.  The sweetness in both the veggies gives  wonderful taste for the rice.  This lunchbox menu can be prepared in no time.  If you have not tried yet try this once.  I am sure you will love this in ways of both taste and the beautiful color.


Beets Rice

Ingredients:

Basmati Rice - 1 cup
Beets - 1 (Big size) cut to small cubes
Frozen Green peas - 1/4 cup
Onion -1/2 sliced
Tomato - 1 small size
Garlic - 2 pod
Ginger- 1/4 inch
Whole spices - 1 cardamom, 2 clove, cinnamon 1 small
Saunf -1/2 tsp
Chilli powder - 1/2 tbsp (According to your taste)
Turmeric - 1/4 tsp
Coriander leaves - 1/4 cup finely chopped
Water - 1 1/2 cup (Use water according to the way you cook 
Regularly)
Oil - 2 tbsp
Salt as required


Method:

1. Heat oil in the pressure pan, add the whole spices.
2. Make paste out of ginger, garlic and saunf.
3. Now add the sliced onion, once it is slightly browned.
4. Add the ground paste. Fry till the raw aroma disappears.
5. Parallely wash the rice with water not more than 2 times, and 
let them get soaked while we are frying the veggies.
6. Now add the Tomatoes, chilli powder and turmeric powder.
7. Sauté them till tomatoes are mushy and starts leaving oil.
8.  Now add the Beets and sauté for few times.
9. Now add the soaked rice, and 1 1/2 cup boiling water.
10.  Check for salt.  Close with the lid.
11. Keep the flame in the medium.
12. When the steam starts coming, reduce the flame to very low.
13. Put the whistle.  And let them be in the low flame for 10 to 12  Minutes.
14. Mean while Microwave or cook the green peas with little salt  separately.
15. After 10 minutes open the lid of the pressure pan, slightly  loosen the rice with fork (Don't over mix it), add the green peas and finely chopped coriander.


Serve the colorful, healthy and tasty rice with Raitha of your  choice. 

Read more...

EGGPLANT FRY/ ROASTED EGGPLANT WITH UNIQUE SPICE BLEND


Blend of few spices gives unique flavor to the dish.  In this case this is one of my simple yet flavorful spice blend that goes very well with any stir fries particularly eggplant(small one), potato, Okra(Bhindi).  The measurement for the spice powder which I am giving today can be stored in airtight container (refrigerate) and can be used for 3 to 5 times.   Try to do in lesser quantity to maintain its freshness. I usually add pumpkin seeds for making this powder since I did not have on that day I used sunflower seeds.  You can either use pumpkin seeds or Sunflower seeds.  Off to the recipe...


Eggplant Fry with flavorful Spices

Ingredients:

Eggplant - 8 (small ones)
Spice powder - 1 1/2 tbsp
Chilli powder - 1/2 tbsp (as needed)
Salt - as required
Oil - for frying
Coriander leaves for garnishing


For Spice powder:

Saunf - 1/2 tbsp
Kalonji/Nigella seeds/Onion seeds - 1/2 tbsp
Coriander seeds - 1/2 tbsp
Pumpkin seeds - 1/2 tbsp

Dry roast the above ones, cool and powder it coarsely (not very fine).  Store in airtight container and refrigerate to maintain its freshness.


Method:

1.  Heat oil in the broad pan (preferably nonstick). 
2. Slit the eggplants to six parts without removing the green part.
3. Wash it again and drain it.
4. Now add to the pan, close with lid.  Keep the flame in medium.
5. Open and change the sides of the eggplant. 
6. Repeat until the eggplant is 1/2 done.  Now add salt, spice powder and chilli powder.
7. After adding this don't close the lid, fry till everything is well coated and roasted well on all sides.
8. Garnish with coriander leaves.

 Serve it with steamed rice and ghee, dhal rice, roti. We had it with rice, dhal, aloo gobi subzi and roti.


Try this spice powder for Potato roast, Okra fry it tastes awesome.

Read more...

BISCOTTI - ITALIAN DELICACY FOR SWEET PUNCH


Hope everyone had wonderful weekend.  This time I am doing pretty late post for Sweet punch :(  Anyway here is an Italian Delicacy.  I used to make them for my Kid snack box for school and now its here for sweet punch this time..... Before proceeding with the recipe, I just wanted to let you know I have opened a Face book fan page for my space as I don't want to mix both personal page and the fan page.  I would love to have your likes for my page :) Here is the link for Facebook Fan page Dishesfrommykitchen, you can also scroll down this page and see the like button in the right hand side you can do it there as well.  Thanks for everyone who already liked it :)  


Here is the brief about Biscotti....

Biscotti more correctly known as biscotti di Prato (English: biscuits of Prato), also known as cantuccini, are a twice-baked cake originating in the Italian city of Prato. The cakes are large almond biscuits, made dry and crunchy through cutting the loaf of dough while still hot and fresh from baking in the oven."Biscotti" is the only traditional name, which in the Italian language is the plural form of biscotto. The word originates from the medieval Latin word biscoctus, meaning "twice-cooked/baked."

Most European countries have adopted their own version of biscotti: English - rusks, French - biscotte and croquets de Carcassonne, Germans - zwieback, Greeks - biskota and paxemadia, Jewish - Mandelbrot, and Russians - sukhariki.

Adapted from joyofbaking with slight changes of Fruit and nuts measurement with Exotic cardamom flavor !!!

Cranberry Raisins Almond Pistachio Biscotti

Ingredients:

Granulated white sugar - 2/3 cup (135 grams)
Eggs - 2 large
Vanilla extract - 1 teaspoon pure (I used 1/4 tsp of powdered cardamom)
Baking powder - 1 teaspoon
Salt- 1/4 teaspoon
All-purpose flour - 1 3/4 cups (245 grams)
Unsalted pistachios - 1/4 cup (30 grams) shelled,  coarsely chopped
Blanched almonds - 1/4 cup (30 grams) shelled, coarsely chopped
Dried cranberries- 1/4 cup (40 grams)
Raisins - 1/4 cup (40 grams) 


Method :

1. Preheat oven to 350 degrees F (177 degrees C) and place the oven rack in the center of the oven. Line a baking sheet with parchment paper. Set aside.
2.In the bowl of your electric mixer (or with a hand mixer), beat the sugar and eggs on high speed until thick, pale, and fluffy (about 5 minutes).  (When you slowly raise the beaters the batter will fall back into the bowl in slow ribbons.)  At this point beat in the vanilla extract or Cardamom powder.  In a separate bowl, whisk together the flour, baking powder and salt.  Add to the egg mixture and beat until combined.  Fold in the chopped pistachios and cranberries.


3.Transfer the dough to your parchment lined baking sheet and form into a log, about 12 inches (30 cm) long and 3 1/2 inches (9 cm) wide.  You may have to dampen your hands to form the log as the dough is quite sticky. Bake for 25 minutes, or until firm to the touch. Remove from oven and let cool on a wire rack for about 10 minutes.
4.Reduce oven temperature to 325 degrees F (165 degrees C).  Transfer the log to a cutting board and cut into 3/4 inch (2 cm) slices, on the diagonal.  Place the biscotti, cut side down, on the baking sheet.  Bake for about 10 minutes, turn slices over, and bake for another 10 minutes or until golden brown.  Remove from oven and let cool.  Store in an airtight container. 


Read more...

TANDOORI TOFU AND A SANDWICH :)

If you ask me what's the breakfast today?  I always end up saying Sandwich or toasts :)  Yes almost 300 days of the year our breakfast is Sandwich/toasts; it may be sweet or savory.  Off course we love to eat them daily with some variations.  I have already posted few sandwiches earlier you can take a look here.....

 
Also I had posted few spreads which can be used a basic filling for making sandwiches

Tapenades
Pesto
Cilantro spread
Yogurt spread


Hopefully will post more...

I have started posting Juices/Smoothies have a look by clicking the side bar or in the link bar..

As requested by friends, I am posting one of our favorite sandwich Tandoori Tofu sandwich. These sandwiches can be packed for breakfast or even lunches. Whenever time permits  I will share few more sandwiches from our regular menu.  Hope you Enjoy !!!

This is 2 in one post,  you can serve Tandoori Tofu as a snack or appetizer and also use it for making sandwiches.

Note : Always keep 2 or 3 spreads ready in the fridge for the whole week to make your job easier. 


TANDOORI TOFU SANDWICH

Tofu can be marinated a day in advance and so as the mint pesto, this would be easier for packing.

Ingredients :

Firm pressed Tofu - 1 block cut into 4, both horizontally and vertically ( Refer this post)

For Marinade :

Thick yogurt / Hung yogurt - 1/4 cup
Ginger+garlic - 1 tsp
Chilli powder - 1/2 tsp
Kashmiri chilli powder - 1/2 tsp
Garam Masala - 1/2 tsp
Lemon - 1/2 squeezed
Salt to taste
Besan - 2 tsp
oil - to smear or for shallow frying


For Making sandwich :

Bread - wheat or white whichever u prefer.
I used Mint pesto - You can use Mint chutney, coriander chutney ( for pesto see this post, just replace Basil with Mint)
Raw onion - 2 to 3 slices(optional)
Cucumber slices - few
Chaat Masala - little


Method :

1. Whisk all the ingredients that are given under the marinade.
2. Apply the paste in the tofu both the sides, cover them and keep refrigerated for minimum 2 hrs or even whole night.
3. Heat a flat pan, smear some oil, roast the Tofu by spraying little oil in low flame. 
4. Let them roast on all sides, flip them once in a while.
5. Once they are well roasted on all sides;  Remove them garnish with sliced onion, lemon wedges and sprinkle little chaat masala on the top.

If you’re using it for Sandwich then here you go...

You can use griller for making sandwiches by filling everything except cucumber

or

Follow these steps

1.  Toast the breads till golden brown.
2. Apply the chutney/pesto, on one side keep sliced onion, cucumber.
3. Keep the Tandoori Tofu sprinkle little chaat masala, close with other bread which is applied with chutney/pesto. 

Now it’s ready to give a big bite.

Note:

1.Roasted Gram Flour(Besan) which is used in the marinade helps the masala's stick to the tofu when shallow fried.
2.You can replace Tofu with Paneer and also sliced potato(half cooked).
3.Use non stick pan to get best result and cook in low to medium flame.
4. You need not use much oil.

Do write your queries on this post or any sandwiches.  I will be happy to help you :)

Read more...


Page copy protected against web site content infringement by Copyscape

Visit Great Cooks Community
All recipes are on Petitchef