Search This Blog

SWISS SWIRL ICECREAM CAKE - DARING BAKERS CHALLENGE JULY 2010


The July 2010 Daring Bakers’ challenge was hosted by Sunita of Sunita’s world – life and food. Sunita challenged everyone to make an ice-cream filled Swiss roll that’s then used to make a bombe with hot fudge. Her recipe is based on an ice cream cake recipe from Taste of Home.


What I did

This was quite interesting challenge. I almost followed the same procedure except these

1. I omitted the chocolate fudge part.
2. And instead of 2 swiss rolls I made one large swiss rolls coz of shortage of pans.
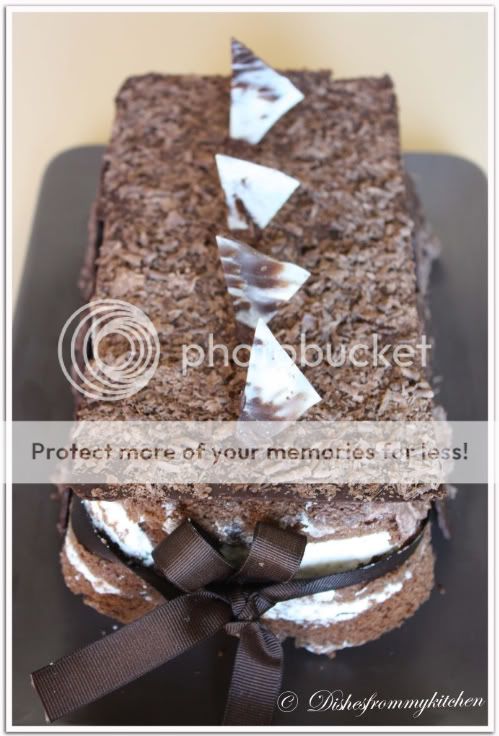
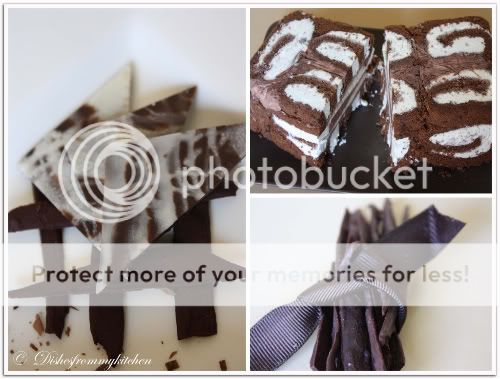
3. Instead of bombe shape I made rectangular shape.
4. I did not use whipped cream for swiss rolls, instead I used the Vanilla icecream which came out so delicious.


THE SWISS ROLLS

Ingredients:

6 medium sized eggs
1 C / 225 grams caster sugar /8 oz + extra for rolling
6 TBS. / 45 grams/ 3 oz of all purpose (plain) flour + 5 TBS. /40 gram / 2.5 oz of natural unsweetened cocoa powder, sifted together
2 TBS. /30 ml /
1 fl oz of boiling water a little oil for brushing the pans

For the filling:

2 C / 500 mls/ 16 fl oz of whipping cream
1 vanilla pod, cut into small pieces of about ½ cm (or 1 tsp vanilla extract)
5 TBS. / 70 grams / 2.5oz of caster sugar

Directions:

1. Pre-heat the oven at 200 deg C /400 deg F approximately. Brush the baking pans (11 inches by 9 inches) with a little oil and line with greaseproof baking paper. If you have just one pan, bake one cake and then let the pan cool completely before using it for the next cake.
2. In a large mixing bowl, add the eggs and sugar and beat till very thick; when the beaters are lifted, it should leave a trail on the surface for at least 10 seconds.
3. Add the flour mixture, in three batches and fold in gently with a spatula. Fold in the water.
4. Divide the mixture among the two baking pans and spread it out evenly, into the corners of the pans.
5. Place a pan in the center of the pre-heated oven and bake for about 10-12 minutes or till the center is springy to the touch.
6. Spread a kitchen towel on the counter and sprinkle a little caster sugar over it.
7. Turn the cake on to the towel and peel away the baking paper. Trim any crisp edges.
8. Starting from one of the shorter sides, start to make a roll with the towel going inside. Cool the wrapped roll on a rack, seam side down.
9. Repeat the same for the next cake as well.
10. Grind together the vanilla pieces and sugar in a food processer till nicely mixed together. If you are using vanilla extract, just grind the sugar on its own and then add the sugar and extract to the cream.
11. In a large bowl, add the cream and vanilla-sugar mixture and beat till very thick.
12. Divide the cream mixture between the completely cooled cakes.
13. Open the rolls and spread the cream mixture, making sure it does not go right to the edges (a border of ½ an inch should be fine).
14. Roll the cakes up again, this time without the towel. Wrap in plastic wrap and chill in the fridge till needed,seam side down.


VANILLA ICECREAM

Preparation time: 5 minutes + freezing

Ingredients:

2 and ½ C / 625 ml / 20 fl oz of whipping cream
1 vanilla bean, minced or 1 tsp/ 5 ml/ .15 fl oz vanilla extract
½ C / 115grams/ 4 oz of granulated sugar

Directions:

1. Grind together the sugar and vanilla in a food processor. In a mixing bowl, add the cream and vanilla –sugar mixture and whisk lightly till everything is mixed together. If you are using the vanilla extract, grind the sugar on its own and then and the sugar along with the vanilla extract to the cream.
2. Pour into a freezer friendly container and freeze till firm around the edges. Remove from the freezer, beat till smooth and return to the freezer. Do this 3-4 times and then set completely.


HOT FUDGE SAUCE

Cooking time: 2 minutes

Ingredients:

1 C / 230 grams / 8 oz of caster sugar
3 TBS. / 24 grams /1.5 oz of natural unsweetened cocoa powder
2 TBS. /15 grams / 1 oz of corn flour/cornstarch
1 ½ C / 355 ml /12 fl oz of water
1 TBS. /14 grams/ 1 oz butter
1 tsp/ 5 ml / .15 fl oz vanilla extract

Directions:

1. In a small saucepan, whisk together the sugar, cocoa powder, corn flour and water.
2. Place the pan over heat, and stir constantly, till it begins to thicken and is smooth (for about 2 minutes).
3. Remove from heat and mix in the butter and vanilla. Keep aside to cool.


CHOCOLATE ICECREAM

Preparation time- 5 minutes + freezing

Ingredients:

2C/ 500 ml whipping cream

1 C/230gms/8 oz caster sugar

3 tblsp/ 24 gms/1.5 oz of natural unsweetened cocoa powder

Method:
1. Grind together the sugar and the cocoa powder in a food processor .
2. In a saucepan, add all the ingredients and whisk lightly.
3. Place the pan over heat and keep stirring till it begins to bubble around the edges.
4.Remove from heat and cool completely before transferring to a freezer friendly container till firm around the edges. If you are using an ice cream maker, churn the ice cream according to the manufacturer’s instruction, after the mixture has cooled completely.
5. Remove from the freezer, beat till smooth and return to the freezer. Do this 3-4 times and then set completely.


ASSEMBLY
1. Cut the Swiss rolls into 20 equal slices ( approximately 2 cms each ).

2. Cover the bottom and sides of the bowl in which you are going to set the dessert with cling film/plastic wrap.
3. Arrange two slices at the bottom of the pan, with their seam sides facing each other. Arrange the Swiss roll slices up the bowl, with the seam sides facing away from the bottom, to cover the sides of the bowl. Cover the bowl with plastic wrap and freeze till the slices are firm (at least 30 minutes).
4. Soften the vanilla ice cream. Take the bowl out of the freezer, remove the cling film cover and add the ice cream on top of the cake slices. Spread it out to cover the bottom and sides of the bowl. Cover the bowl with plastic wrap and freeze till firm ( at least 1 hour)
5. Add the fudge sauce over the vanilla ice cream, cover and freeze till firm . ( at least an hour)
6. Soften the chocolate ice cream and spread it over the fudge sauce. Cover with plastic wrap and freeze for at least 4-5 hours till completely set .
7. Remove the plastic cover, and place the serving plate on top of the bowl. Turn it upside down and remove the bowl and the plastic lining. If the bowl does not come away easily, wipe the outsides of the bowl with a kitchen towel dampened with hot water. The bowl will come away easily.
8. Keep the cake out of the freezer for at least 10 minutes before slicing, depending on how hot your region is. Slice with a sharp knife, dipped in hot water.


Read more...

SWEET MEMORIES - MY 200th POST !!!

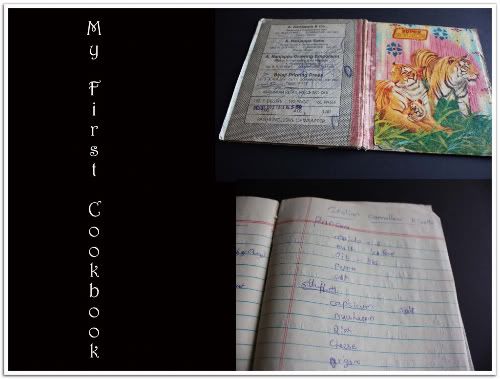
Yep, that's right, this is my 200th post ! I thank everyone who visits my blog and encourage me with your wonderful comments. I want to make each milestone a most memorable one. Instead of posting a recipe today, I wanted to share some my treasures here; my first cookbook, which I still use it for reference. We all have sweet memories or Flash backs of old friends, school, college best days of our lives. It is nice to look back your wonderful memories after few years. The photos of the below dishes are taken long before when I was in Singapore and few are after coming to US. I always have the habit of taking pictures of my dishes before blogging itself. I am also sharing some pictures here which I also want to keep in my digital dairy too. The Pictures mostly are taken in nights so don't mind the clarity, as it is just 4 mega pixel Power shot camera.

Don't Mind my bad Handwriting this was written quickly watching the TV program
Collecting recipes is my hobby and interest or passion towards food is not bloomed suddenly, its started from my childhood itself. Believe or not the collection of my recipe started from 10th grade summer vacation. Even though I collected many recipes I was not into full-fledged cooking. But I help my mom a lot and give ideas for her. But my full swing cooking is after marriage. The Paper which you are seeing on the left side is the notes for traditional dishes like idli, dosas etc which I wrote after my marriage engagement.
Tasting different kind of foods started from my school days itself, I think this is inherited from my father who has passion of trying different dishes wherever he goes. Even though I have never tasted the Italian and Mexican foods at that time, I had the collection of recipes and little knowledge on enchiladas, tacos, Risotto kind of stuffs. The note book which you are seeing is collection of some Mexican and Italian cuisine which I noted from Femina, woman's era book. So till now there is no end to my food passion, Hope this continues forever.

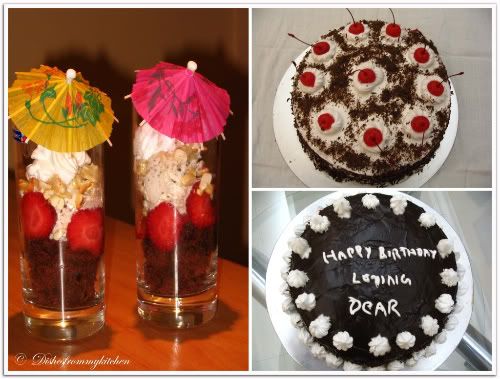
1. Dessert with instant Microwave cake
2. My first cake (Black forest)
3. Chocolate fudge cake


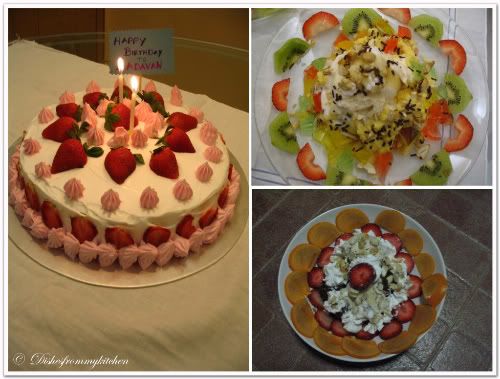
1. Strawberry shortcake
2. Custard with Icecream pudding with homemade jellos
3. Fruit salad with Icecream


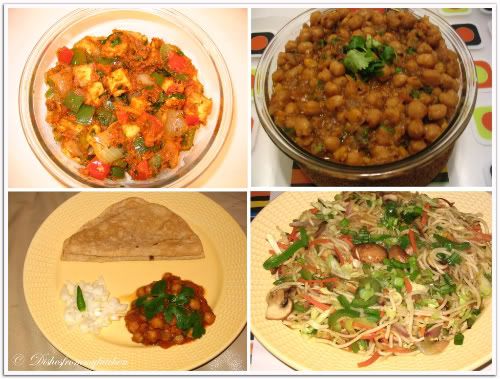
1. Kadai Paneer
2. Channa Masala
3. Simple roti platter
4. Chinese vegetable noodles


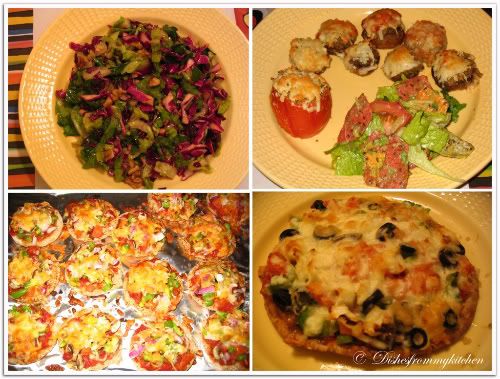
1. Red Cabbage salad with lemon vinegratte
2. Stuffed mushroom and stuffed tomato with tortilla salad
3. Mini Pizza
4. Wheat Pizza


1. Pasta with Alfredo sauce
2. Tomato juice
3. Cream of Tomato soup
4. Masala Papad


1. Triple delight( Avocado, chikku and banana)
2. Strawberry custard


1. Water melon and Cucumber cooler
2. Big mouth Sandwich
3. Paneer tikka


1. Egg Kothu parotta
2. Fried rice with Gobi 65
3. Banana Walnut cake
4. Stuffed Brinjal


1. My first notes for traditional dishes(Idli, dosas...)
2. My First cook book


I am Happy to share my treasures with you all and Thanks for taking time to read my Sweet Memories !!!!


Read more...

GAZPACHO SOUP !!!


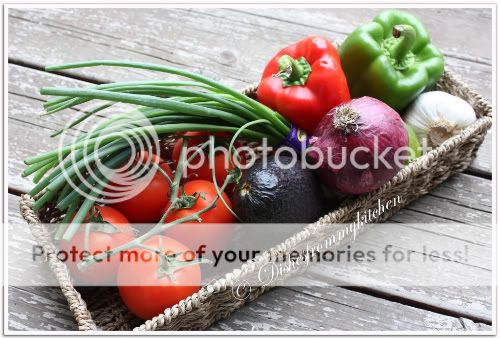
Gazpacho is a liquid salad from the southern Spanish region of Andalusia, made of ripe tomatoes, bell peppers, cucumbers, garlic and bread moistened with water that is blended with olive oil, vinegar. Some may also include onion and served cold. It is Andalusia's best known dish and probably originated as a soup during the time when Spain was part of the Islamic world in the Middle Ages, a soup the Spanish call an ajo blanco, Which contained garlic,almonds, bread, olive oil,vinegar and salt.


Gazpacho is traditionally made in a mortar and the bread is ideal when it is about a week old. Gazpacho was traditionally eaten by workers in the fields of vineyards, olive plantations, citrus groves, wheat fields or cork farms. Originally gazpacho was nothing but bread, water, and olive oil, all pounded in a large wooden bowl called a dornillo. This soup is a way to cool off during the summer and to use available ingredients such as fresh vegetables and stale bread. There are many modern variations of gazpacho, often in different colors and omitting the tomatoes and bread in favor of avocados, cucumbers, parsley, watermelon, grapes, meat stock, seafood, and other ingredients. Gazpacho has become an almost generic term for chilled vegetable soup.


Here is the recipe of Gazpacho to cool of this summer heat with fresh raw veggies which is so healthy. Refrigerate atleast for overnight to enjoy the wonderful flavour.


GAZPACHO SOUP


Ingredients:


Ripe tomato - 4 ( medium size)
Cucumber - 1 (short cucumbers chopped finely, reserve half for accompaniment)
Red pepper - 1 (small size chopped finely, reserve half for accompaniment)
Green pepper - 1(small size chopped finely, reserve half for accompaniment)
Garlic - 1 pod
Red onion - 1(small size chopped finely reserve half for accompaniment)
Red or white wine vinegar - 1/2 tbsp ( You can substitute with Balsamic vinegar or freshly squeezed lime juice to your taste)
Tomato paste - 2 tbsp( diluted with 1/2 cup of water)
Olive oil - 1 1/2 tbsp
Salt and pepper to taste


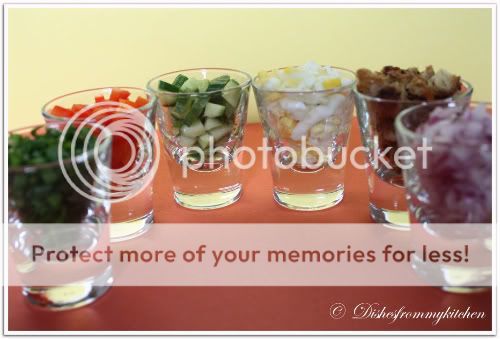
Accompaniments:


Red and green bell pepper - 1/2 the quantity that is already reserved
Onion - 1/2 chopped which is reserved
Cucumber - 1/2 chopped finely which is reserved
Spring onion - 1 tbsp finely chopped
Hard boiled eggs - 1 or 2 finely chopped
Bread roasted in Olive oil - 1 finely chopped and seasoned with salt and pepper
Mint, Basil or Coriander for garnishing - Your choice


Method :


1. Put a cross section in each tomato. Cover with boiling water for few minutes and then plunge into the cold water.
2. Peel the skin and deseed them.
3. Now in a blender blend the red, green bell pepper, cucumber, garlic, onion to coarse paste. Add the peeled tomato and give a nice whip.
4. Now transfer them to the bowl add the olive oil, vinegar or lime juice, Tomato paste which is diluted, salt and pepper.
5. Refrigerate this for at least 4 to 5 hrs or overnight.( It tastes good if it is refrigerated overnight)
6.Next day serve them in the bowl and add the accompaniments of your choice for topping. Garnish with your favourite herb.


Enjoy the cool cool soup for the hot summer !!!


Note :


1. You can use Avocado and finely chopped olives for accompaniment as well.

Read more...

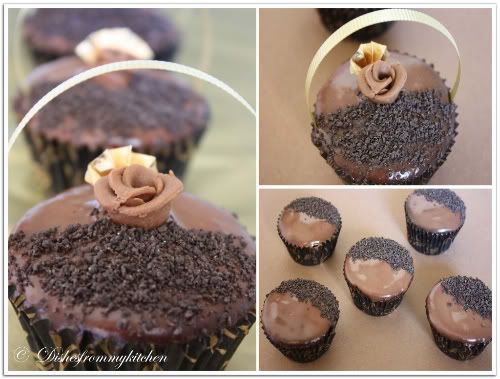
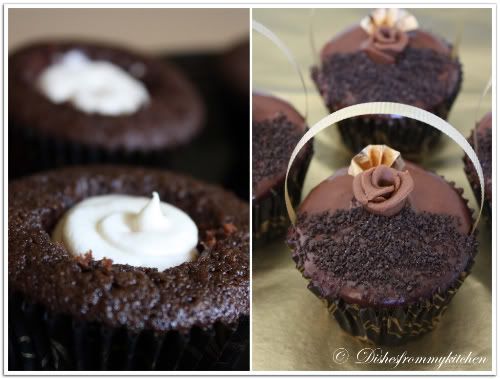
DEVIL'S FOOD CUPCAKE WITH VANILLA CREAM FILLING - FOR SWEET PUNCH


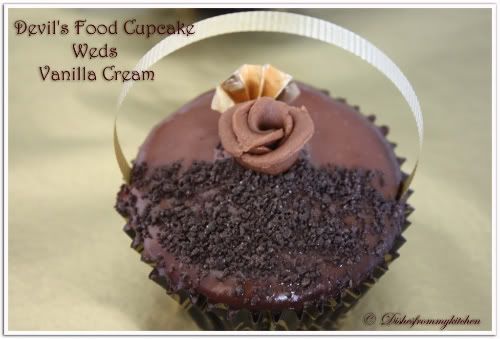
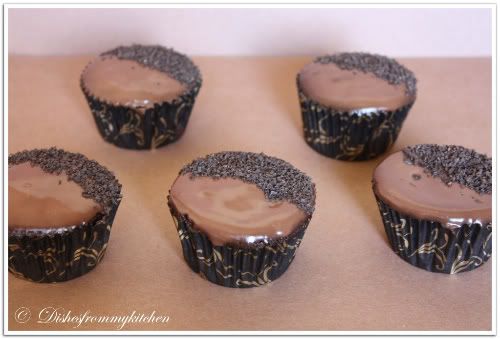
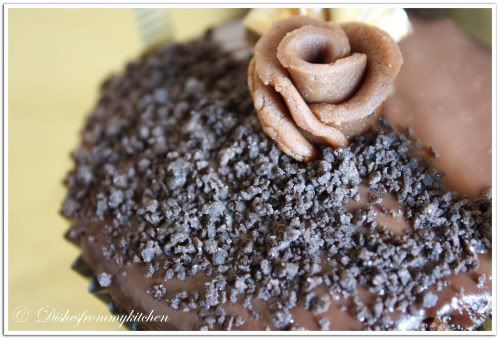
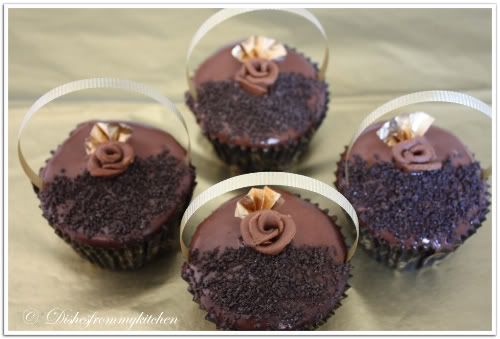
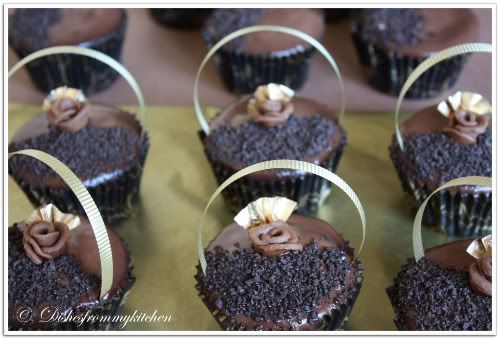
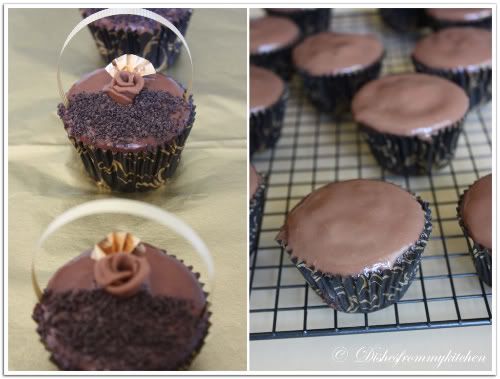
The Second Sweet Punch - Devil's Food Cupcake with Vanilla Cream Filling with Chocolate butter cream frosting. Here is delicious Chocolate decadence cupcake and the Vanilla cream filling recipe.  The filling was different and it was so yummy!!! The frosting is  Chocolate Custard Frosting which I make for Chocolate fudge cake. So here is the recipe.....


DEVIL'S FOOD CUPCAKE WITH VANILLA CREAM FILLING


Ingredients :

Cocoa Powder - 1/2 cup
Brown Sugar - 3/4 cup
Butter - 1 stick at room temperature
Flour -1 1/4 cups
Salt - 1/2 tsp
Boiling Water - 1 cup
Buttermilk - 1/2 cup
Sugar - 1 1/4 cup
Baking Soda - 1 tsp
Egg - 2 at room temperature


Method:

1.Pour the boiling water over the cocoa powder.  Whisk in buttermilk and brown sugar.
2.In a medium bowl, whisk together the flour, baking soda and salt.
3.Using a hand held or stand mixer with paddle attachment, cream together the butter and sugar.  Add the eggs, one at a time and continue beating until light and fluffy.  Scrape the bottom and sides of the bowl.
4.On low speed, add 1/3 of the dry mixture, followed by 1/2 of the wet, 1/3 of the dry and then the remaining wet and dry in that order.
5.Scoop batter in 18-20 cupcake liners and bake at 350 for 15 minutes or until the cupcakes bounce back when poked.


Vanilla Cream Filling

3 tbsp all purpose flour
1/2 cup milk (low fat is fine)
1/2 cup butter (or trans fat-free shortening)
1/2 cup granulated sugar
1/2 scraped vanilla bean or 1 tsp vanilla extract


Method :

1. Whisk together the flour and milk and cook in a small saucepan over medium heat until thick. This will only take a few minutes.
2. Stir continuously to prevent the mixture from clumping and do not bring all the way to a boil.
3. When thickened (consistency will be that of a thin pudding or custard), strain with a mesh strainer into a small bowl, cover with plastic wrap and let cool completely to room temperature.
4. When the milk mixture is cool, cream the butter (or shortening) and sugar together in a medium bowl until light. Add in the milk/flour mixture and the scraped vanilla bean seeds (or vanilla extract) and beat at high speed with an electric mixer for 7 minutes, until light and fluffy. Scrape into a pastry bag fitted with a plain tip, or a large zip lock bag with the corner cut off, and set aside until ready to fill your cupcakes.


Chocolate Butter cream Frosting

Here is chocolate butter cream frosting if you want so.. But i did not use this instead i used chocolate custard frosting...

1/2 cup butter, room temperature
1/2 cup unsweetened cocoa powder
2-3 cups powdered sugar
1/4 cup milk
1 tsp vanilla extract


Method :

Combine all ingredients in a large bowl and beat, with an electric mixer, until frosting is creamy, 3-5 minutes. Add additional powdered sugar as needed to achieve a thick, but not stiff, frosting that is easy to spread. Add additional milk, if necessary, to thin the frosting if it gets too thick.

Assembly :

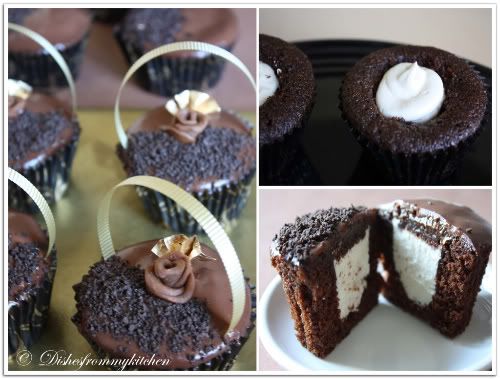
Take a cooled cupcake and, using a small pairing knife, cut a cone of cake (1-inch across by 1-inch deep) out of the top. Trim off the pointy end of the cone, leaving a flat circle of cake. Set aside and repeat this process for all the cupcakes.
Take the cream filling and squeeze a tablespoon or so into each cupcake cavity, filling the hole up to the top with filling. Top off with a flat circle of cake to plug the hole and keep the filling in place.
Using a butter knife or a small offset spatula, frost each cupcake with a layer of chocolate butter cream frosting. Place a dollop of icing in the center of the cupcake (on top of the cut out circle of cake) and spread from the center to the sides of the cupcake.
If you have leftover filling, transfer it to a fresh Ziploc bag and cut a very small opening in one corner. Pipe a swirly line down the center of each cupcake.
Store in an airtight container until ready to serve.
Makes 2-dozen.

Chocolate custard Frosting

Sugar - 60 gms
Gelatin( I used Vegetarian one) or Instant Jelly(unflavoured) - 1/2 tbsp
Water - 200 ml
Salt a pinch
Milk - 125 ml
Custard powder - 30 gm
Chocolate chips( I used semi sweet) - 60 gm
Butter - 1 very little piece


Method :

1. Boil the first 4 ingredients in the microwave until the sugar and gelatin is dissolved.
2. Parallely cook the custard and milk in the gas top to thin consistency.
3. Mix both and cook in the microwave for 2 more minutes stirring once every minute.
4. Now take this out, add the chocolate and butter.
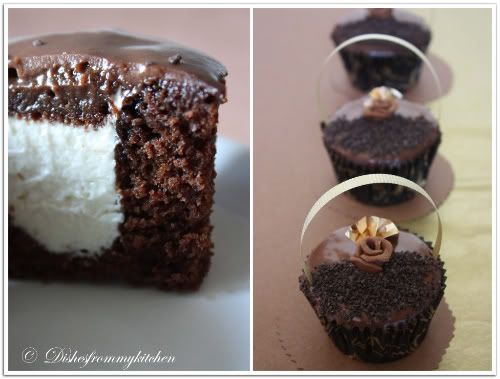
5. Once it is cooled( stir in between). Then you can dip the cupcakes in this frosting . Set aside for a minute and do this again to get thick coating on the top.
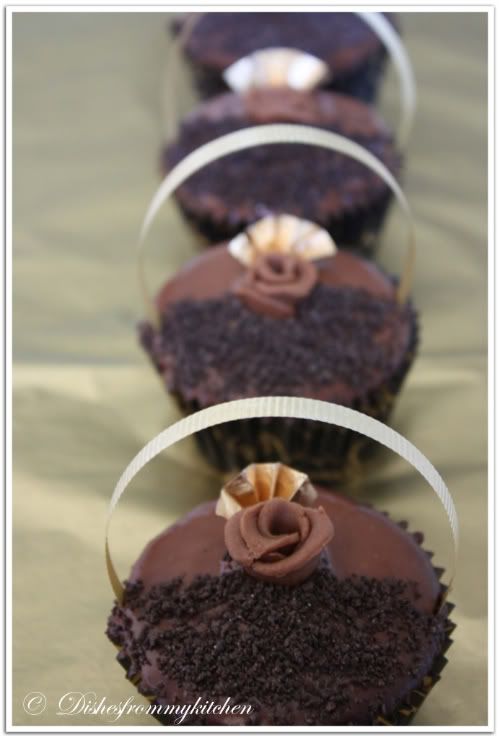
Enjoy !!!! One more interesting part of this is below....


Note :

1.The butter we add to the frosting is to give glossy effect...If your making popsicles increase the sugar according to your taste. The above measurement will be perfect for the cake.

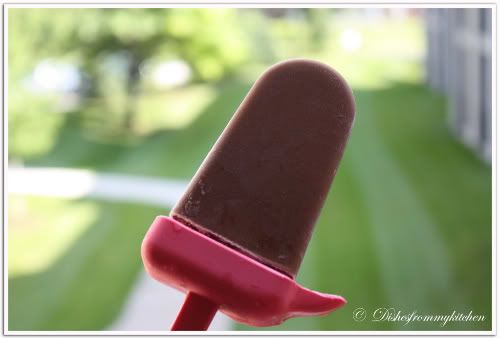
2.The quantity which I have given for the frosting is more. You can half the measurement for 12 cupcakes. But I do more because it tastes sooo delicious if you make chocolate Popsicles.. just pour the remaining frosting in the Popsicle mould, freeze and enjoy them!!!!!

Here is the picture for the Chocolate Popsicle.....


Read more...


Page copy protected against web site content infringement by Copyscape

Visit Great Cooks Community
All recipes are on Petitchef