Search This Blog

SCONES a.k.a BISCUITS - DARING BAKERS 2012

Audax Artifex was our January 2012 Daring Bakers’ host. Aud worked tirelessly to master light and fluffy scones (a/k/a biscuits) to help us create delicious and perfect batches in our own kitchens!

Audax is truly an inspiring baker came up with whole bunch of variations and Tips.  The scones came out very fluffy with beautiful crust outside, he explained every single steps with lots of explanation and effort which resulted in beautiful scones. I should thank him for this wonderful recipe and sure it is a keeper !!!  

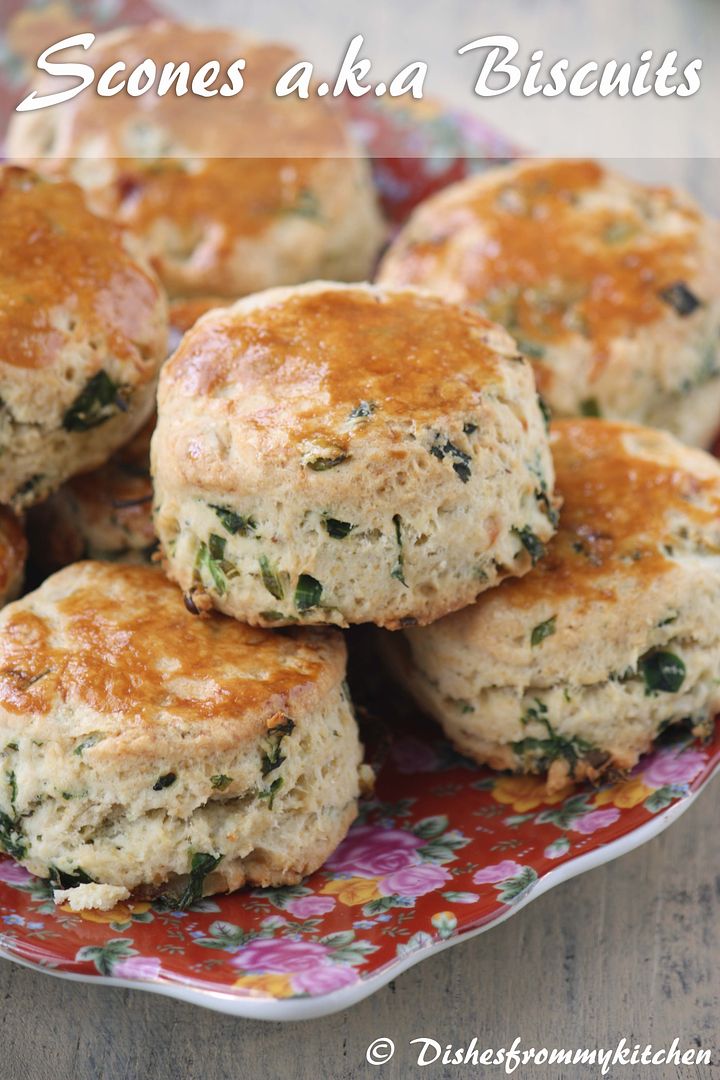
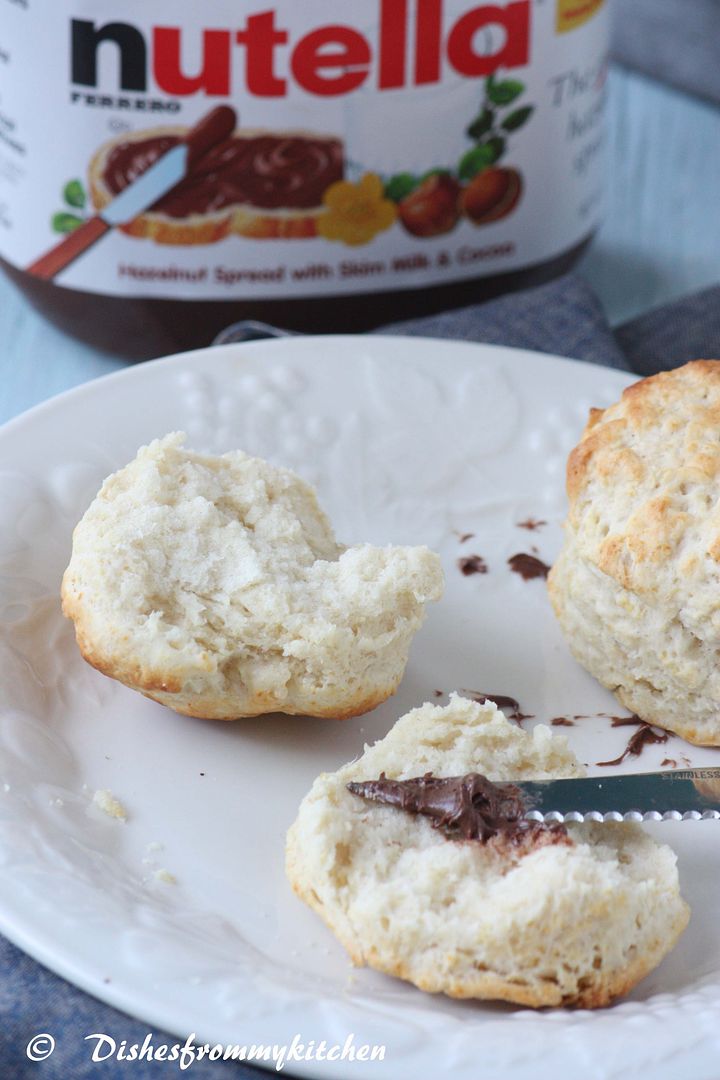
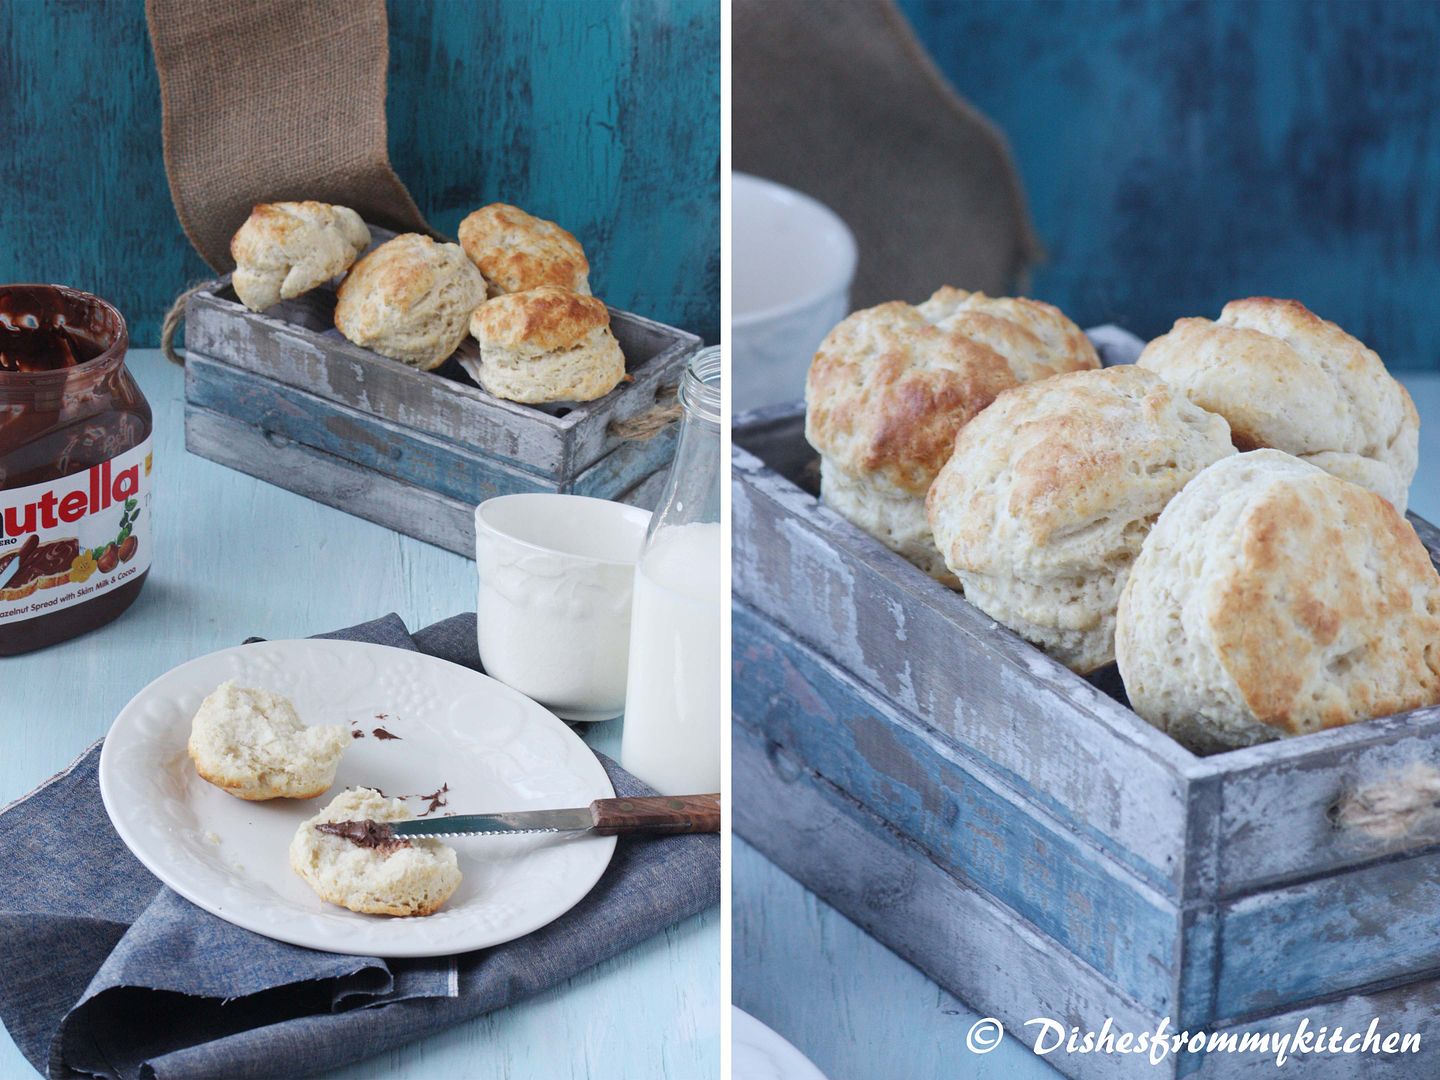
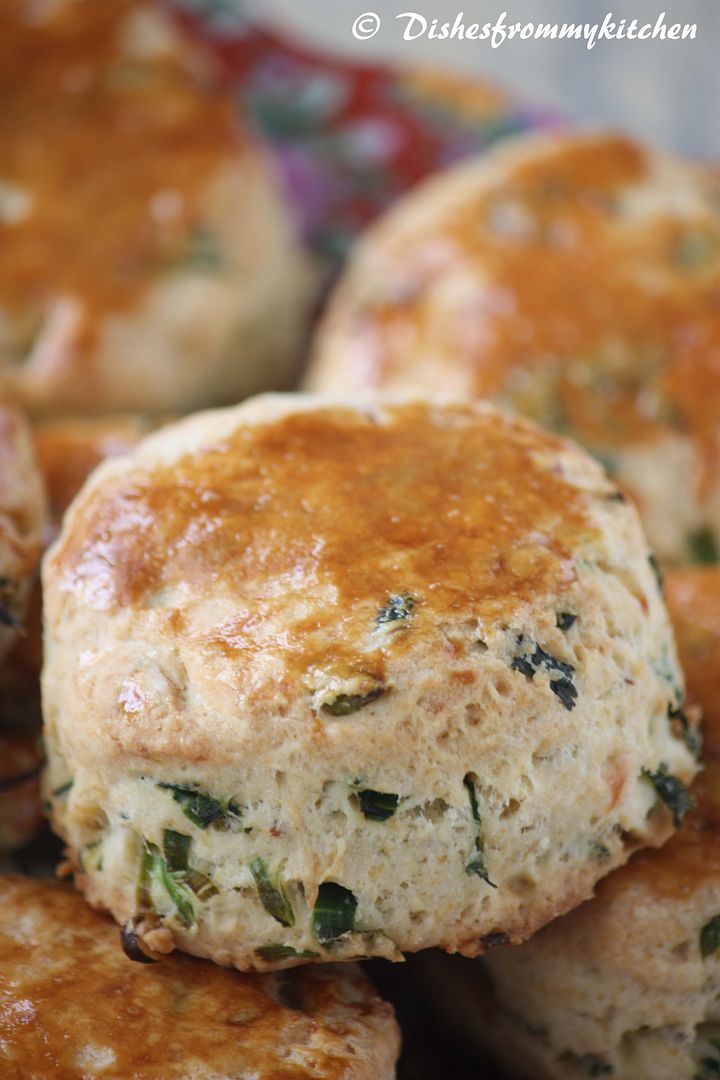
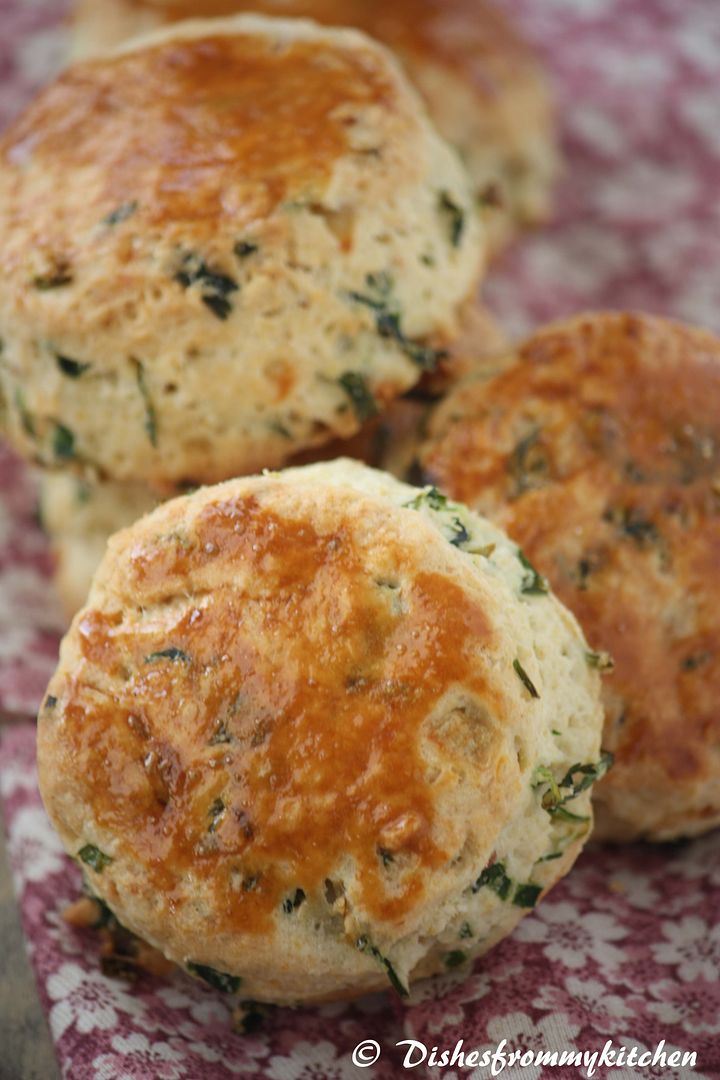
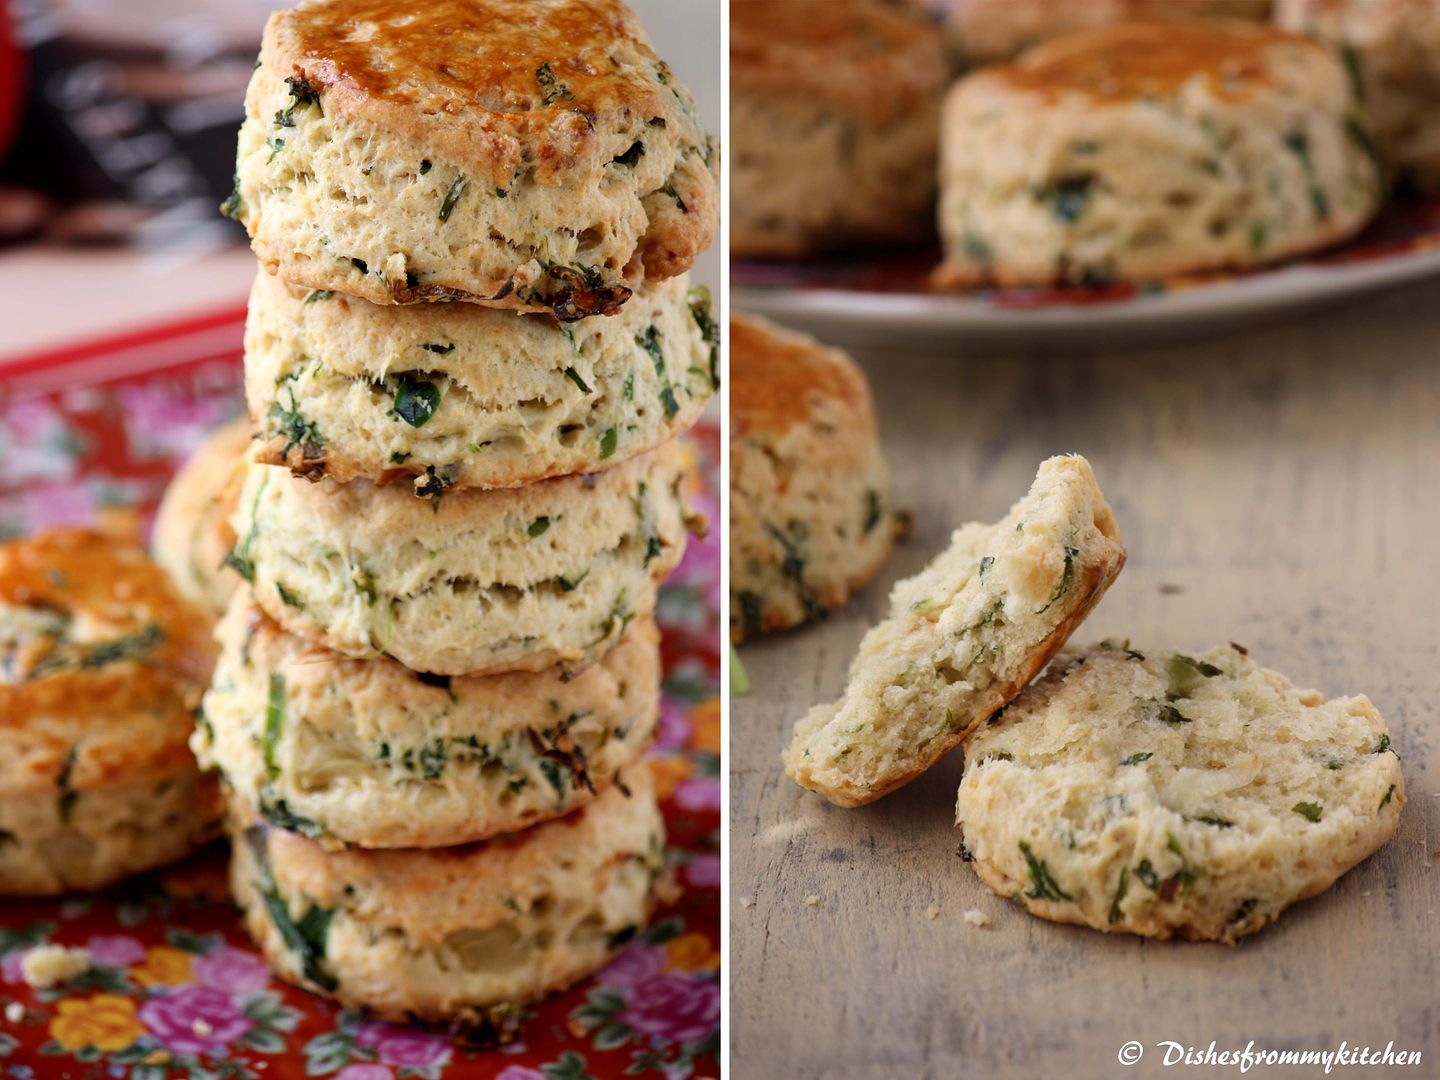
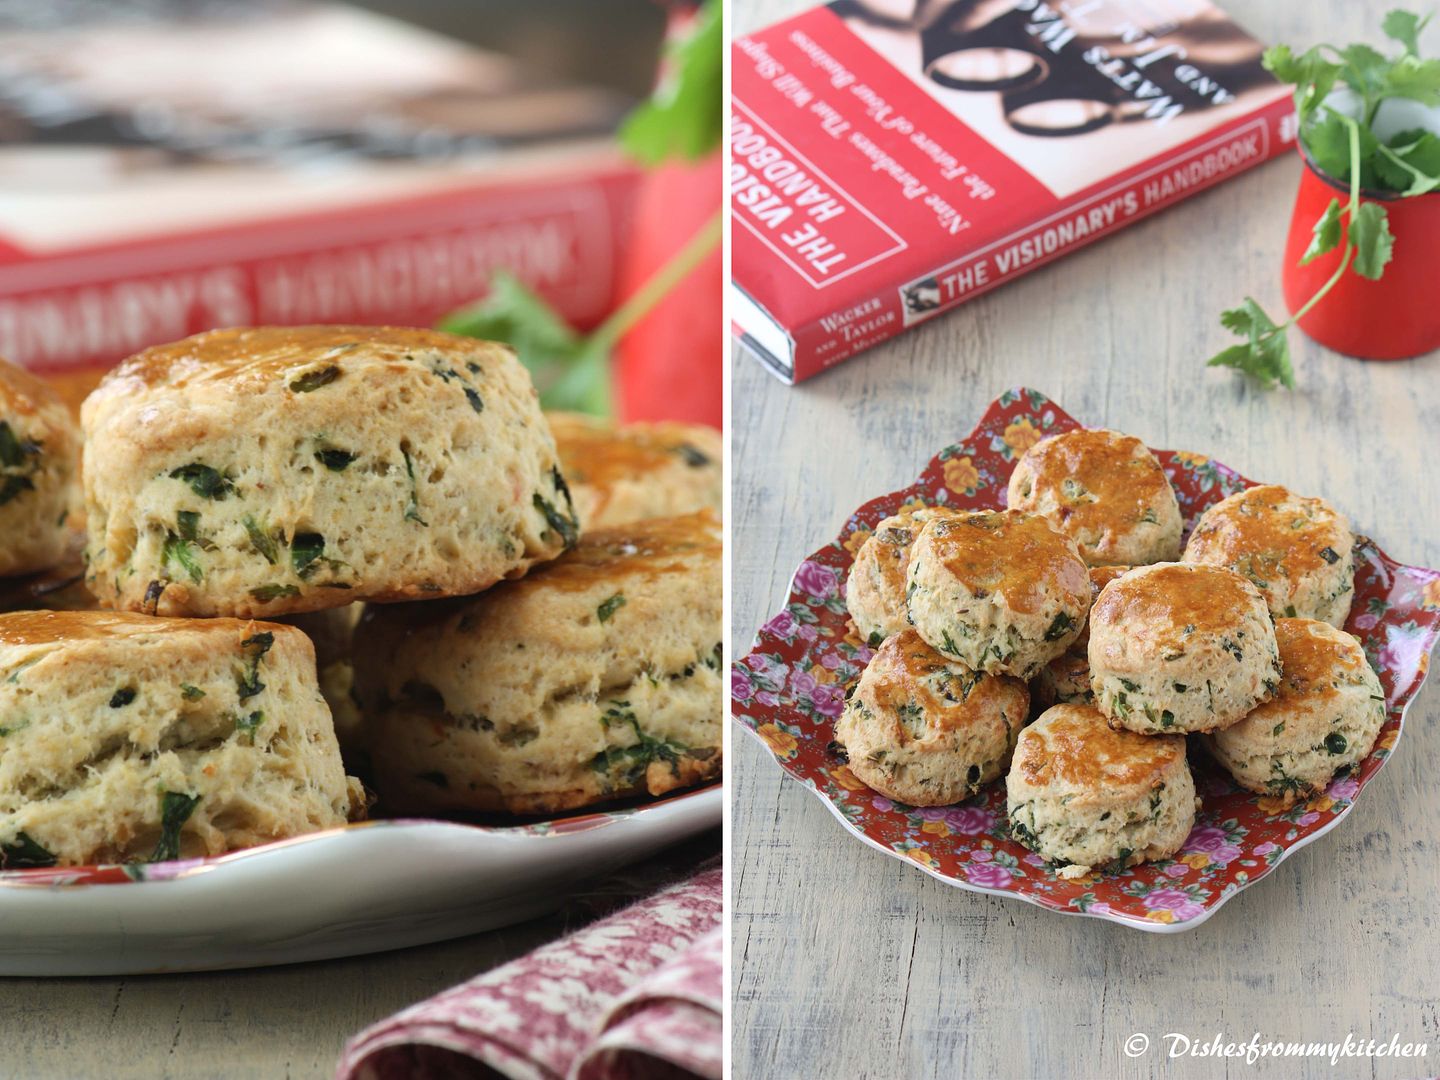
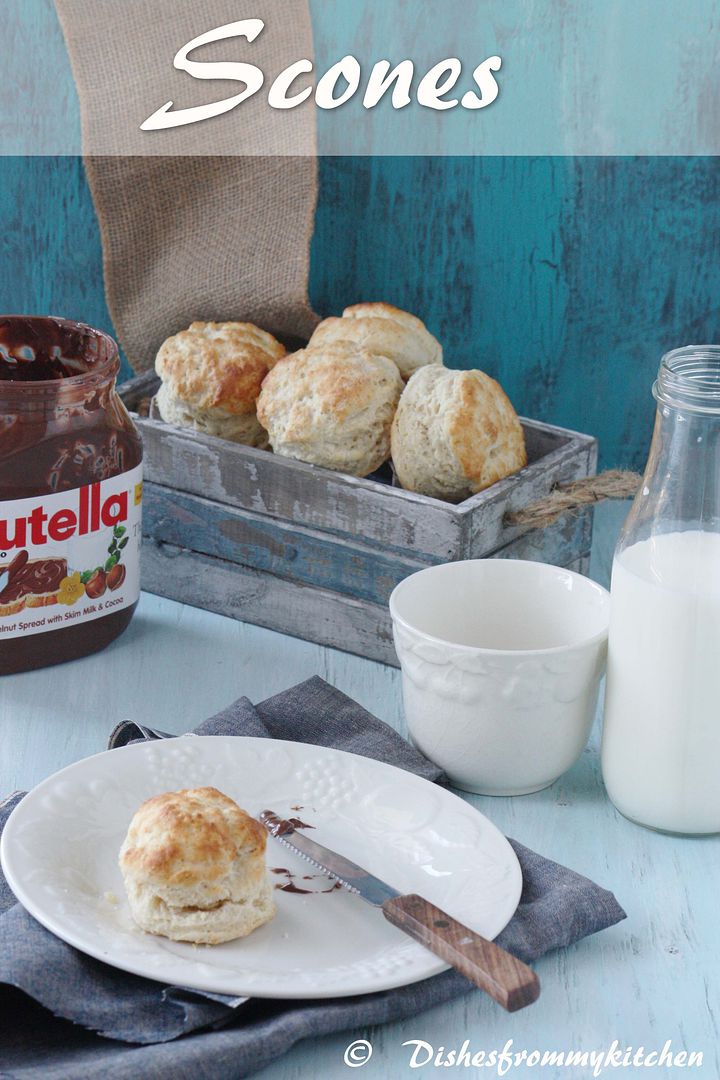
Here are my plain scones which we enjoyed with nutella and mini scones with Indian touch. It includes caramelized onion, finely chopped green chilies, Scallions, lots of coriander leaves with hint of whole cumin. I have also used whole wheat flour and half all purpose flour to the basic recipe.  Hope you all enjoy my treat as much as I enjoyed baking in the gloooooomy and lazy day!!!

The scone is a small Scottish quick bread. They are usually made of wheat, barley or oatmeal, with baking powder as a leavening agent. The scone is a basic component of the cream tea or Devonshire tea.

The original scone was round and flat, usually the size of a medium size plate. It was made with unleavened oats and baked on a griddle (or girdle, in Scots), then cut into triangle-like quadrants for serving. British scones are often lightly sweetened, but may also be savory. They frequently include raisins, currants, cheese or dates. Round-shaped British scones can resemble North American biscuits in appearance, but scones rely on cold butter for their delicate, flaky texture, while biscuits are more often made with animal fat or vegetable shortening and are crumbly rather than flaky.

Here are my mini scones with Indian touch. It includes caramelized onion, finely chopped green chilies, Scallions, lots of coriander leaves with hint of whole cumin. I have also used whole wheat flour and half all purpose flour to the basic recipe.  Hope you all enjoy my treat as much as I enjoyed baking in the gloooooomy and lazy day!!!


BASIC SCONE RECIPE

Ingredients:

Plain (all-purpose) flour - 1 cup
Fresh baking powder - 2 teaspoons
Salt - ¼ teaspoon
Frozen grated butter - 2 tablespoons
Cold milk - ½ cup approximately
Optional 1 tablespoon milk, for glazing the tops of the scones


Method:

1. Preheat oven to very hot 475°F/240°C/gas mark 9.
2. Triple sift the dry ingredients into a large bowl. (If your room temperature is very hot refrigerate the sifted ingredients until cold.)
3. Rub the frozen grated butter (or combination of fats) into the dry ingredients until it resembles very coarse bread crumbs with some pea-sized pieces if you want flaky scones or until it resembles coarse beach sand if you want tender scones.
4. Add nearly all of the liquid at once into the rubbed-in flour/fat mixture and mix until it just forms a sticky dough (add the remaining liquid if needed). The wetter the dough the lighter the scones (biscuits) will be!
5. Turn the dough out onto a lightly floured board, lightly flour the top of the dough. To achieve an even homogeneous crumb to your scones knead very gently about 4 or 5 times (do not press too firmly) the dough until it is smooth. To achieve a layered effect in your scones knead very gently once (do not press too firmly) then fold and turn the kneaded dough about 3 or 4 times until the dough has formed a smooth texture. (Use a floured plastic scraper to help you knead and/or fold and turn the dough if you wish.)


6. Pat or roll out the dough into a 6 inch by 4 inch rectangle by about ¾ inch thick (15¼ cm by 10 cm by 2 cm thick). Using a well-floured 2-inch (5 cm) scone cutter (biscuit cutter), stamp out without twisting six 2-inch (5 cm) rounds, gently reform the scraps into another ¾ inch (2 cm) layer and cut two more scones (these two scones will not raise as well as the others since the extra handling will slightly toughen the dough). Or use a well-floured sharp knife to form squares or wedges as you desire.
7. Place the rounds just touching on a baking dish if you wish to have soft-sided scones or place the rounds spaced widely apart on the baking dish if you wish to have crisp-sided scones. Glaze the tops with milk if you want a golden color on your scones or lightly flour if you want a more traditional look to your scones.
8. Bake in the preheated very hot oven for about 10 minutes (check at 8 minutes since home ovens at these high temperatures are very unreliable) until the scones are well risen and are lightly colored on the tops. The scones are ready when the sides are set.
9. Immediately place onto cooling rack to stop the cooking process, serve while still warm.


Note :


For the Herb and Caramalized onion scone 


Onion - 1 finely chopped
Green chillies - 3 very very finely chopped
Scallions/chives - 4 only green part finely sliced
Cumin seeds - 1/2 tsp
Cilantro - 1/4 cup very finely chopped
Oil - 1/2 tbsp
salt - little


Method :

1. Heat oil in the pan . Add the cumin once it splutters. Add the green chillies.
2. Add the onion to brown color in low flame.
3. Now once it is done add other ingredients and give it a stir and put off the flame.
4. Let them cool and add this cooled mixture after step 3 in the above scone recipe.
5. And follow remaining steps.  


Enjoy the Scone with Indian touch !!!!

I used egg wash for my Herb scone but if you want to avoid egg , just substitute with milk like the basic scone.


Storage and Freezing Instructions/Tips:

Scones are best eaten warm. Scones (biscuits) are really easy to store – bag the cooked and cooled scones and freeze until needed then reheat in a moderate hot for a few minutes.

Read more...

JOWAR - HEALTHY GLUTEN FREE DISH !!!

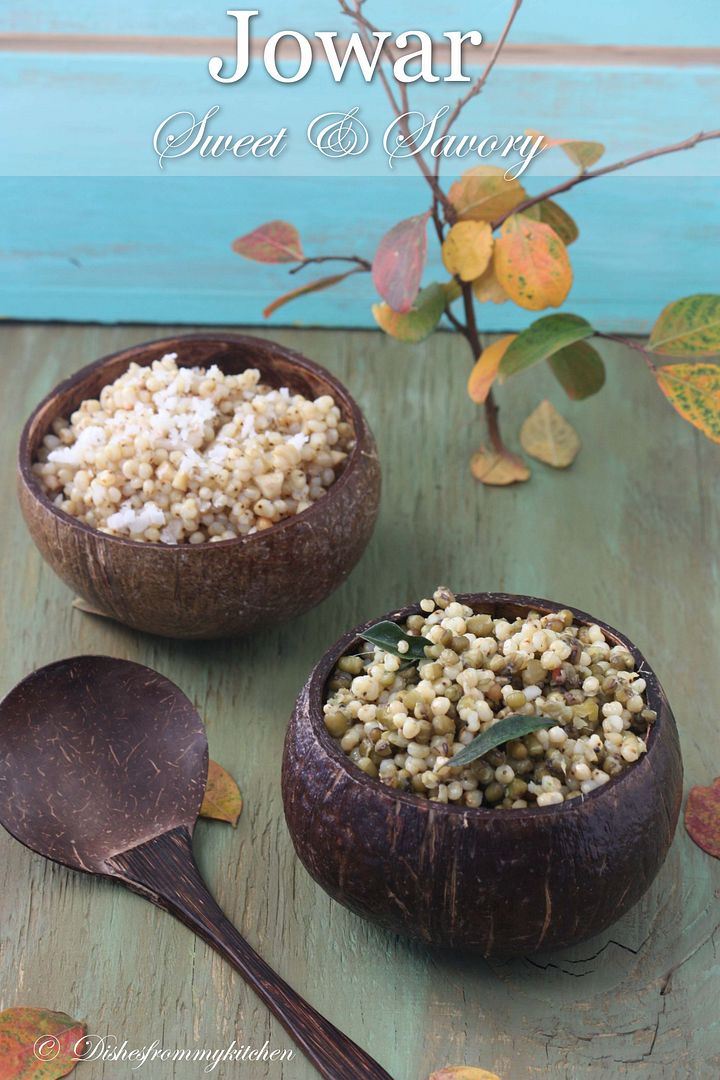
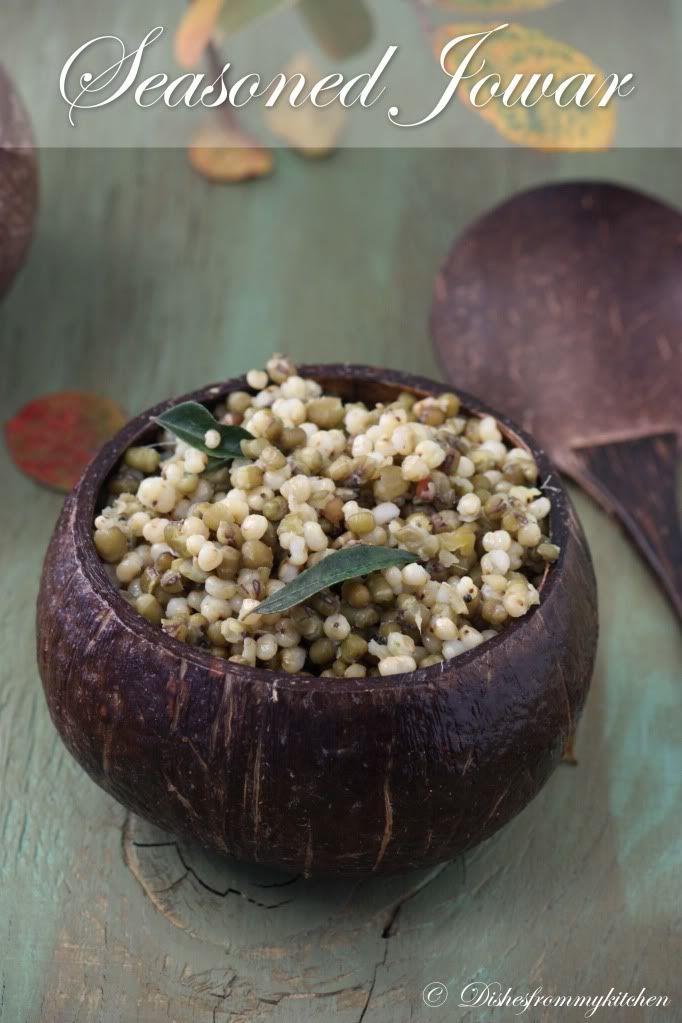
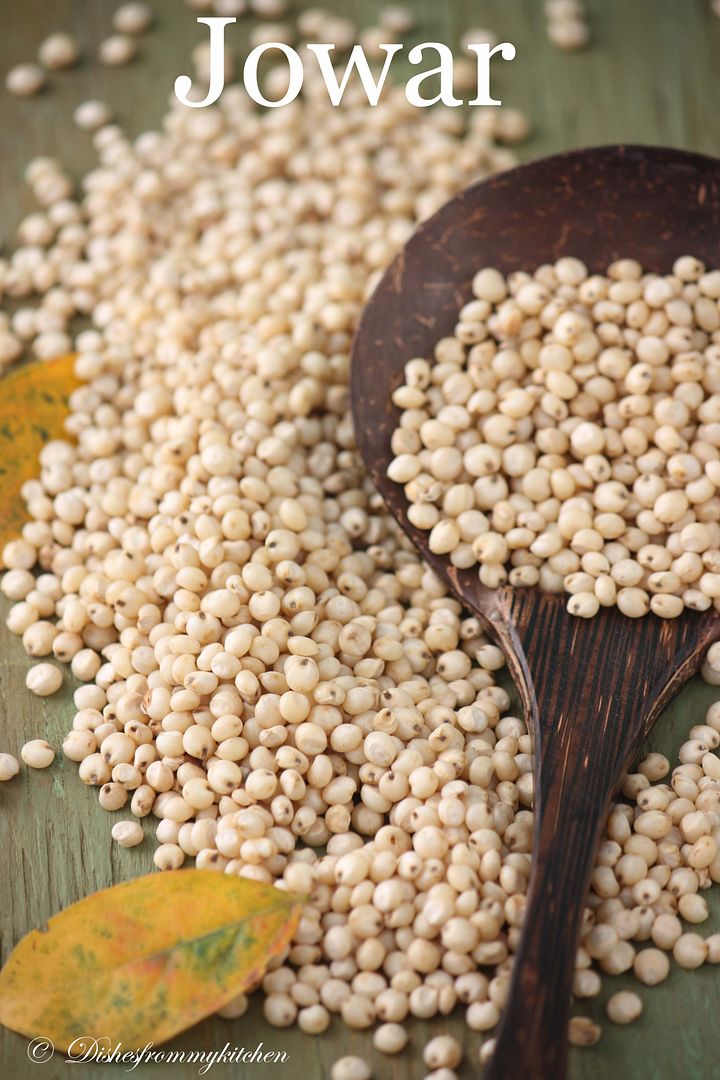
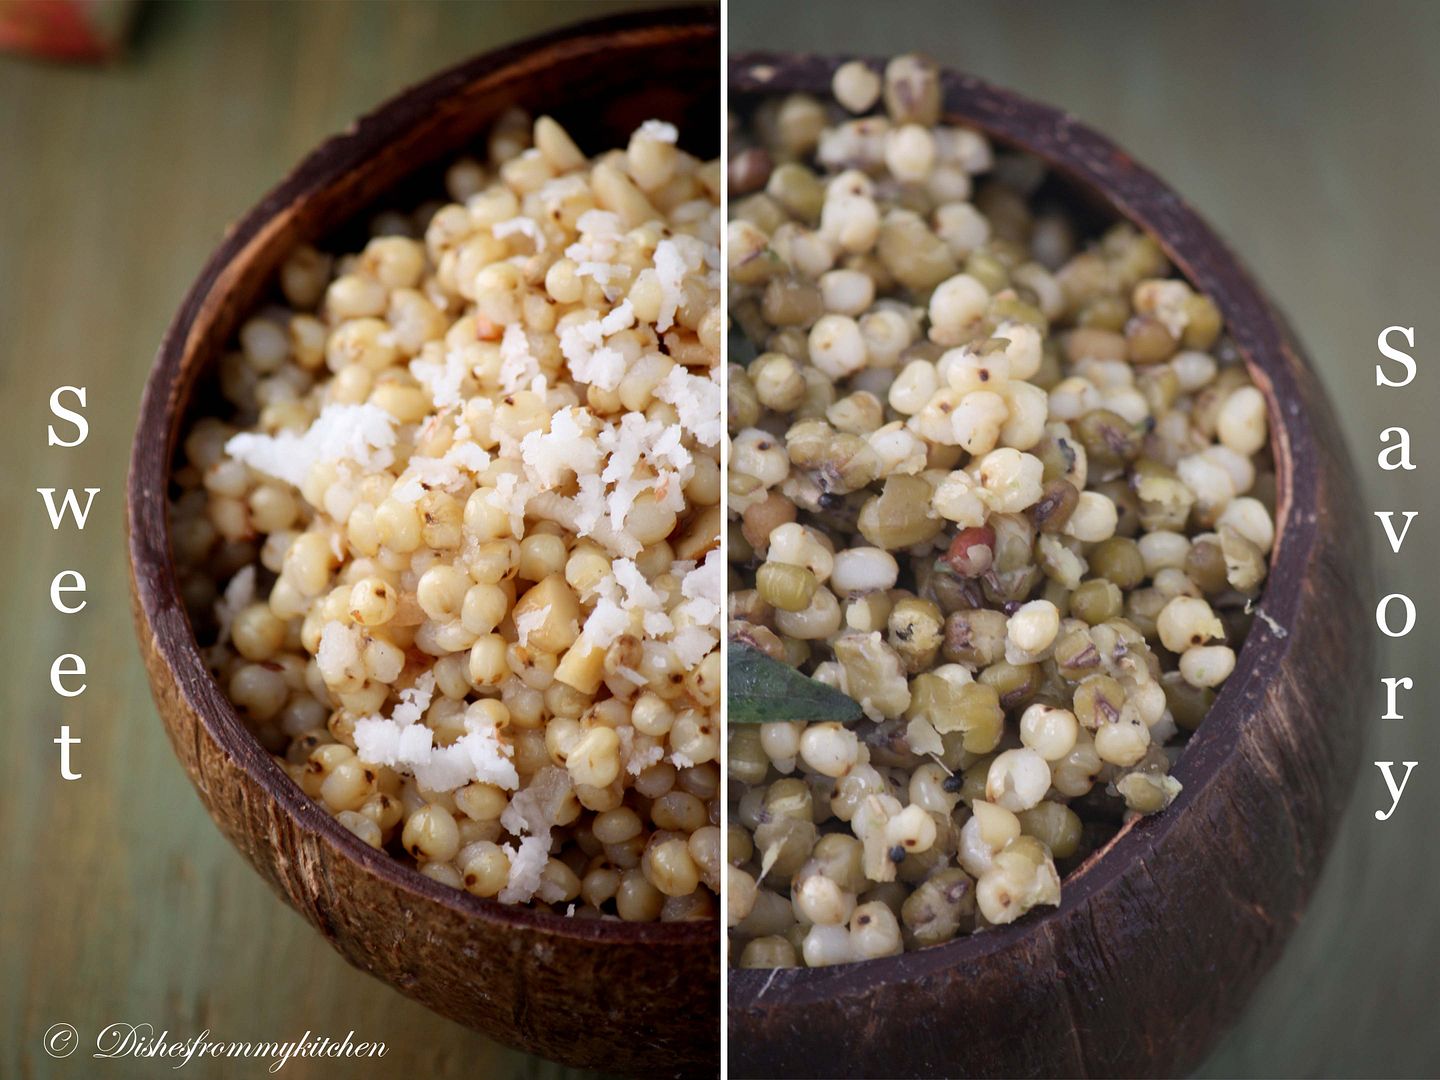
Jowar is also known as sorghum (Sorghum vulgare), great millet, kaffir corn, guinea corn.  Sorghum or Jowar roti is one of the traditional and well know dish to almost everyone.  This is a excellent gluten free diet and has wonderful health benefits.  The recipe which I am posting today is seasoning the Jowar, which is savory version and also the sweet version.  My mom used to make this during weekends; we enjoy a lot eating them piping hot.  This is my family favorite dish from my childhood days which is also very healthy and tasty.  Since long time I wanted to post this. Here is my childhood favorite dish. 


SAVORY VERSION OF JOWAR

Ingredients:

Jowar - 3/4 cup
Green gram - 1 cup
Mustard seeds - 1/2 tsp
Curry leaves - few
Asafoetida - 1/4 tsp
Urad dhal - 1 tsp
Ginger paste - 1/2 tbsp
Green chilli paste - 1/4 tbsp
Oil and salt 


Method:

1. Wash and soak both Jowar and green gram in water separately for whole night.
2. Pressure cook jowar for 4 to 5 whistles. Once whistle sound is release, drain them in the colander.
3. Cook green gram in boiling water till soft but it should hold its shape.  Drain the water.
4. Heat oil in a pan, season with mustard, urad dhal, asafoetida, curry leaves, ginger and green chilli paste.
5. Add cooked jowar and green gram, Mix until they are blended well.

Serve piping hot to enjoy the freshness and taste !!!


SWEET VERSION OF JOWAR

Ingredients:

Jowar - 1/4 cup
Sugar - 3 to 4 tbsp
Cardamom - 1/8 tsp
Cashewnuts - 5 to 6 chopped finely
Ghee - 1/4 tbsp
Coconut shredded - 1 tbsp


Method :

1. Wash and soak jowar overnight.
2. Pressure cook jowar for 4 to 5 whistles.
3. Drain the water.
4. When it is still hot add the sugar and mix well.
5. In a small pan heat the ghee, add chopped cashew nuts till light brown in color.
6. Add the jowar give it a stir, add cardamom and coconut. Mix well.
7. Switch of the flame immediately and transfer to the serving bowl.

Serve Piping hot!!!


Note:

In the sweet version, jowar tends to harden little bit when it is cooled.  So consume them as soon as you make or microwave it whenever you are ready to eat.

Read more...

BUTTER AND GHEE(BROWN BUTTER) FROM SCRATCH!!!

This is a long time due in my posting list.  Even though I make this regularly at home , I never took picture because of my laziness and off-course with bit busy schedule :( .  I just don't want to postpone this anymore.  Before moving forward please do bear with the very loooooooong post :).  Yes today I am posting how to make butter and brown butter (clarified butter/ghee) from scratch.  In my mother-in-law's place we never buy butter or ghee from store. Here is a brief of  how she prepares butter and ghee.

1. When the milk is boiled and cooled she collects the cream which is formed as layer in the milk (cream is a top layer that is formed when milk is cooled after boiling) . She does this daily.  
2. After that she stores the collected cream in refrigerator.  
3. When it comes to certain quantity she adds little yogurt (kind of active bacteria) to the cream and keep it overnight(outside the refrigerator). 
4.Then the next day she churns to get yummy butter and this kind of butter is called cultured butter.  Ghee is prepared out of that butter.


Cultured butter has distinctive, very slight tangy taste and has a longer shelf life.   The rich butter made from cultured cream, is popular in Europe.  Whereas today I am posting sweet butter which is made from the fresh cream without adding any active culture to the cream which is called as Sweet Cream in US. The United States primarily produces sweet cream butter, which includes lightly salted, unsalted and whipped butter. Anyway we love both the butter whether it is Sweet or Cultured :)  Both the butter can be used interchangeably in cooking.  


What is Ghee?

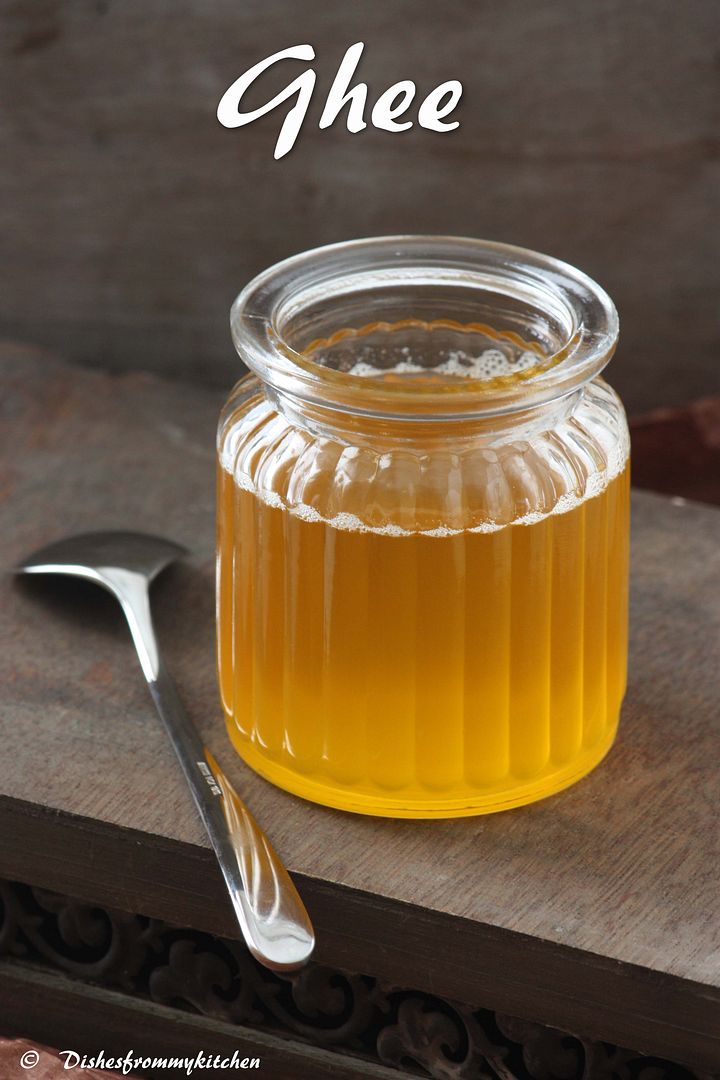
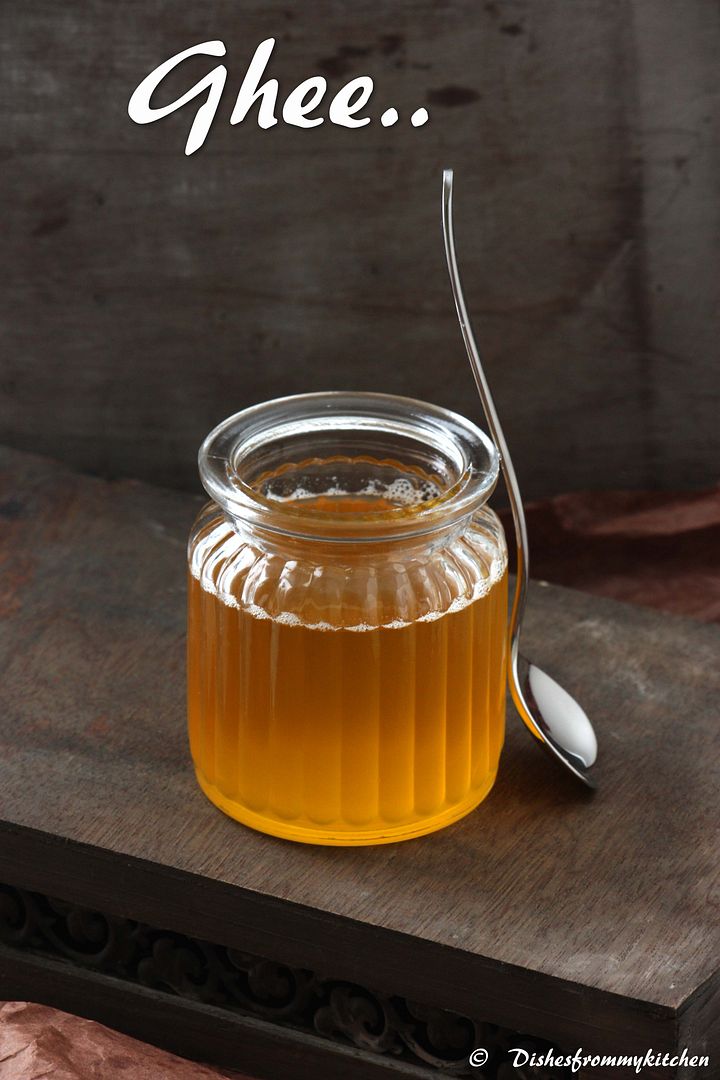
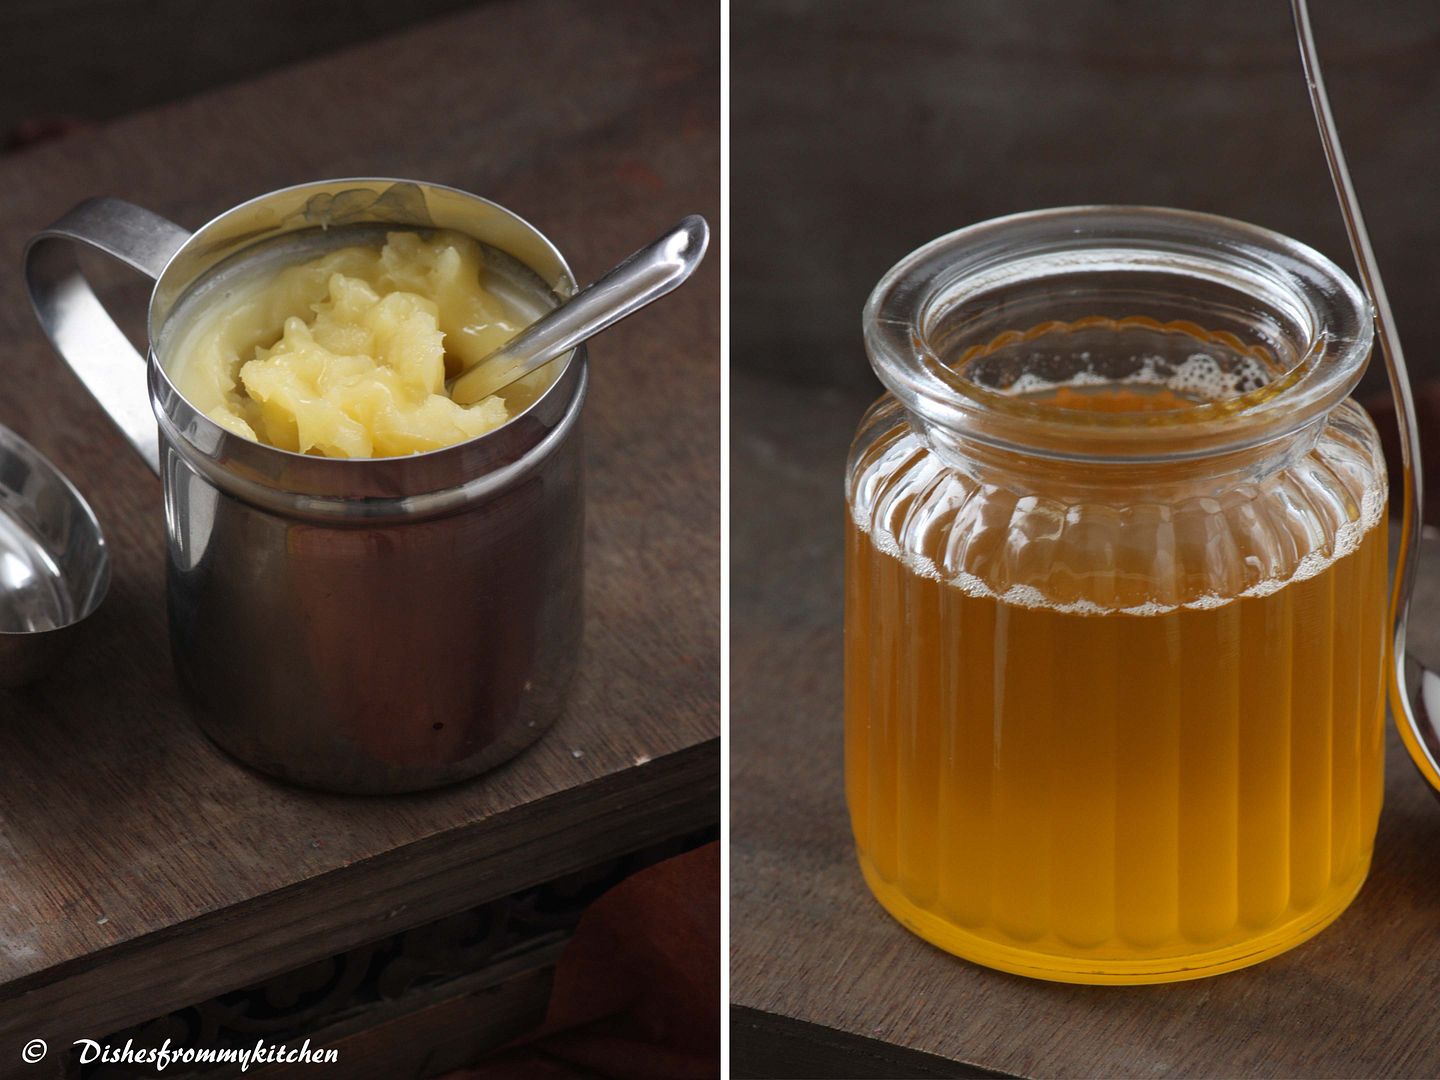
Clarified butter is milk fat rendered from butter to separate the milk solids and water from the butterfat.  The word ghee comes from Sanskrit and has several names around the world. The preparation of ghee involves heat; it has a distinctive toasted flavor, often described as nutty. Sticks of pure butter are placed in a large saucepan or kettle over medium to high heat. As the butter melts, it begins to boil. The solids settle to the bottom, while a thicker layer of oil forms in the center. The excess water forms a foamy top layer as it boils away.  Once the boiling process has slowed considerably, the middle layer should have a golden brown appearance. This is clarified butter or ghee.

As butter and ghee are one of the important things in Indian cooking there will be no house without these two. 

Today I am posting Sweet Cream Butter and Ghee from scratch.  As I told this butter is just made from pasteurized fresh cream which is not allowed to sour (without any active culture added).  But surely I will be posting the process of making cultured butter as well when all this batch of ghee and butter is over.


MAKING BUTTER
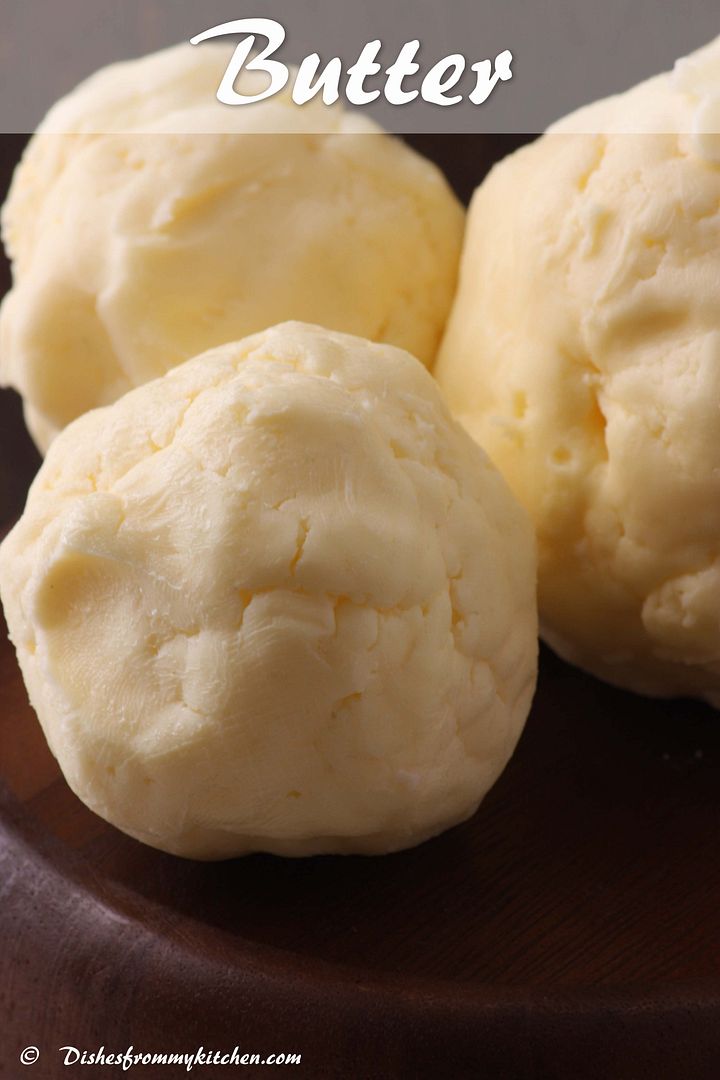
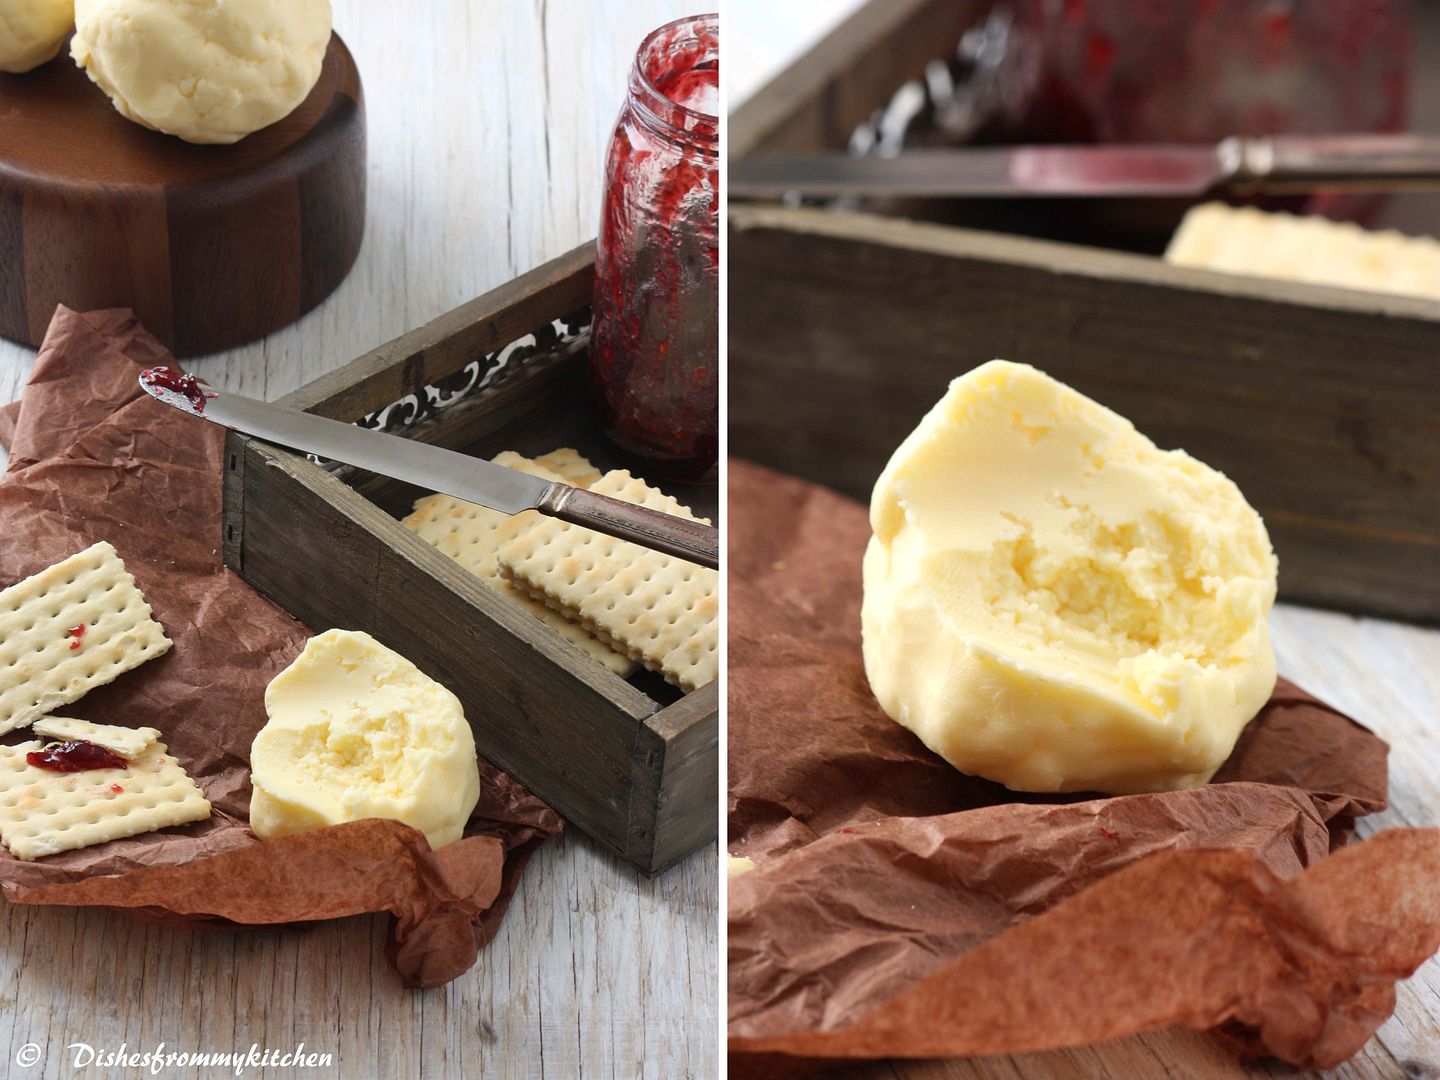
I used one half gallon of heavy cream and it yielded approximately 750 gm of butter.

Ingredients:

Pasteurized heavy cream - 1/2 gallon (1.89 L)
2 glass of cold water (slightly chilled)

Equipment:

Kitchen aid or electric whisk.


Method:

The whole process approximately takes 15 to 20 minutes (keep in medium speed).

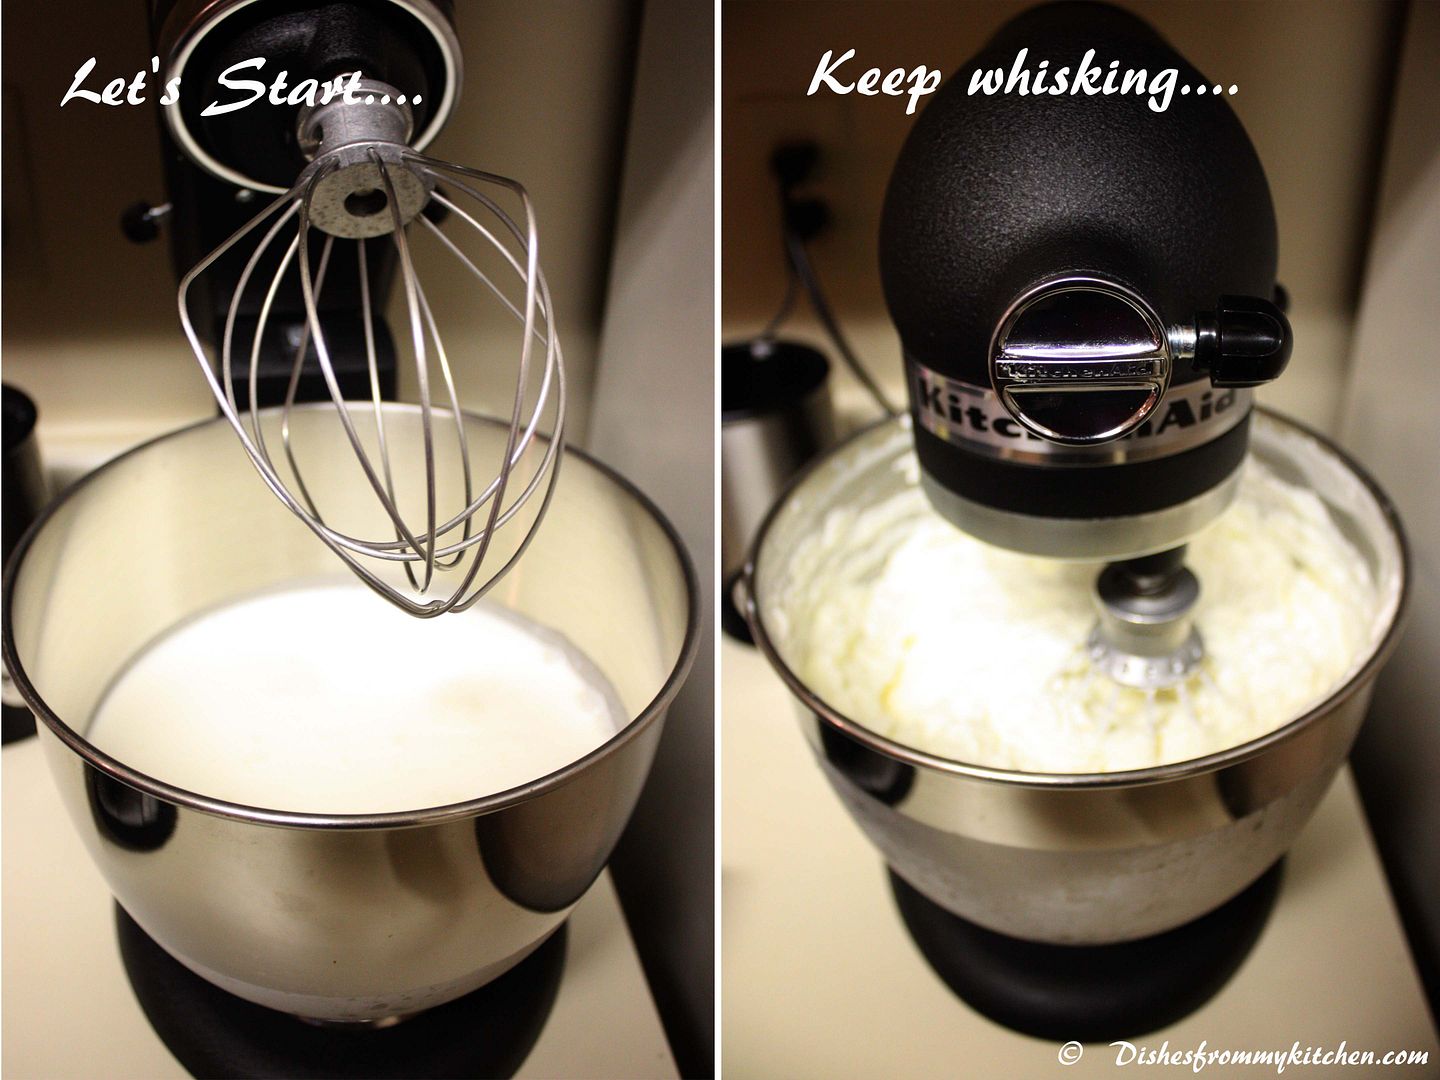
1. Pour the heavy cream in the container or the kitchen aid bowl. 
2. Whisk using the attachment.  When you start whisking this passes different stages like soft whipped cream, and then it becomes stiff.
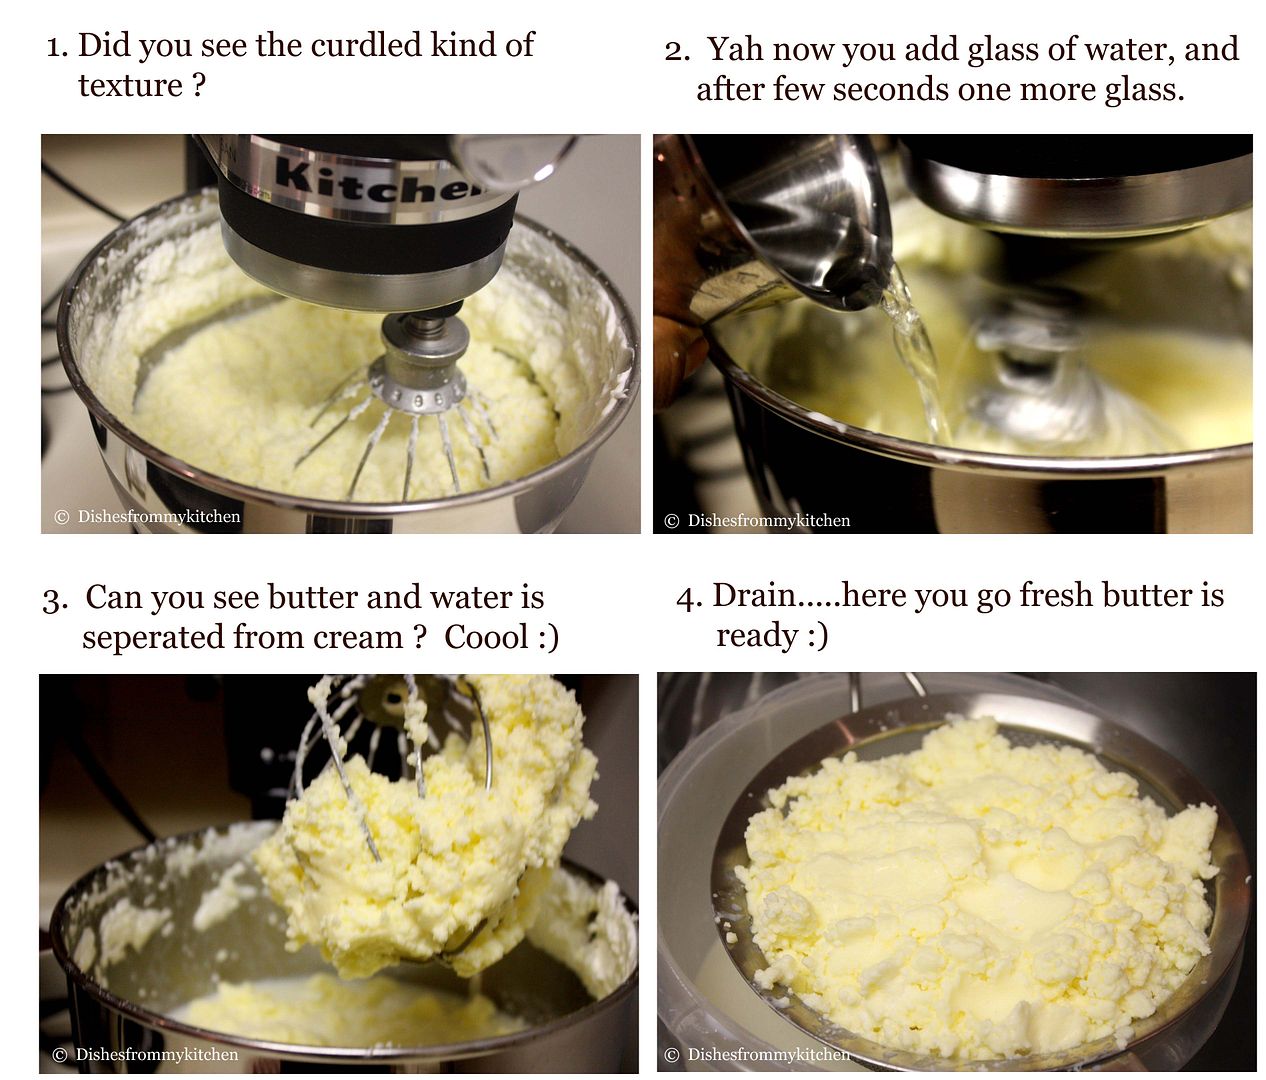
3. When you see curdled texture add glass of cold water.  Keep the bowl closed other wise you will end up in cleaning the whole area.
4. Now add one more glass of water and keep whisking (reduce the speed to low at this stage). 
5. Now you will see the butter and water gets separated from the cream. The butter starts to float in the water.
6. At this stage stop whisking and drain the water using drainer.
7. Leave it for few minutes.  Then slightly give it a press to see if there is any excess water.
8. Make butter balls and refrigerate.

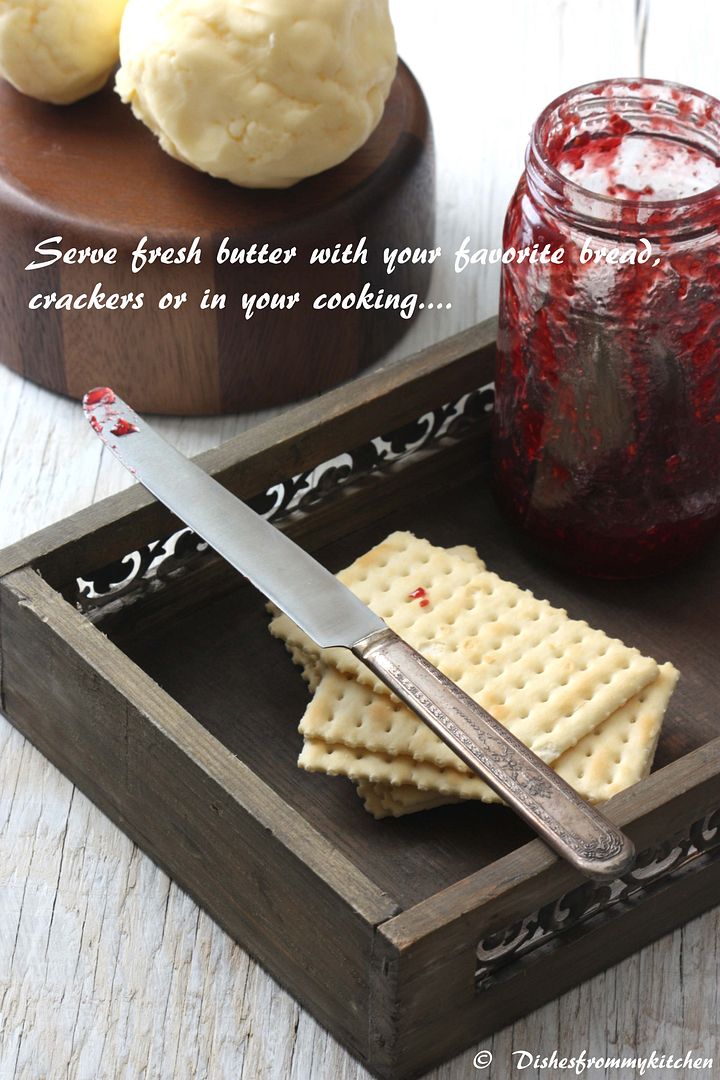
Enjoy the fresh butter with your favorite bread, crackers or in your cooking!!!

Note:

1. Keep the bowl closed and if you feel like it splashes outside then reduce the speed.


Here are Mouthwatering Indian sweet recipes using Ghee/clarified butter.  Enjoy making with your Homemade ghee !!!

Indian sticky rice sweet
Badam Halwa(Almond halwa)
Obattlu
Besan Ladoo
Boondhi Ladoo
Corn flour Halwa


MAKING GHEE

Ingredient:

The above 750 gm of butter yields approximately 750 gm of ghee (few points less).

Butter - 750 gm 


Method:

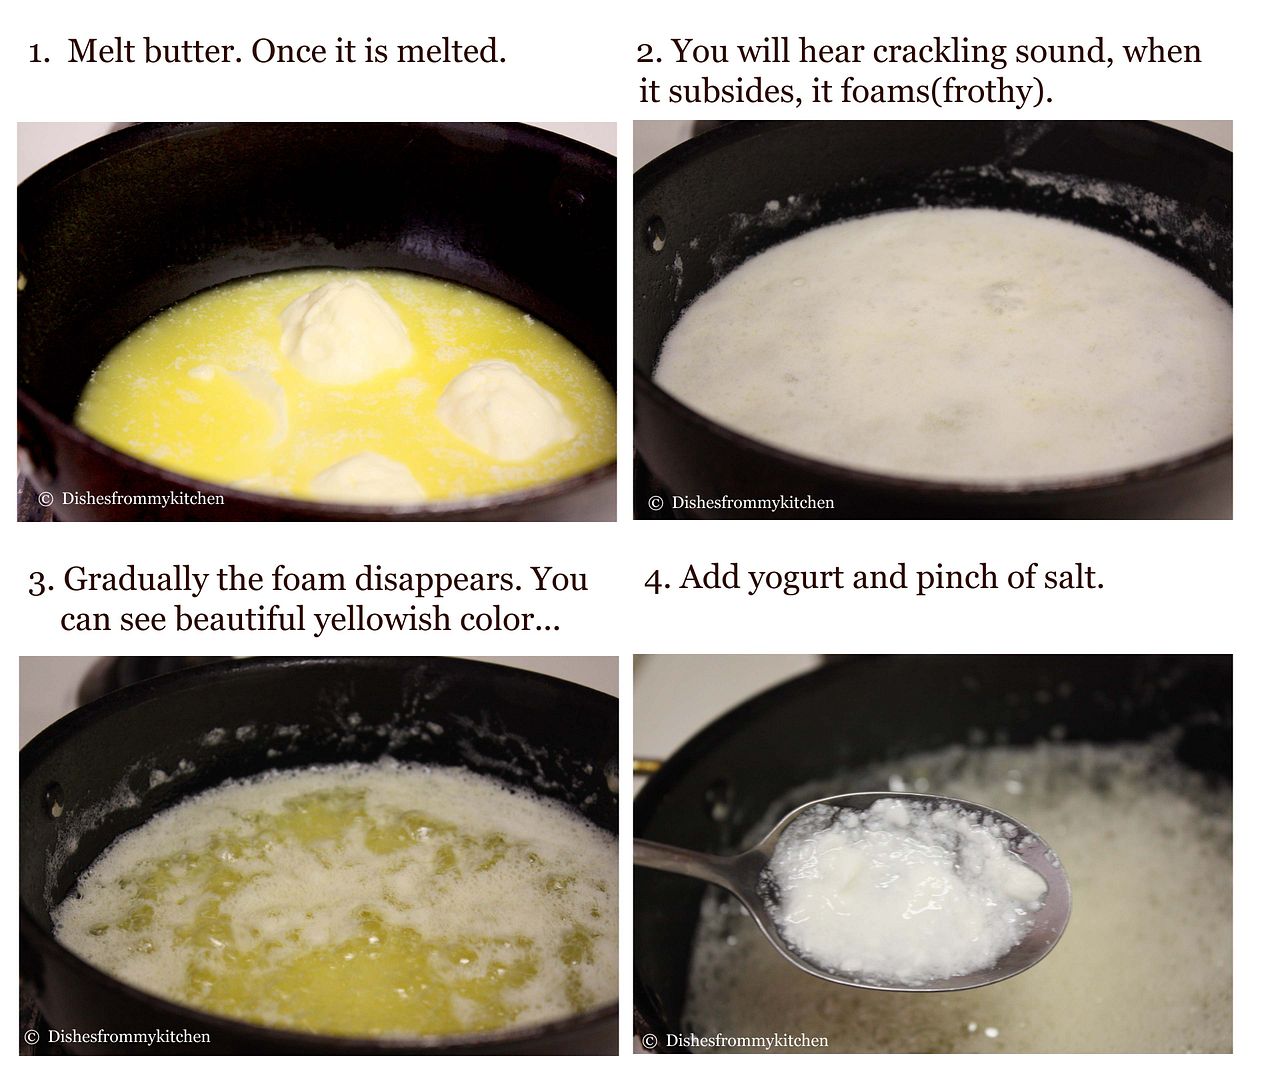
1. Place the butter in the heavy bottom pan and start the process in medium flame. Make sure the pan is dry otherwise it starts spluttering when it gets heated. Keep stirring in between to avoid burning.
2. Once it is melted, you will hear the crackling sound at this stage. When the sound subsides the butter starts to foam up.
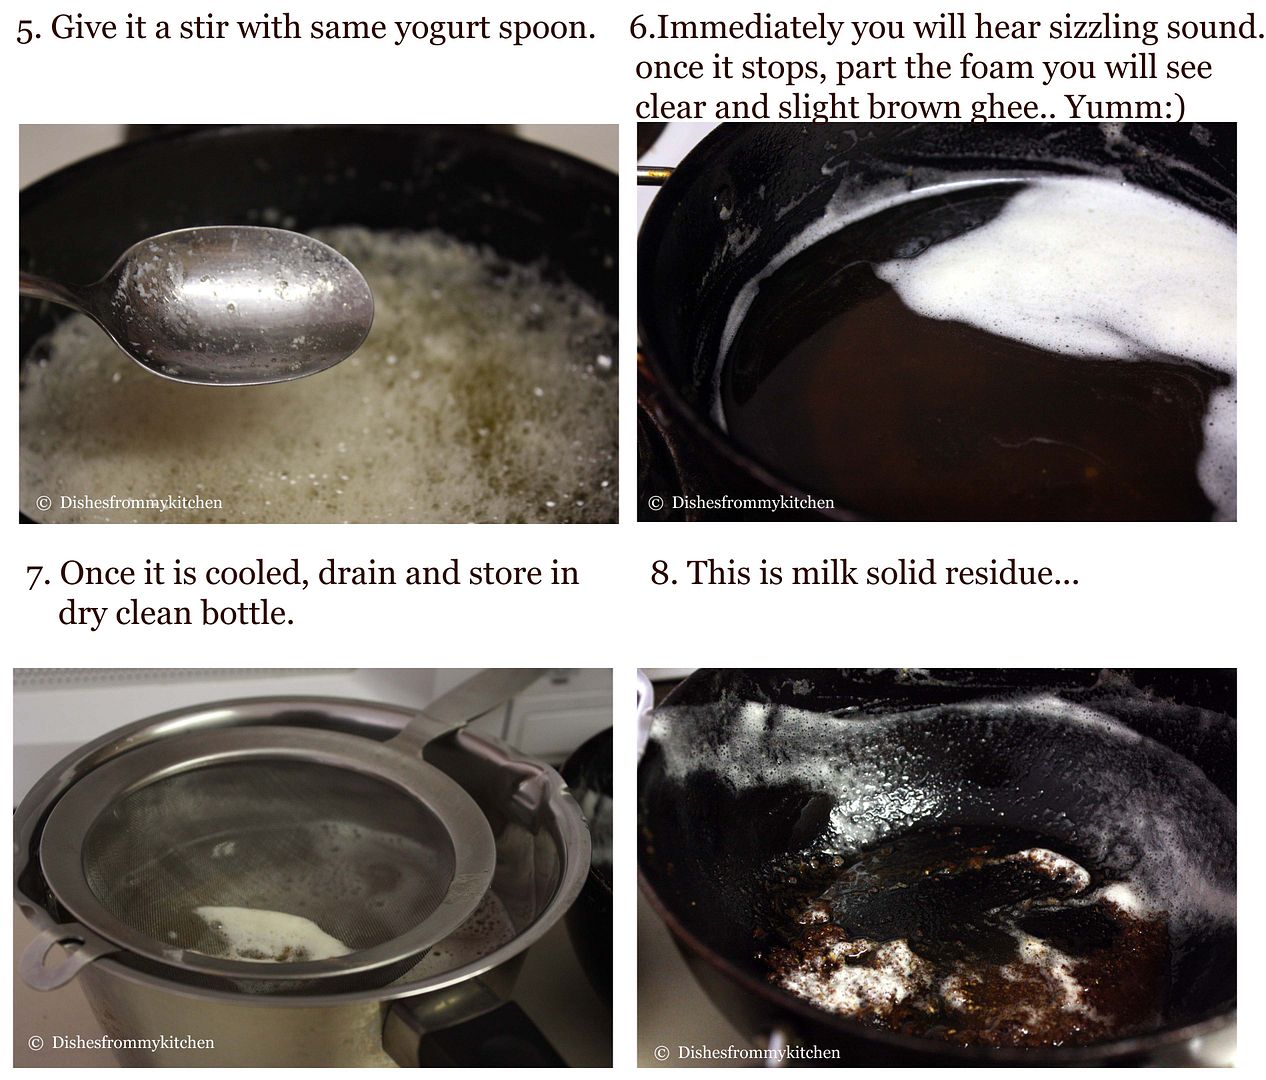
3. Now slowly the butter changes to creamy yellow color and the sound subsides. Even the foam gets reduced at this stage.  Mix 1/4 tsp of yogurt and mix it with pinch of salt in a spoon and now add this to the melted mixture.
5. Give it a stir.  Now when you part the foam you will see golden yellow color ghee(changes from creamy yellow to transparent yellow color) and it now slowly changes to very light brown color and the milk solids settle at the bottom changes to slight brown color. Switch of the flame. Keep the pan aside. 
6. Let it cool for some time and now strain them.  Store it in clean dry bottle/glass. 
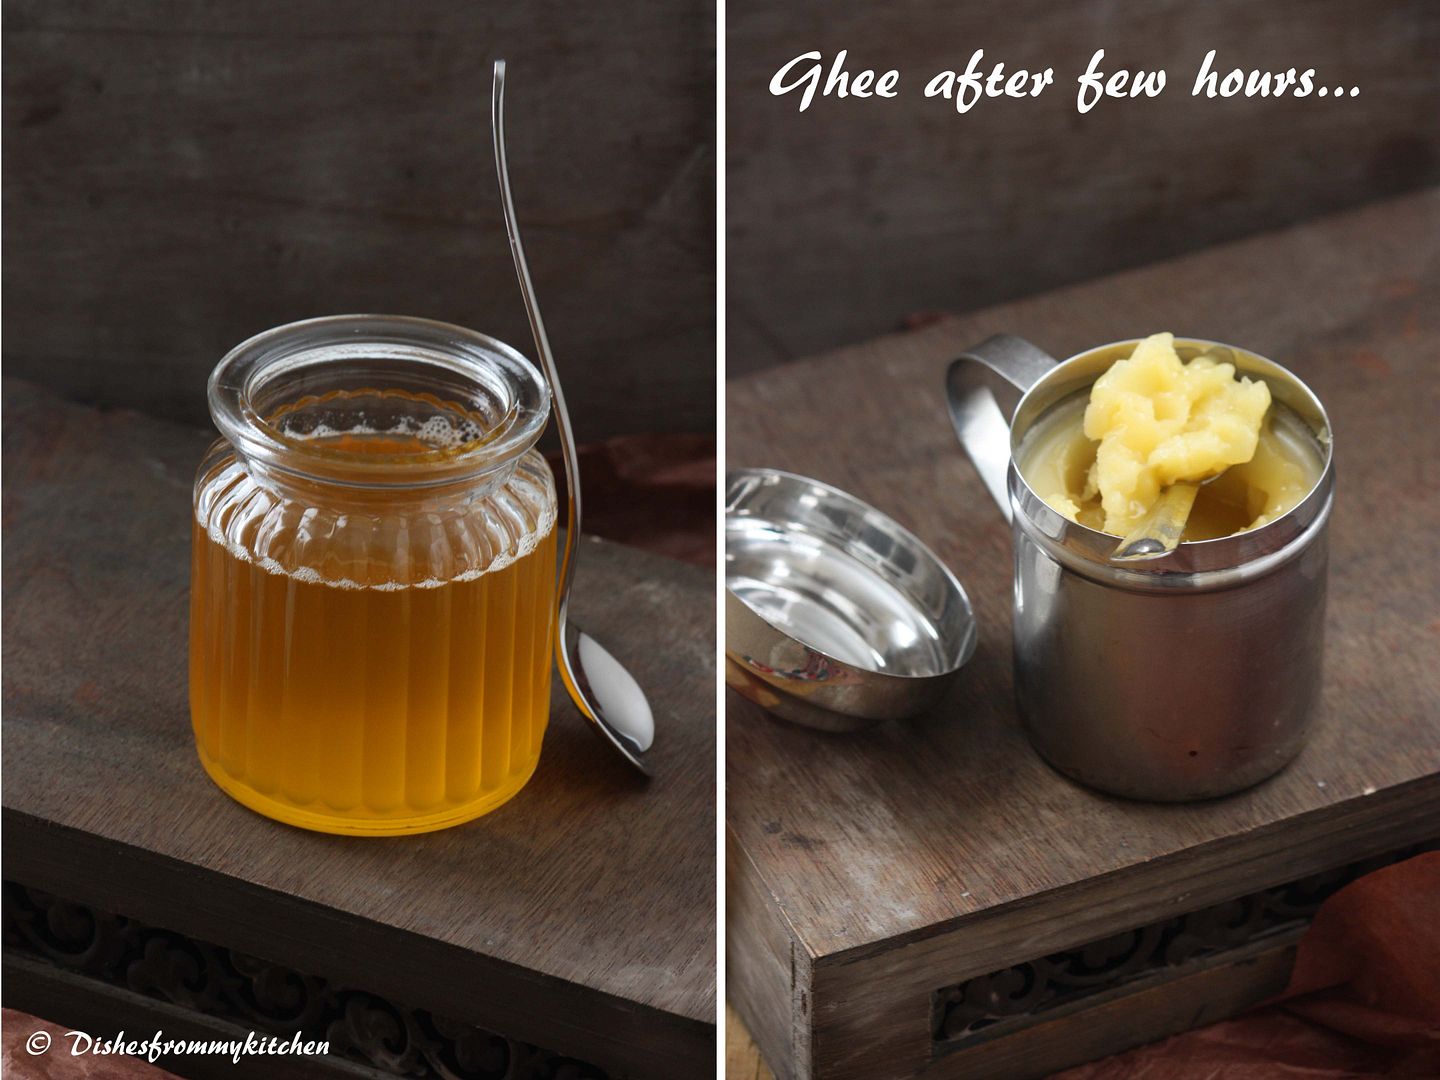
7. When the ghee is cooled it becomes solid, you can always melt in microwave when you need them.


Note:

1. You can always make the same process for smaller quantities too.  The process is same.
2. While making ghee, start with the medium flame then slowly reduce to low flame to avoid burning.
3. The milk solid that settles at the bottom should be in light brown color.  If you allow  it to  become dark brown it means the ghee is burnt then you will end up with a burnt smell in ghee which is not good :( So always keep an eye while making ghee.
4. You can always flavor the ghee by adding curry leaves or your favorite herbs(rosemary,thyme) .
5. You can use the herbs(roasted herbs in ghee smells yuuuuuumm) mix it with rice and little salt and serve it with your favorite vegetable.
6. Milk solid that is separated at the bottom can be used for making sweet.
7. Adding yogurt is optional, but it gives nice flavor to ghee.  Even if you don't have yogurt add pinch of salt to keep the ghee for longer shelf life.

What to do with the residue ?

Add few tbsp of wheat flour or multigrain flour,  roast slightly with milk solid residue (do this in low flame) until raw aroma of flour disappears.  Then put off the flame.  Now add powdered sugar and mix well until everything is blended.  Cool and store in an air tight container.  You can have them as a snack whenever you feel like eating sweet.  It tastes yummy with  nutty flavor.  Kids will love this off course adults too :)

Enjoy making butter and fresh ghee at home !!!  Drop a comment or mail me if you have any questions. 


Read more...

OPERA CAKE - AN ADDICTIVE BOMB !!!

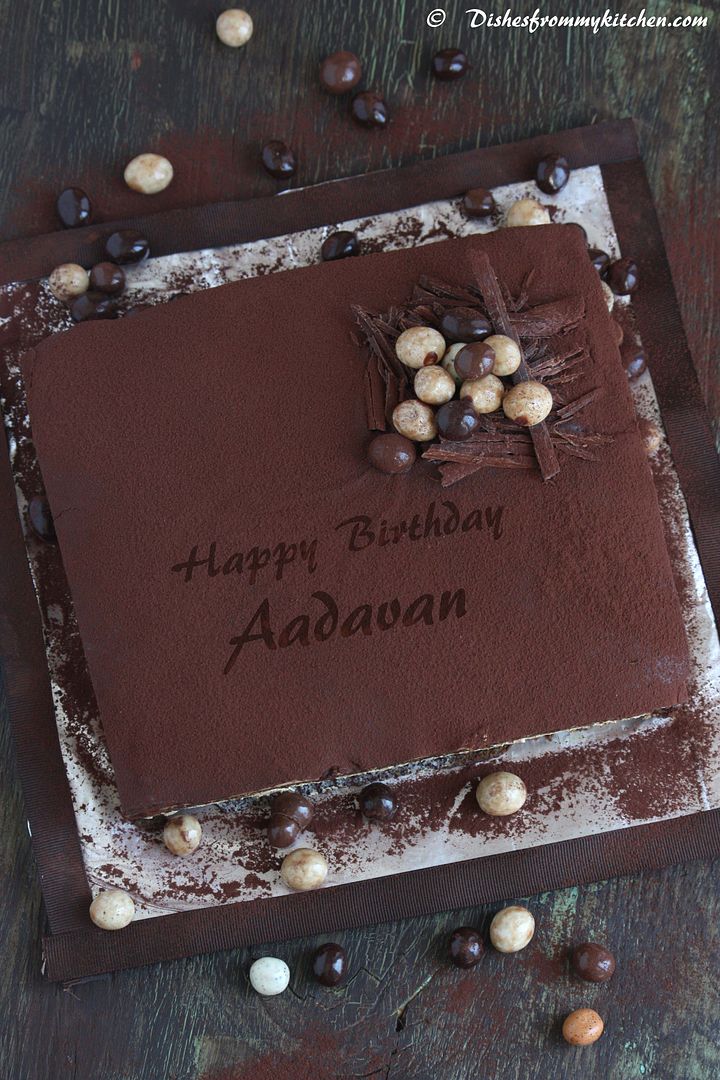
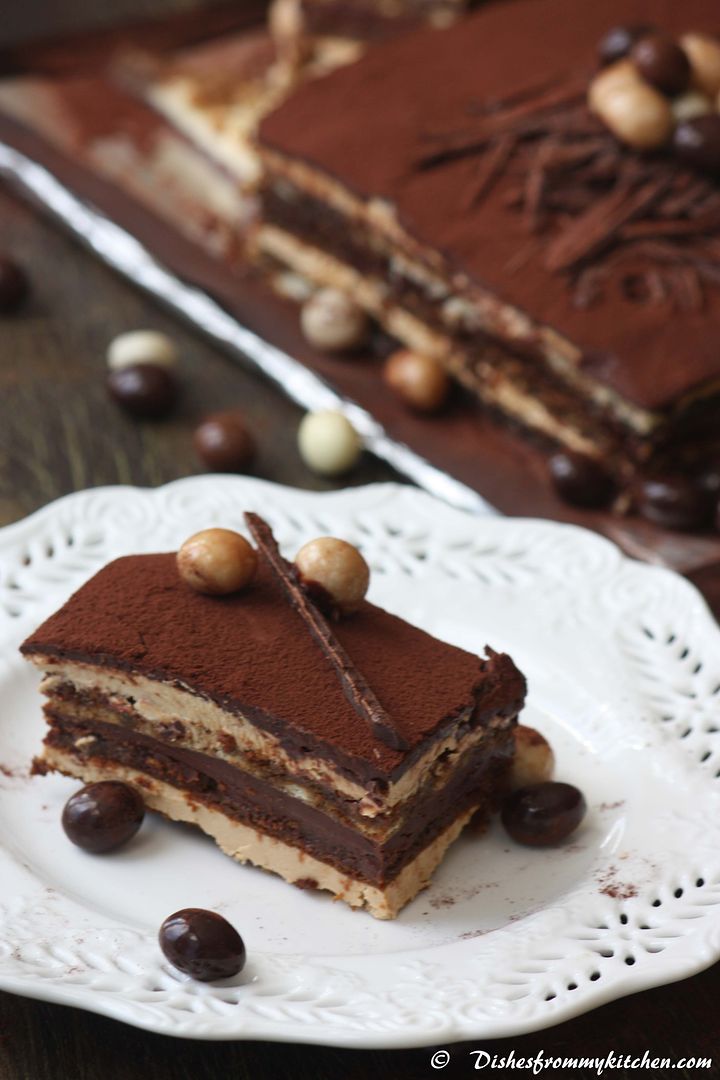
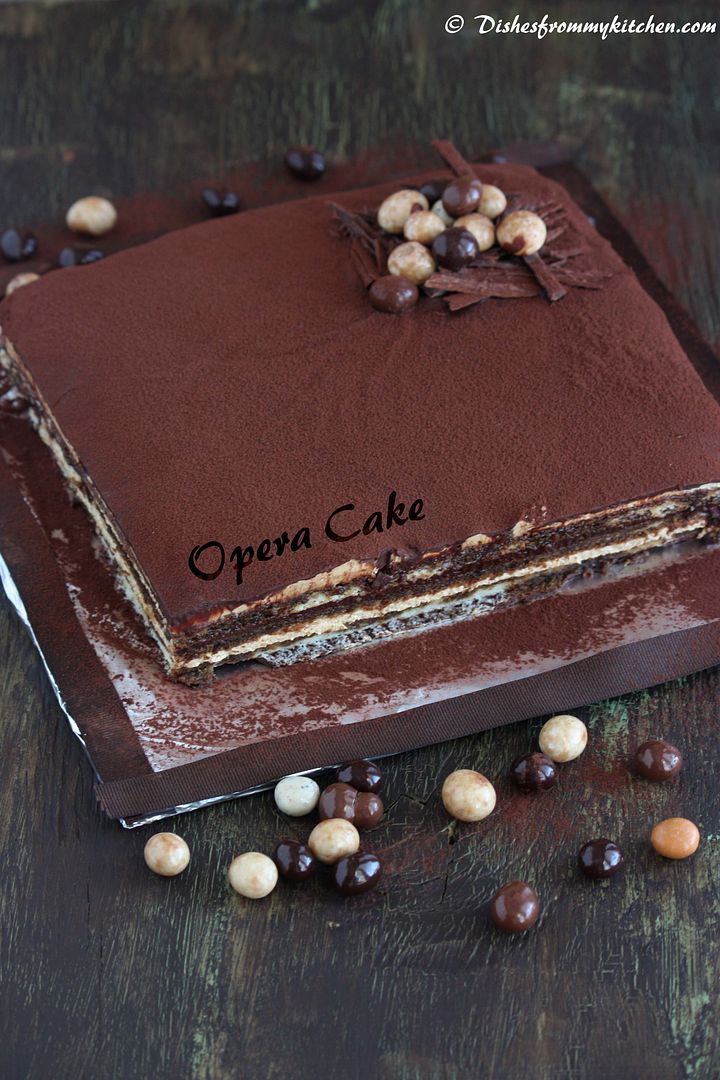
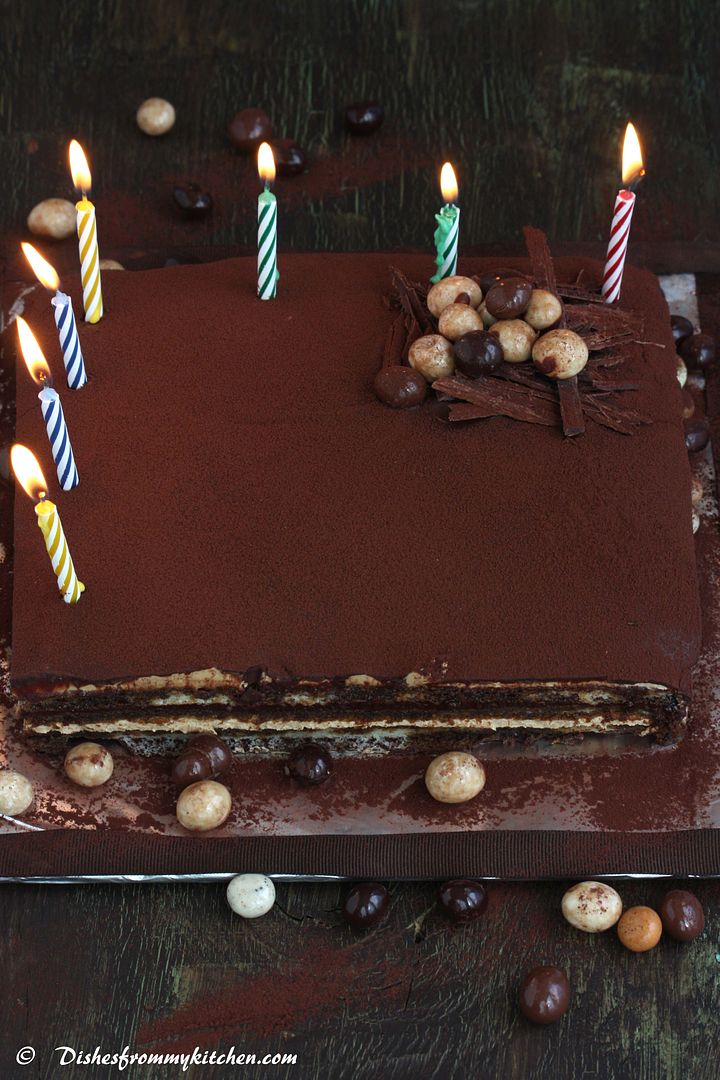
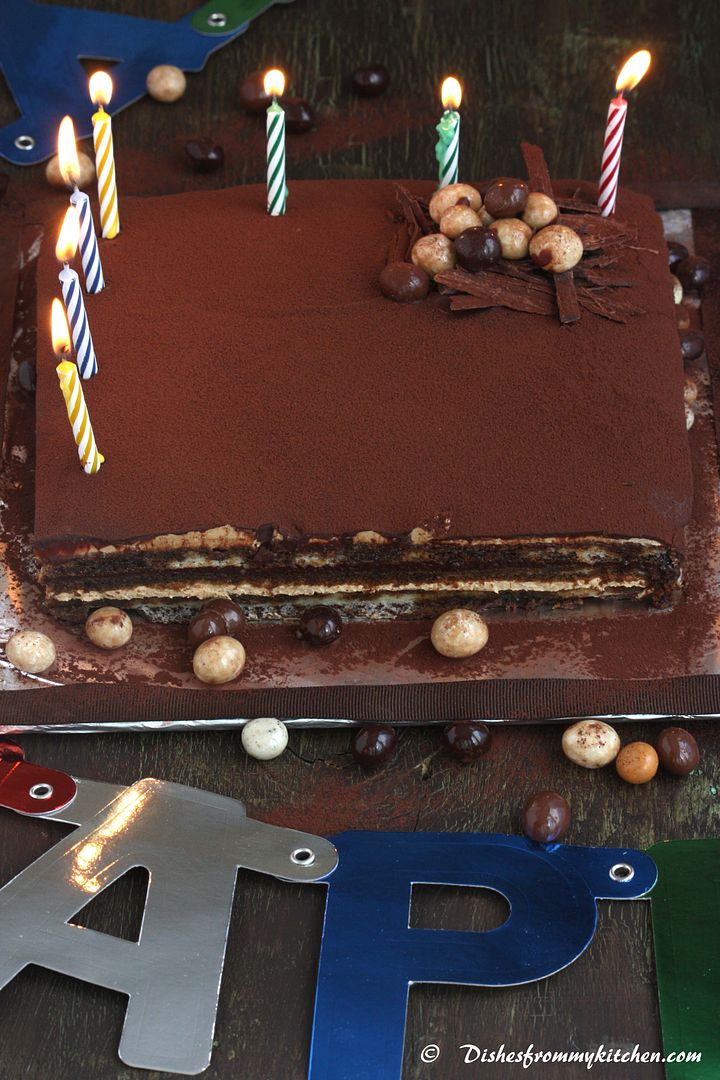
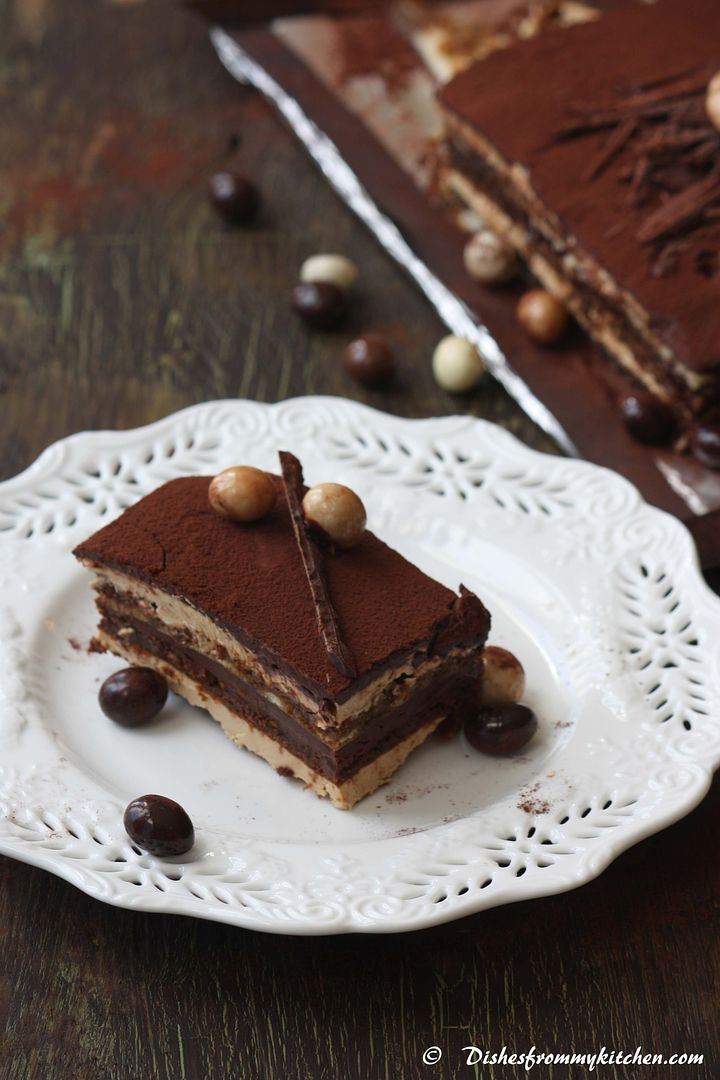
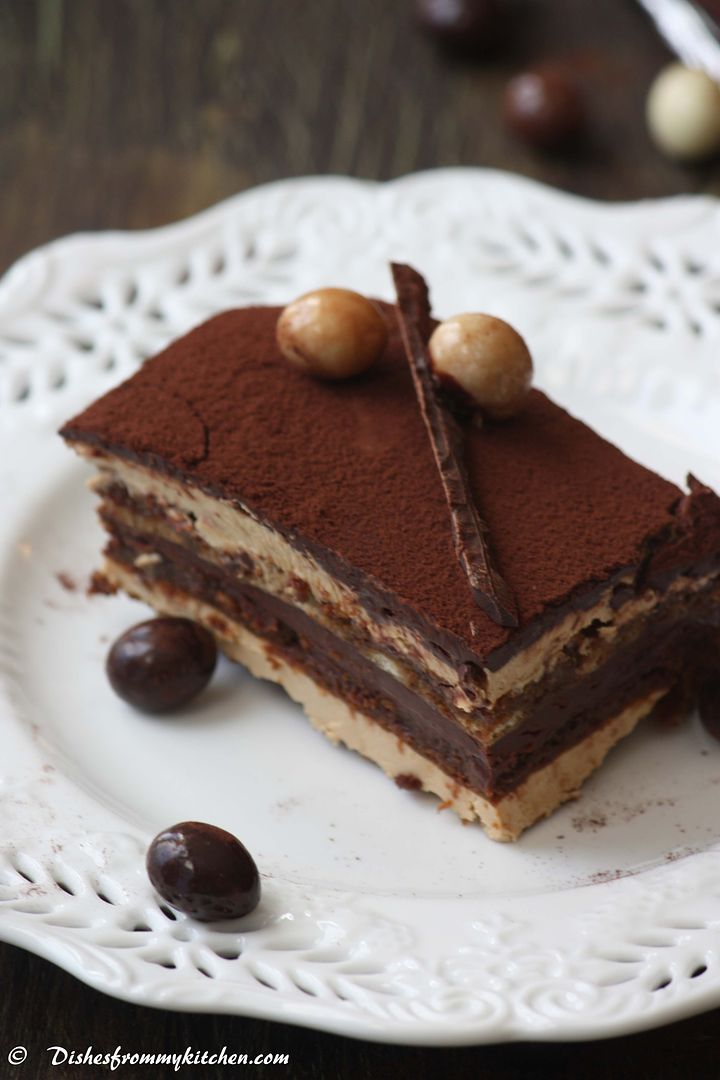
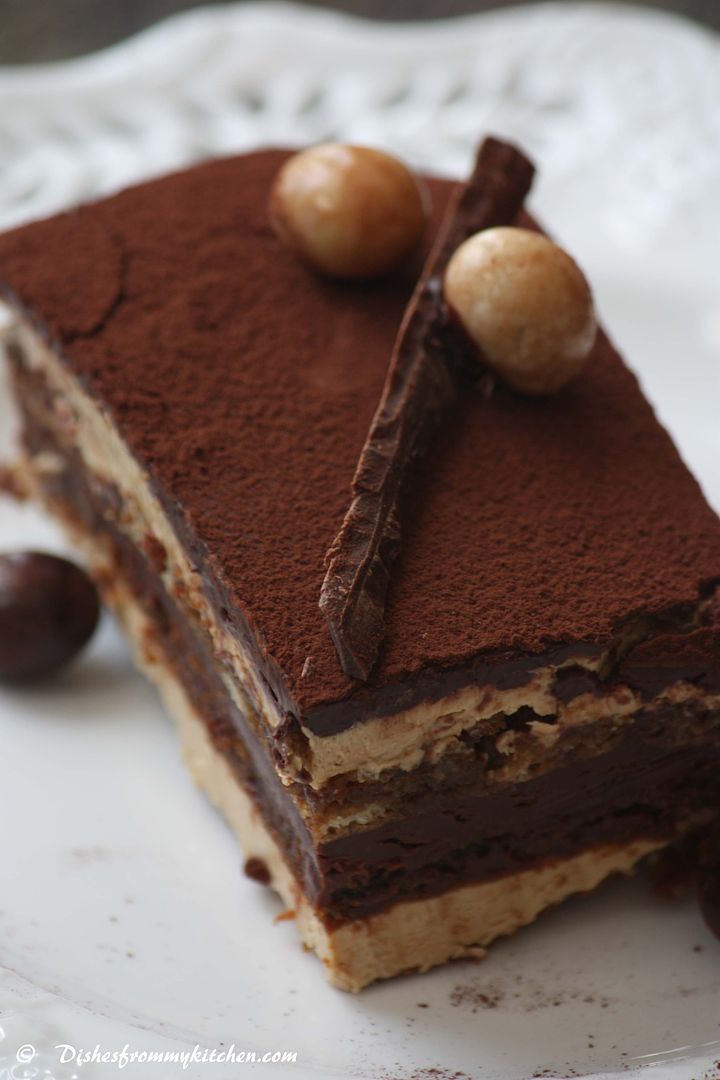
Opera Cake is a type of French cake. It is made with layers of almond sponge cake (known as Joconde in French) soaked in coffee syrup, layered with ganache and coffee buttercream, and covered in a chocolate glaze. According to Larousse Gastronomique "Opéra gateau is an elaborate almond sponge cake with a coffee and chocolate filling and icing.  An addictive bomb !!!!  Enjoy this virtual treat  of the cake which I made for my Sweet little Birthday boy yesterday !!!


I took all these pictures in hurry, as nobody had patience to wait for long time :):)
Here is the recipe for JOCONDE

Here is the recipe for TEMPERED CHOCOLATE(Glaze)


Read more...

HAPPY PONGAL TO ALL OF YOU !!!!


Pongal is a four-day festival celebrated with lot of excitement in Tamil Nadu. It is observed in the Tamil month, Thai Masam.  This is not only a festive day, its also another exciting day for us because its my son's birthday too.  


Lets know more about pongal festival before we eat it.....

Pongal is the biggest harvest festival celebrated as thanks giving occasion to the nature. Bhogi Pongal, Surya Pongal, Mattu Pongal, Kannum Pongal are the four festivals. And this year it falls on Jan 14th,15th,16th and 17th respectively.

Bhogi Pongal :

Bhogi Pongal or Bogi festival is the first day of Pongal celebrated in Tamil Nadu, Andhra Pradesh and Karnataka.Bogi festival is dedicated to Lord Indra, the God of clouds and rains.

On Bhogi Pongal, people clean and white wash their houses. They store unwanted and waste goods for this festival. They Keep their houses attractive and to welcome all Gods they draw beautiful Kolam.In some areas, cow dung balls are also kept on kolams.

In the evening, the main ritual called ‘Bhogi Mantalu’ or the sacred bonfire is performed. The waste material is kept in middle and set fire. In some places, people dance around the Bhogi Mantalu or sacred bonfire.


Surya Pongal :

Surya Pongal is the second day of pongal festival in Tamil Nadu. As the name suggests, the festival is dedicated to Surya or Sun God. Surya Pongal is celebrated as Makar Sankranti in Andhra Pradesh, Karnataka and North Indian states. This is also the first day of the Tamil month of Thai masam. Kolam is the main attraction of Pongal festival in Tamil Nadu. Women folk take it as a challenge to decorate their houses with beautiful kolam designs.
Surya Puja is the most important ritual during Surya Pongal festival. Devotees offer naivedyam of milk and jaggery to Lord Surya. Milk is boiled in every house in a clay pot and when the boiled spills out from the pot, children shout out “Pongal – oh – Pongal”. In some places, Pongal (rice recipe) is cooked.

Mattu pongal or Kanuma :

Kanuma festival is the third day of four-day Sankranthi festival celebrated in Andhra Pradesh. Kanuma festival is celebrated as Mattu Pongal in Tamil Nadu.

Mattu Pongal is dedicated to the cattle. Mattu pongal is celebrated on the next day of Pongal to honour bulls which works hard throughout the year. Bulls are given bath, their Horns are painted and decorated.Jallikattu, the ancient and bull taming festival, which is celebrated in some rural districts. In Alanganallur a village about few kilometers from Madurai it is one of the most popular events. This sport is also known as "Manju Virattu", meaning "chasing the bull".

Govardhana Puja or Go puja (worship of cows) is the major ritual during Kanuma. It is believed that Lord Sri Krishna lifted the Govardhana parvatham (Mount Govardhan) to save the farmers and people of Gokulam. Lord krishna’s victory over headstrong Indra is celebrated as kanuma pongal.

Kaanum Pongal or Karinal :

Kaanum Pongal is the final day of Sankranti celebrations.

As the name indicates Kaanum pongal is essentially a day of relaxation. On this day people arrange huge feasts, invite friends and relatives.
In some places, on this day bullock cart races and cock fightings are held. In some rural part of Tamil Nadu, People perform the ritual "Kummippattu". People Mingle freely and this gives opportunities to initiate new relationships.
So coming to the Food part...

Many people they use new vessel for making pongal they decorate with Mineral slaked lime(Sunnam or Sunnambu or Chunna), Kumkum and Chandanam(sandal wood powder)


These are types of pongal they do on Pongal day ...

1. Paal Pongal(Milk pongal with salt)
2. Chakkara Pongal(Sweet Pongal)
3. Kuzhambhu or Pulusu made with all country vegetables which is the best combo with Paal Pongal.


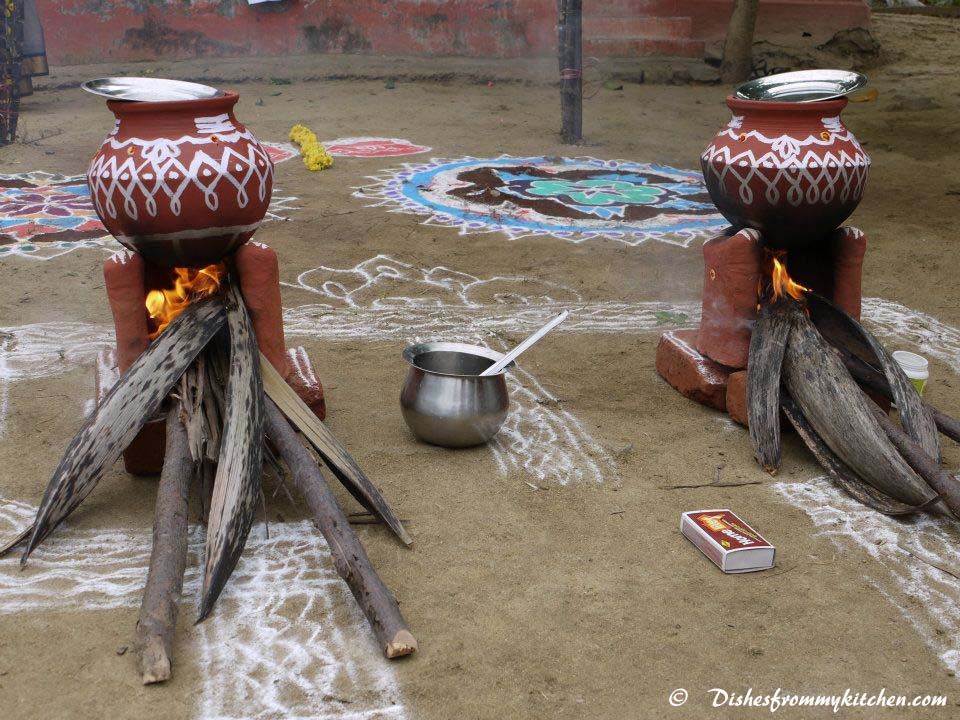
How is Pongal celebrated in India traditionally ?   Pongal is made in clay pot, the whole area is decorated with Rangoli (kolam) etc .  More than to explain,  here is the beautiful celebration you can see virtually.   These pictures are shared by my cousin who celebrated their Pongal in their farm during their recent trip to India.  Thanks soooooo much akka.


Beautiful rustic wall decorated with Kolam 


Whole area is getting ready with lots of kolam decorations...


Pot ready for making Pongal :)


Fire lit up for making pongal


Two pots for making Sweet Pongal(chakarai pongal) and Paal Pongal(milk pongal)


Did you see the milk boils and ready for spilling ...


When the boiled  milk spills out from the pot, everyone shout  “Pongal – oh – Pongal”. And it means abundance of everything ..


Then to this milk rice and jaggery is added for making sweet pongal.  Rice and salt is added for making paal pongal.  Here is how it looks

Chakkara Pongal(Sweet Pongal) - Click here for recipe


Paal Pongal (Milk Pongal) - Click here for recipe


Pongal kulumbu/pulusu or curry made with country vegetables - click here for recipe


The next day is Maattu Pongal .. Wish you all Happy Maattu Pongal too :)


Read more...


Page copy protected against web site content infringement by Copyscape

Visit Great Cooks Community
All recipes are on Petitchef