Search This Blog

Armenian Challenge !!! - Daring Baker's April 2012


The Daring Bakers’ April 2012 challenges, hosted by Jason,were two Armenian standards: Nazook and Nutmeg cake. Nazook is a layered yeasted dough pastry with a sweet filling, and nutmeg cake is a fragrant, nutty coffee-style cake.

Nazouk or Nazook is a crisp and buttery, sweet but not too sweet. This pastry is a traditional favorite among Armenians. It goes well with coffee or tea, or even hot chocolate. 

A little on this pastry's background: Jason’s aunt Aida tells that other Armenians eat Nazook, but they might call it “Gata” (Gata is what Persian-Armenians reserve for a specific type of round cake).  Armenians prepare it usually around the time of Easter, and it is eaten for 40 days through Ascension.


Next is Armenian Nutmeg cake, this is a wonderful and delectable coffee cake with crunchy base, soft and moist sponge and topped with walnuts. The key flavor of the cake is Nutmeg.  
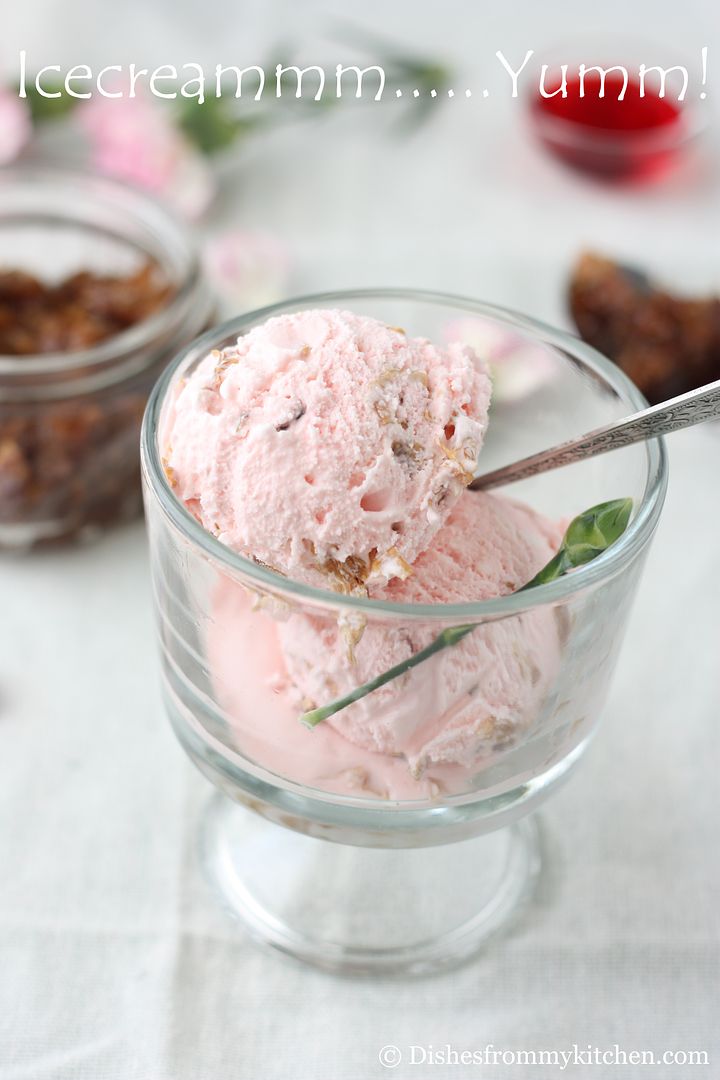
Absolutely I loved both the cake and pastry.  I really enjoyed making them.  Thanks for this wonderful challenge Jason :)


NAZOOK OR NAZOUK
Yields 40 pieces


Ingredients for the Pastry dough:

All-purpose flour - 3 cups (sifted)
Active dry yeast - 2½ tsp
Sour cream - 1 cup
Softened butter (room temperature) - 1 cup

Ingredients for the Filling:

All-purpose flour - 1 1/2 cup (sifted)
Sugar - 1 1/2 cup
Softened butter - 3/4 cup (room temperature)
Vanilla extract - 2 tsp
Cinnamon powder - 2 tsp (I added extra)

Wash:
1-2 egg yolks (for the wash; alternatively, some yogurt, egg whites, or a whole egg)


Method:

Make the Pastry Dough:

1. Place the sifted flour into a large bowl.
2. Add the dry yeast, and mix it in.
3. Add the sour cream, and the softened butter.
4. Use your hands, or a standing mixer with a paddle attachment, to work it into dough.
5. If using a standing mixer, switch to a dough hook. If making manually, continue to knead for about 10 minutes, or until the dough no longer sticks to the bowl or your hands. If it remains very sticky, add some flour, a little at a time.
6. Cover the dough and refrigerate for 3-5 hours, or overnight if you like.

Make the filling:

7. Mix the flour, sugar, and the softened butter in a medium bowl.
8. Add the vanilla extract.
9. Mix the filling until it looks like clumpy, damp sand. It should not take long. Set aside.


Make the Nazook:

10. Preheat the oven to moderate 350°F/175°C/gas mark 4.
11. Cut the refrigerated dough into quarters.
12. Form one of the quarters into a ball. Dust your working surface with a little flour.
13. Roll out the dough into a large rectangle or oval. The dough should be thin, but not
transparent.
14. Spread 1/4 of the filling mixture across the rolled-out dough in an even layer. Try to spread the filling as close as possible to the edges on the short sides, but keep some of pastry dough uncovered (1 inch/2.5 cm) along the long edges.
15. From one of the long sides, start slowly rolling the dough across. Be careful to make sure the filling stays evenly distributed. Roll all the way across until you have a long, thin loaf.
16. Pat down the loaf with your palm and fingers so that it flattens out a bit (just a bit).
17. Apply your egg yolk wash with a pastry brush.
18. Use your crinkle cutter (or knife) to cut the loaf into 10 equally-sized pieces. Put onto an ungreased cookie sheet.
19. Place in a preheated moderate oven for about 30 minutes, until the tops are a rich, golden brown.
20. Allow to cool and enjoy

ARMENIAN NUTMEG CAKE


Ingredients:

Milk - 1 cup
Baking soda - 1 tsp
All-purpose - 2 cups
Baking powder - 2 tsp
Brown sugar, firmly packed - 2 cups
Butter - 3/4 cup (preferably unsalted, cubed)
Walnut pieces -1/2 cup you may need a little more
Ground nutmeg - 1 to 1 1/2 tsp (5 to 7 ½ ml) (5 to 8 gm) (try to grate it fresh yourself; the aroma is enchanting)
Egg - 1


 Method:

1. Preheat your oven to moderate 350°F/175°C/gas mark 4.
2. Mix the baking soda (not baking powder; that's for the next step) into the milk. Set it aside.
3. Sift together the flour and the baking powder into a large bowl. One sift is fine
4. Add the brown sugar. Go ahead and mix the flour and brown sugar together.
5. Toss in the cubed butter.
6. Mash the butter with a fork into the dry ingredients (you can also use your fingers if you want). You'll want to achieve a more-or-less uniform, tan-colored crumbly mixture.
7. Take HALF of this resulting crumbly mixture into your spring form (9”/23cm) pan. Press a crust out of it using your fingers and knuckles. It will be easy.
8. Crack an egg into a mixer or bowl.
9. Toss the nutmeg in with the egg.
10. Start mixing slowly with a whisk attachment and then increase to medium speed, or mix with a hand whisk if you're doing it manually. Once it's mixed well and frothy (about 1 minute using a standing mixer, or about 2-3 minutes of vigorous beating with a whisk), pour in the milk and baking soda mixture. Continue to mix until uniform.
11. Pour in the rest of the crumbly mixture. Mix that well, with either a paddle attachment, or a spatula. Or continue to use the whisk; it won't make much of a difference, since the resulting batter is very liquidy.
12. Pour the batter over the base in the spring form pan.
13. Gently sprinkle the walnut pieces over the batter.
14. Bake in a preheated moderate oven for about 30-40 minutes. You'll know it's done when the top is a golden brown, and an inserted toothpick comes out clean.
15. Allow to cool in the pan, and then release. Enjoy!


An Even Easier Way...if you have a Food Processor

1. Preheat your oven to moderate 350°F/175°C/gas mark 4.
2. Mix the baking soda (not baking powder) into the milk. Set aside.
3. Put the flour, baking powder, and the brown sugar into your food processor. Pulse until uniformly mixed.
4. Toss in the cubed butter. Pulse until uniformly mixed into tan-colored crumbs.
5. Pour HALF of the crumbs into your spring form (9”/23cm) pan. Press out a crust using your fingers and knuckles.
6. Crack the egg into the food processor with the rest of the crumbs still in it.
7. Grate 1 to 1-1/2 teaspoon of nutmeg. Toss that into the food processor, too. Pulse until well-incorporated.
8. Pour in the milk and baking soda mixture. Continue to mix until a slightly lumpy tan batter is formed.
9. Pour the batter over the crust in the spring form pan.
10. Gently sprinkle the walnut pieces over the batter.
11. Bake in a preheated moderate oven for 30-40 minutes. Its ready when the top is golden brown, and when it passes the toothpick test (comes out clean).
12. Cool the cake in the pan, and then dig in. Yum yum!

Note:

1.  I baked the Armenian nutmeg cake extra 15 minutes in my oven covering with the foil to avoid darkening.  So check your cake after 30 minutes and decide whether you have to bake for few more minutes.
2. For the perfect and neat slices cool the cake completely this is very important.  But I did not do it though :)  I was very eager to taste the cake :)

Both the cake and pastry was so delicious!!! I hope you all enjoyed the post as much as we enjoyed eating them :):)

Freezing/Storage Instructions/Tips: Nazook will keep in an airtight container at room temperature for a couple of weeks, and the Armenian nutmeg cake will keep (covered) at room temperature for 2-3 days. Both taste even better still warm from the oven.
Allow to cool completely before attempting to freeze. Nazook will freeze best if put in a freezer bag with all the air squeezed out. Armenian Nutmeg Cake will also freeze fairly well if completely sealed. Both can be frozen for up to 3 months.

Read more...

LYCHEE SANDESH IN RABRI - PURELY DIVINE !!!


Lychee is one of my favorite fruit from my childhood days.  It was really expensive fruit in those days and my dad would get them for us when he comes from his business trip.  From that time it became one of my favorite fruit, not only me its all in our family loves Lychee a lot.  Even though we eat that fruit very rare we will never miss the flavor, yes our refrigerator will always have the Lychee squash.  Lychee squash is wonderful summer treat :) So don't miss it.    The fresh fruit has a "Delicate, whitish pulp" with a "Perfume" flavor.  Its distinctive flavor tastes so good with any milk based desserts.   


Here is tapioca dessert which I have posted earlier using Lychee and other tropical fruits

” Thai Tapioca Pudding “- This dessert is so light and healthy with all good nutrients of fruits which are perfect for hot summer nights  ...

Ok coming to the recipe, this is a rich and wonderful dessert.  Even though it’s little bit time consuming it’s really worth the try.  I made this after a loooooong time, even I can say few years.  This recipe has two parts one is Rabri and another one is Sandesh which is stuffed in Lychee.

What is Rabri?

Rabri is condensed milk based dish made by boiling the milk on low heat for a long time until it becomes dense and changes its color to pinkish. Sugar, spices and nuts are added to it to give it flavor. It is chilled and served as dessert. Rabri is the main ingredient in several desserts. 
**** Here are some of my Rabri based desserts which I have posted earlier try them I am sure you will love it.

“Apple Jalebi with Pistachio Rabri “– Warm Apple Jalebi with cold Rabri is purely divine!

“Mango Rabri “- This is another excellent combination that you will fall in love in first spoon itself :)


What is Sandesh?

Sandesh is a typical Bengali dessert.  The most common way of making the Sandesh is with the use of cottage cheese. Cottage cheese (chhena) is the solid form which is separated by curdling milk.  It is basically prepared by tossing the Indian cheese (chhena) lightly with sugar over low heat. That mixture is flavored and nuts are added, now the mixture is shaped based on the moulds. The majority of these moulds are carved out of stone, though some may also be carved from wood. 

The recipe which I am posting today is the combination of above all. Don’t you think it is awesome????   It’s divine...we enjoyed the treat and hope you all enjoy my virtual treat. 


LYCHEE SANDESH IN RABRI

Ingredients for Sandesh:

Lychee - 1 tin ( 10 to 15 lychees peeled and destoned)
Whole Milk - 1 litre
Sugar - 4 tsp
Water - 2 tbsp
Citric acid - 1/4 tsp
Cardamom - 1 pinch

Ingredients for Rabri:

Milk - 1 1/2 litre
Bread - 1 slice
Sugar - 1/4 cup
Almonds - 10 sliced or chopped finely
Pistachio - 10 sliced or chopped finely
Cardamom powder - 2 pinches
Saffron strands - few dissolved in little Milk.


To Prepare Sandesh:

1.  Bring the milk to a boil. 
2. Add citric acid dissolved in a little water, continue to boil till the milk curdles.
3. Strain the Paneer (cheese) by draining excess water and allow it to cool.
4. Put the Paneer and sugar in a blender and churn to obtain a smooth paste.
5. Add this paste to a pan and fry slightly (for 2 minutes) switch of the flame and now add the cardamom.  Let this mixture cool completely.

To Prepare the Rabri:

1. Boil milk in a heavy bottomed vessel. Keep stirring continuously till it is reduced to 3/4 th the quantity.
2. Add sugar and stir till it is dissolved.
3. Now churn the bread in a blender by adding 2 tsp of milk.
4. Add this to the milk mixture followed by cardamom and saffron.  Bring to one boil.
5. Remove from heat and allow it to cook completely. Once it is cooled add the chopped nuts reserving few for garnishing on the top.


Refrigerate at least for couple of hours or until you are ready to serve.

How to serve:

1. Stuff Sandesh in fresh or tinned Lychee.
2. Put the stuffed lychees in Rabri.  Garnish with Chopped nuts.  Serve Chilled :)

Enjoy Lychee Stuffed Sandesh with Rabri !!!  You will be in heaven :)

Read more...

SPROUTED MUNG BEAN SALAD !!!


Hope you all enjoyed my last post  How to Sprout???   .  I am happy to see the mails that few of you tried and found the post very helpful.  I also gave so many links in my past post for the Salads using sprouts.  Today I am posting different combination of Salad using sprouts.  With simple ingredients here is delicious and healthy salad.  This Salad is quick with very simple seasoning.  If you like sprouts then I am sure you will love this Salad :)

Click here for HOW TO SPROUT???   


SPROUTED MUNG SALAD

Ingredients:

You can add the below listed vegetables and fruits as per your liking or Preference.

Mung Sprouts - 1/2 cup
Lettuce - 1 cup
Cucumber - 1/4 cup cubed (deseed)
Tomato - 1/4 cup cubed (deseeded)
Pineapple - 1/4 cup cubed
Carrot - 1/4 cup grated
Coriander leaves for garnishing


For seasoning :

Oil - 1/2 tsp
Cumin seeds - 1/2 tsp
Pepper powder - 1/2 tsp
Salt as needed
Lemon juice - 1/2 tbsp (or as needed)


Method:

1. Mix all the above ingredients (except the seasoning item) in the bowl.
2. Heat oil in a small ladle, add the cumin when it crackles, remove from the flame and add to the salad mixture.
3. Now add pepper, salt and lemon juice.
4. Give it a nice toss and garnish with coriander leaves.
5. Serve chilled or in room temperature.

Enjoy the healthy and delicious salad !!!

Read more...

HOW TO SPROUT ??? - INCLUDE THIS FOR YOUR HEALTHY DIET


Sprouting the bean is the one which I am seeing from my childhood days, my mom use to sprout mostly twice or at least once a week.  She used to incorporate these sprouts in so many salads, stir fries etc and some time we also eat them raw.   It has amazing nutritional/health benefits.  The health benefits of bean sprouts are tremendous as they are rich with proteins, enzymes, moisture, vitamins and minerals.  Sprouting increases the digestion.  You can sprout more beans once in a week and store them for the whole week.  In this way it’s easy to have sprouts daily in your diet. 


Today I am posting, How to sprout the Mung Bean?  The same procedure can be adopted for sprouting all kind of beans like garbanzo, pinto, black bean etc.   In the Indian Ayurvedic approach to health, Mung Beans are one of the most cherished foods.  The amazing biochemical process of sprouting, transforms this seed with a number of significant health benefits into a "Super food".  The sprouting process makes Vitamin C available which is not found in the seed. 


Here are few recipes that you can make using this sprouted Mung bean...See the notes in the below posts to get more ideas on how to use sprouts in other ways :) 

3. Moong Dhal Salad (Follow the same procedure by substituting the Moong dhal with sprouted Mung bean)   
4. Green gram with spinach curry  ( Substitute the whole Mung with the sprouted one and follow the same procedure)
5. Tri color Channa sundal ( Substitute other bean with this sprouted mung bean and follow the same procedure)
6. Seasoned Green Gram ( You can use this sprouted Mung bean for the same procedure)
 
Still there are so many recipes that you can make using the sprouts, will post one by one so stay tuned for future post on sprouts recipes.


How to Sprout??? (Mung Bean/Green gram)

Ingredients:

Mung bean
Water
Muslin Cloth
Wide bowl for sprouting


Method :

1. Wash the dried Mung bean, remove the dirt and stone if any.
2. Soak them for at least 8 hrs (preferably overnight) in about 3 times the water.
3. Next morning drain them off completely using a colander.
4. Once they are drained completely, put them in the muslin cloth.
5. Loosely tie them and keep in the big bowl and close with the lid.
6. Keep them in the dark place for 8 hrs. (Preferably overnight)
7. You will get beautifully sprouted bean the next morning...

Enjoy them raw or in salads..for your healthy diet.


Note:

Here are few things you should keep in mind for successful sprouting...

1. Select good quality Bean.
2. Make sure the water is drained completely after the soaking process. (but little moisture is ok)
3. Use only the muslin cloth to tie the bean. (Don't use a thick cloth)
4. The bean has to be soaked minimum of eight hours, less hours of soaking will not yield good sprouts.
5. If you’re sprouting Garbanzo, pinto or black beans which are bigger in size than the Mung bean, keep it in dark place for extra 4 to 5 hours.
6. Do not open the bowl often while it is in the process of sprouting.

Read more...

ROSE PETAL JAM ICECREAM / GULKAND ICECREAM - EGGLESS !!!


Wish You All A Happy Tamil New Year and Happy Vishu !

Gulkand is a sweet preserve of rose petals.  Gul means flower (Rose) and Kand means sweet (sugar).  Gulkand is an Ayurvedic tonic and it is the most delicious Ayurvedic preparation known to mankind.  The National Institute of Ayurvedic Medicine provides a list of the benefits obtained from eating Gulkand.  This includes reduction of pitta and heat in the body, a reduction in eye inflammation and redness, strengthening of the teeth and gums, and the treatment of acidity etc.  There are so many other medicinal properties for Gulkand.  


Gulkand is used in various ways, I am listing a few

1. It commonly used as an ingredient of Paan (Betel leaves), which is served after meal and claimed to be chewed as a palate cleanser, a breath freshener and for digestive purposes.
2. Because of its unique taste and flavor of the rose they are used for many sweet preparations. 
3. You can also enjoy Gulkand on its own like Halwa :) I love this :)

Back home in India, I use to have this Gulkand with Vanilla ice cream which tastes so yummy.  That is the main inspiration of this Gulkand ice cream and it tastes soooo fresh, aromatic and flavorful.  This ice cream is so easy to make and it is perfect dessert to beat the heat... We enjoyed licking the ice cream and I am sure you too..


I am glad to share that this is my first post with my new lens which I won here, thanks Siri :) .  You not only did an awesome job, you also gave us a wonderful opportunity to help the cute little kids.  

In this recipe I am using 2 important ingredients, off course one is Gulkand and another one is Rose syrup.  You can buy this in any Indian grocery or even you can order through Amazon.

Click here to see another Rose flavored dessert using the Rose Syrup "Jigarthanda - A popular one from southern part of India"

ROSE PETAL JAM ICECREAM/GULKAND ICECREAM

Ingredients:

Heavy cream - 2 cups (well chilled)
Whole milk - 1 cup (well chilled)
Sugar - 1/2 cup + 2 tbsp
Gulkand - 5 tbsp
Rose syrup - 1 tbsp


Method:

1. In a bowl whisk milk and sugar together until the sugar is dissolved.
2. Stir in the heavy cream.
3. If you are using the ice cream maker pour the mixture into the freezer bowl through the ingredients spout. (Note: Refer to your manual for instructions pertaining to your ice cream maker)
4. When it starts to thicken, add the Gulkand and rose syrup.  Once they are well blended and thicken further, transfer them to the airtight box and freeze them for another 2 hrs for scooping.

Creamy and flavorful ice cream will be ready to scoop now.....


 What if you don't have an ice cream maker...

1. Follow the first 2 steps mentioned above.
2. Take a bowl full of ice cubes.
3. Keep the milk mixture inside the bowl filled with the ice cube.
4. Now whip it using electric egg beater until it is thicken.
5. When it starts to thicken, add the Gulkand and rose syrup.  Once they are well blended and thicken further, transfer them to the airtight box and freeze them for another 2 hrs for scooping. 


Enjoy Home made delicious ice cream!!!!

Read more...

PIZZA BITES - GOOD & DISASTER WHICH ONE DO YOU WANT ???


If you scroll down and see the pictures you get to see the Disaster Pizza Bites :)  those are disaster pizza bites :(  Since they are small bite size pieces I named it as "Pizza Bites" .  Even though they are disaster one's they came out Super crispy and Super yummy :):)  

I have already posted few Pizza recipes in my space, take a look at them
Thin crust Pizza with Marinara sauce
Pizza in a cup and thick crust pizza with pesto and yummy toppings

But few changes while making the thick crust comes out super yummy and we are loving it a lot. 
1. I add less yeast and proof the dough for extra 1 hour.
2. Seasoning the crust with Spice and herbs.


Here is story of Disaster Pizza bites :)

I planned to make 2 pizzas for our Sunday Lunch.  I mixed the dough and divided them to 2 equal parts and kept them for rising in the oven (turned off).  Usually I keep few of my baking trays in the oven, ha ha I use my Oven for double purpose both for baking and storing the baking trays.  After couple of hours I took all the baking trays out and one of the dough for topping.  While I was making topping for one pizza, without realizing about the other dough I switched on the oven for preheating(preheated to 425F for nearly 20 minutes).  When I opened the oven to put the pizza for baking I got to see the other dough. When I saw the dough it already rised to 4 times bigger than the original one with a crusty bottomL.  I just don't want to waste it.  Bling !!! I made it to small pieces, topped with sauce, toppings and baked it.  To my surprise it came out very very yummy like Bruschetta and we enjoyed it a lot. 

The good thing that happened was I kept the dough in stainless steel bowl and wrapped them with the aluminum foil.  Can you imagine what would have happened, if I had used plastic bowl and cling wrap for covering the dough..............OMG I cannot imagine :(


I have already posted few Pizza recipes in my space; take a quick view of them
A.Thin crust Pizza with Marinara sauce
B.Pizza in a cup and thick crust pizza with pesto and yummy toppings.

The Pizza dough recipe which I am posting today is altered little bit to the recipe which I have posted earlier.  This recipe is a keeper.  Few changes while making the thick crust comes out super yummy and we love it a lot. 
1. I add less yeast and proof the dough for extra 1 hour.
2. Seasoning the crust with Spice and herbs.


PIZZA DOUGH (THICK CRUST)
Makes  2  Pizzas 10” inch  thick crust


Ingredients :

All purpose flour - 3 1/2 cup (you can also substitute with bread flour which has high gluten content . It gives nice chewy texture to the base)
Yeast - 1 pouch (2 1/4 tsp)
Salt - 1 1/2 tsp
Sugar - 1 tsp
Extra virgin Olive oil - 3 tbsp + 1 tbsp(For brushing the dough)
Warm water - 1 1/3 cup
Garlic Powder – 1 tsp
Italian seasoning - 1 tsp
Red chilli flakes - 1/2 tsp


To make the dough :

1. Add the yeast to warm water and keep it aside for about 5 minutes. You will know its working if it bubbles and looks creamy. (Make sure the water is not hot)
2.In a bowl mix all the ingredients together. Stir the yeast water mixture using a spoon and now add to the flour mixture.
3.Make dough and knead it for 8 to 10 minutes until you get soft and smooth ball(knead it really well but fast).  If you have a mixer with a dough hook, knead the ingredients on low for about five minutes with the dough hook.
4. Now divide the dough to 2 equal parts and roll into a ball.
5. Place the dough balls into the oiled bowls.  Now brush the dough with little olive oil to avoid cracking or drying.
6. Close it with the lid or the plastic wrap and keep it in the warm place.  I usually keep them in the oven(turned off).
7.Let the dough rest for couple of hours.  (It has to be doubled in size)
8. Now preheat the oven to 425 degree Fahrenheit, while the oven is preheating, get ready for rolling and topping.
9. Sprinkle some flour onto the counter or board, take one ball and dust with little flour.  Using rolling pin  make 10 inch circle/disc or if you are using your hand use your finger tips to make a well defined edge. Use a press and stretch sort of technique.  Try to have the dough even all the way through without making it too thin in the middle.
10. Now brush rolled pizza dough with the Olive oil.
11. Top them with your favorite sauce and toppings.
12. Bake them in the lower rack for 20-25 minutes until the crust turns golden brown and cheese melts and becomes bubbly.

PIZZA SAUCE


Ingredients :

This sauce will be enough for two 10" thick crust pizza.

Tomato Pureed- 1 can (1 lb)
Mixed Italian herbs - 2 tsp ( oregano, thyme, basil, rosemary etc)
Tomato ketchup - 1 tbsp
Sugar - 1/2 tbsp
Garlic - 2 pods very finely chopped
Onion - 2 tbsp very finely chopped
Crushed red chilli flakes - 2 tsp or according to spice level
Olive oil - 1 tbsp
Fresh Basil – few chopped finely
Salt


Method :

1. Heat oil in the pan, add the garlic and onion.  Saute till slight brown.
2. Now add the pureed tomato. Let it cook for some time until it becomes little thick.
3. Now add all other ingredients. Mix well and finish it with chopped fresh Basil.
4. Cool it and store in the air tight container.  Use when needed.


If you are using the Pizza stone follow this procedure :

1. Put the pizza stone in the lower rack of the oven and preheat them to 450F for 20 minutes or so. Now get ready for rolling and topping.
2. Sprinkle some flour onto the counter or board, take one ball and dust with little flour.  Using rolling pin  make 10 inch circle/disc or if you are using hand use your finger tips to make a well defined edge. Use a press and stretch sort of technique.  Try to have the dough even all the way through without making it too thin in the middle.
3. Place the rolled Pizza in the  pizza peel which is dusted with the flour or cornmeal.
4.Top your pizza with your favorite sauce and topping.
5.When the Pizza is ready with the topping, slide it on the pizza stone.
6.Bake it until the crust is golden brown and cheese are melted and bubbly.  It takes about 15 to 20 minutes to bake.

Cool, Slice and enjoy !!!

Topping I used for my Pizza :

1. Tomato (deseeded) - few
2. Chopped Onion - few
3. Chopped Bell peppers - few
4. Baby corn - few
5.Artichoke - few
6.Black olives - few
7. Basil - few while serving

Read more...


Page copy protected against web site content infringement by Copyscape

Visit Great Cooks Community
All recipes are on Petitchef