Search This Blog

Showing posts with label Daring Bakers. Show all posts

SCONES a.k.a BISCUITS - DARING BAKERS 2012

Audax Artifex was our January 2012 Daring Bakers’ host. Aud worked tirelessly to master light and fluffy scones (a/k/a biscuits) to help us create delicious and perfect batches in our own kitchens!

Audax is truly an inspiring baker came up with whole bunch of variations and Tips.  The scones came out very fluffy with beautiful crust outside, he explained every single steps with lots of explanation and effort which resulted in beautiful scones. I should thank him for this wonderful recipe and sure it is a keeper !!!  

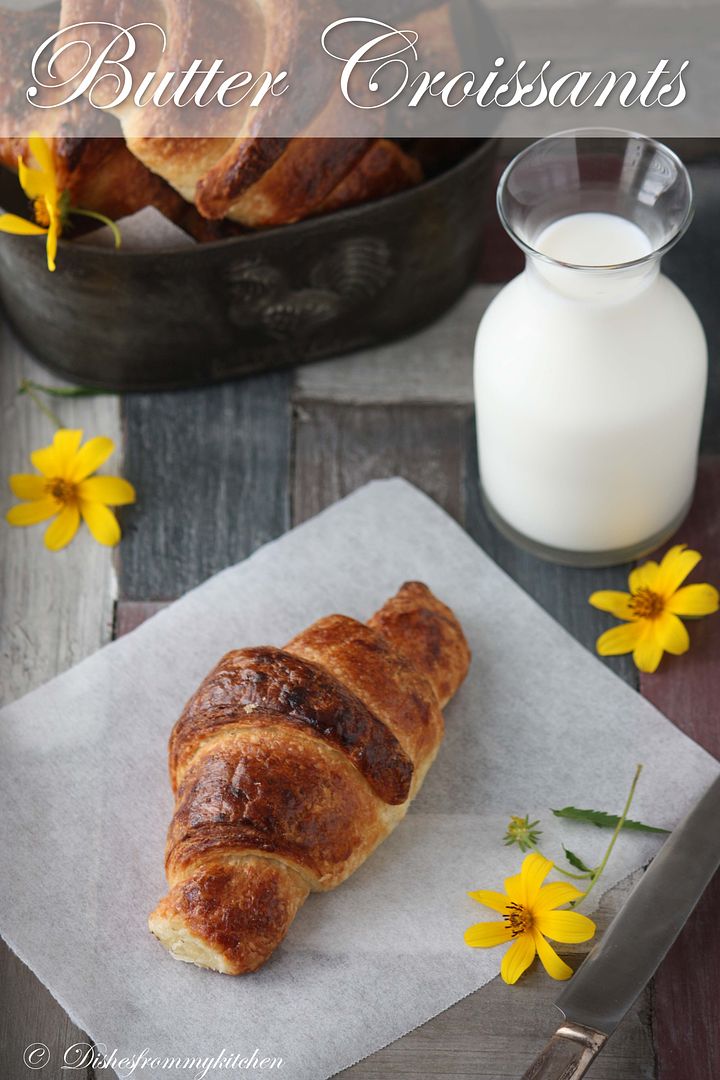
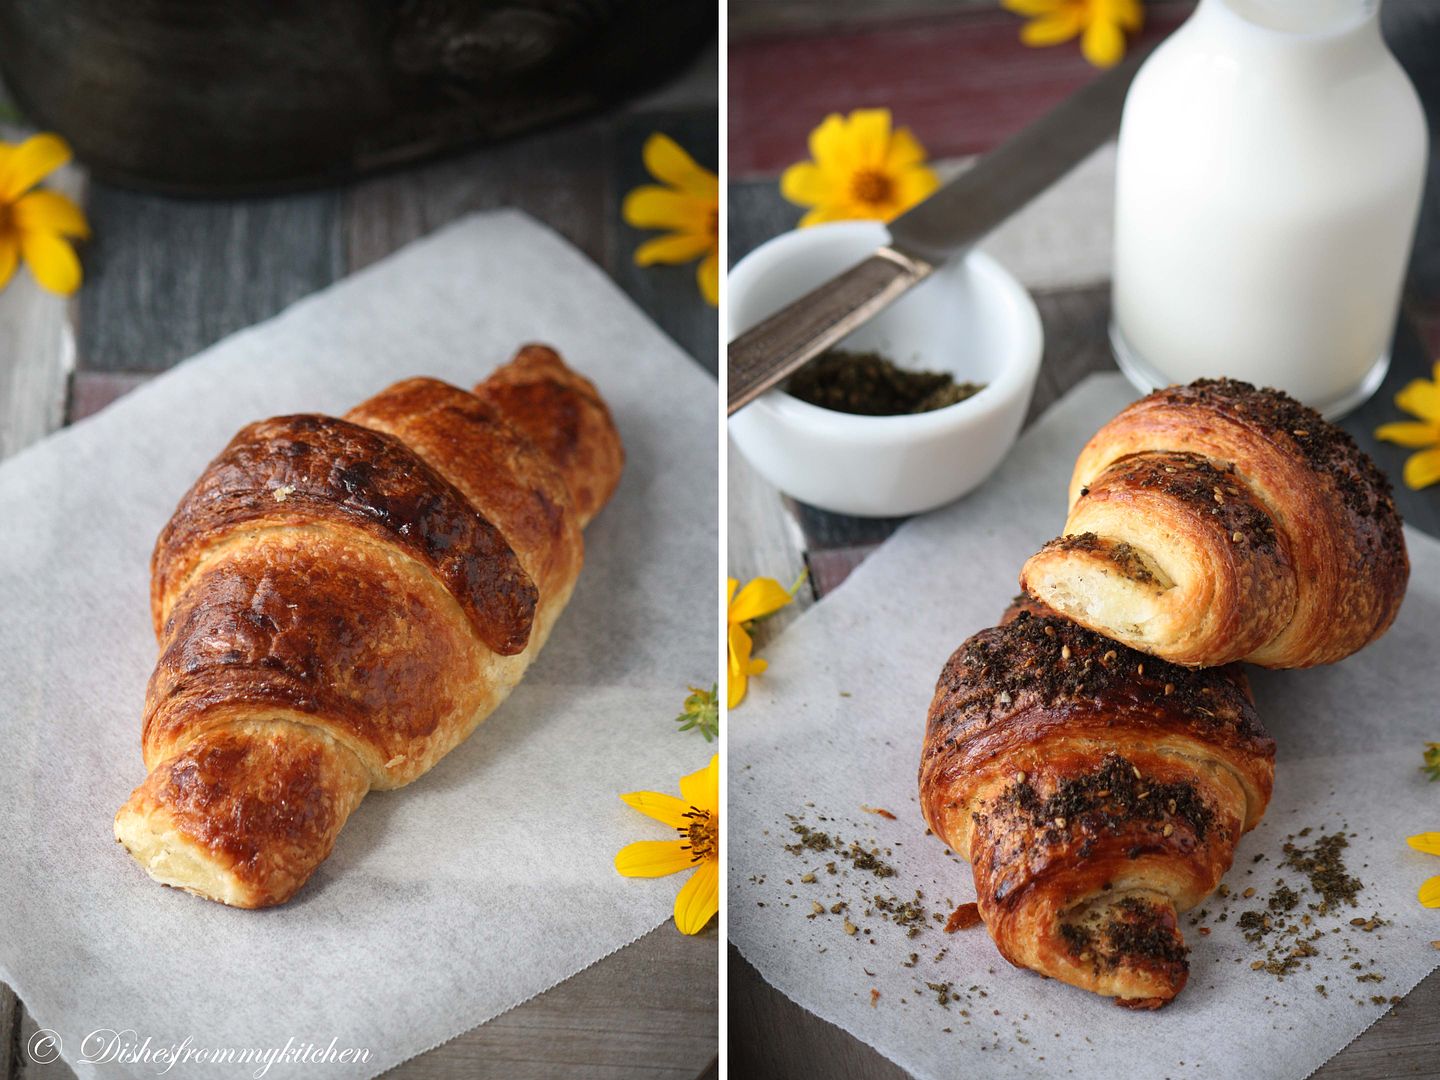
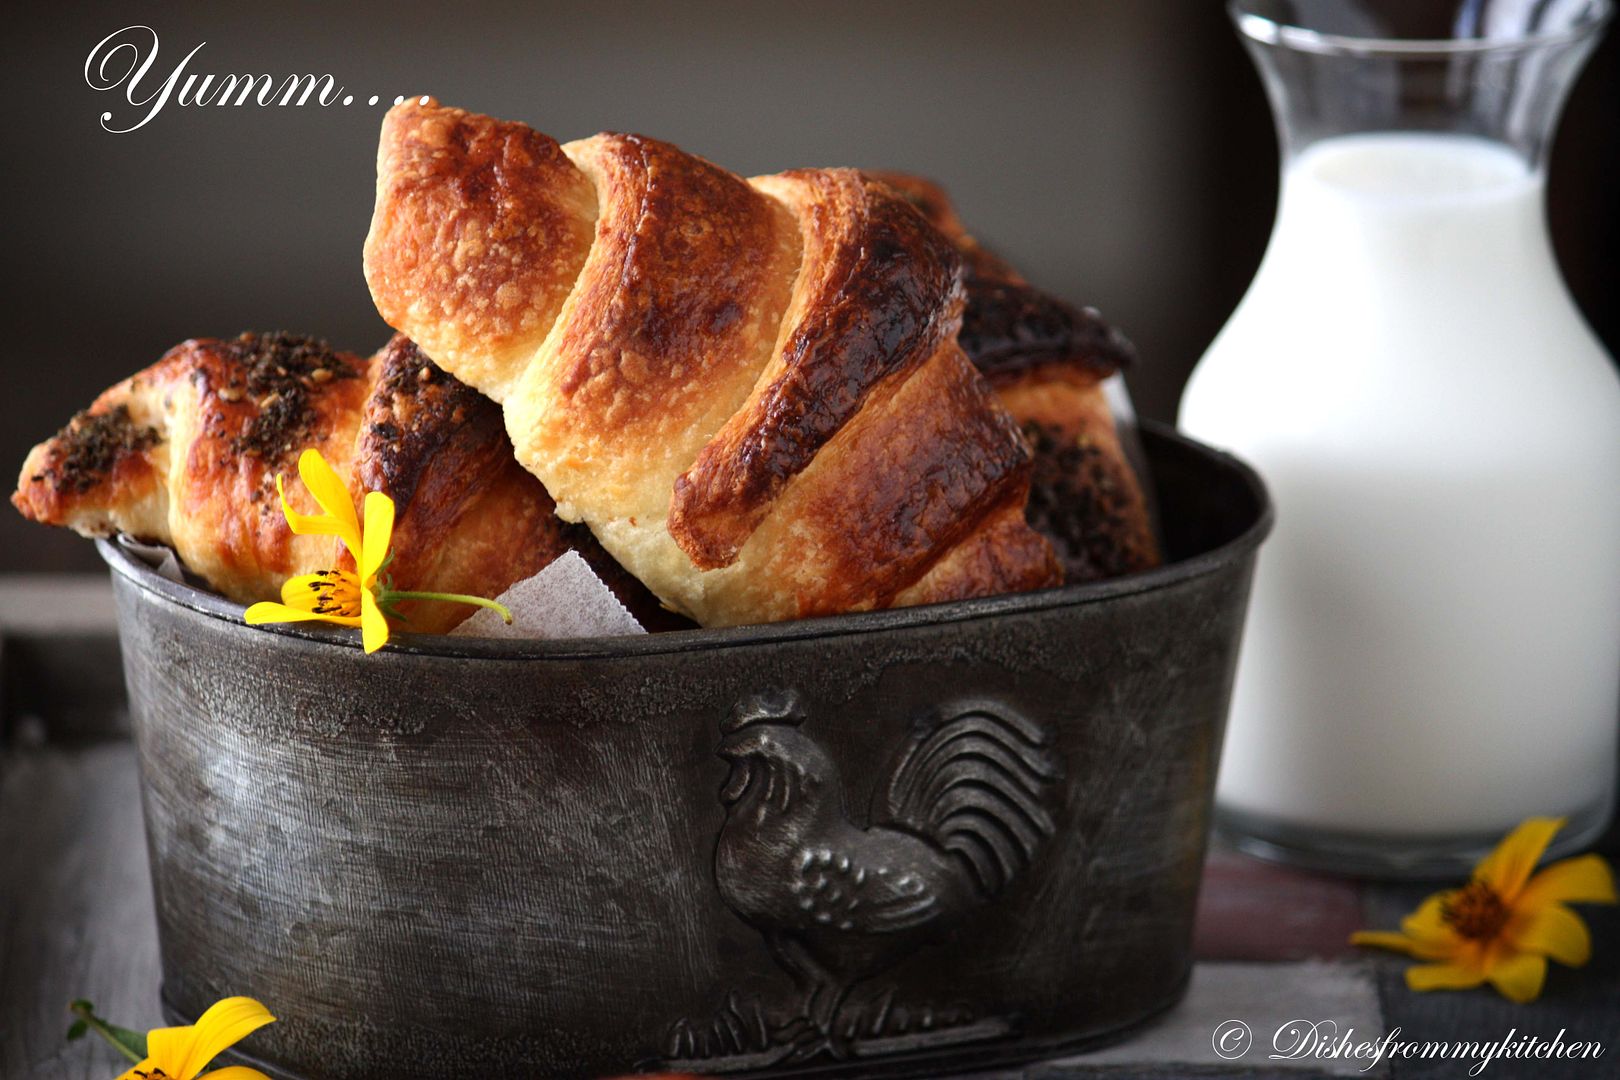
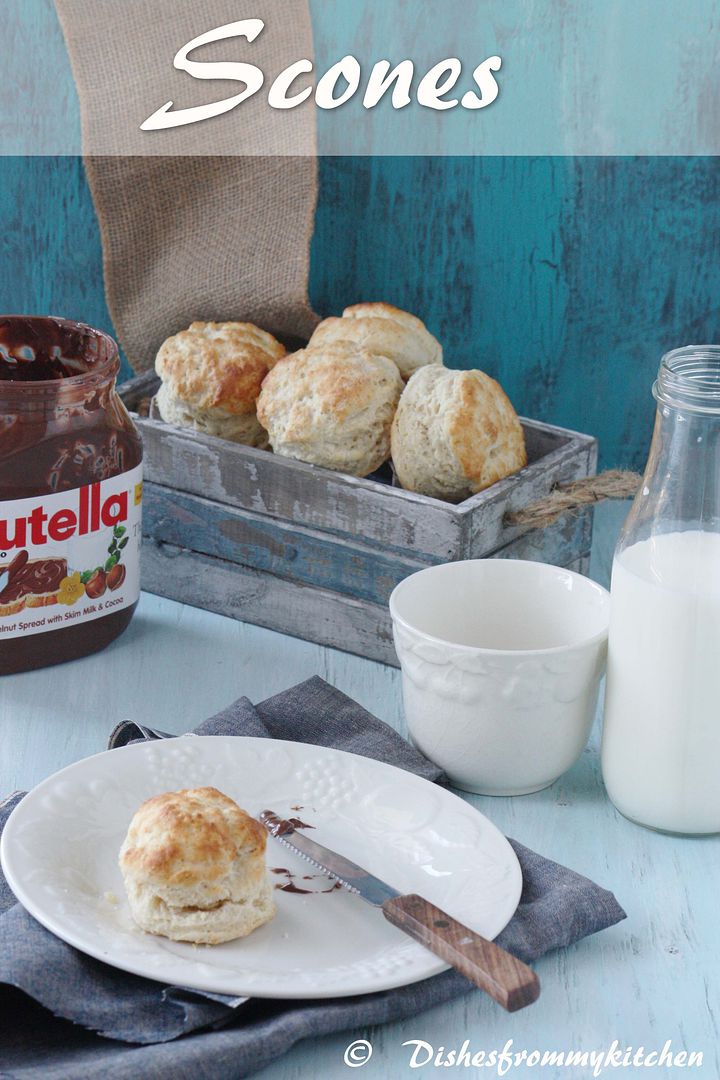
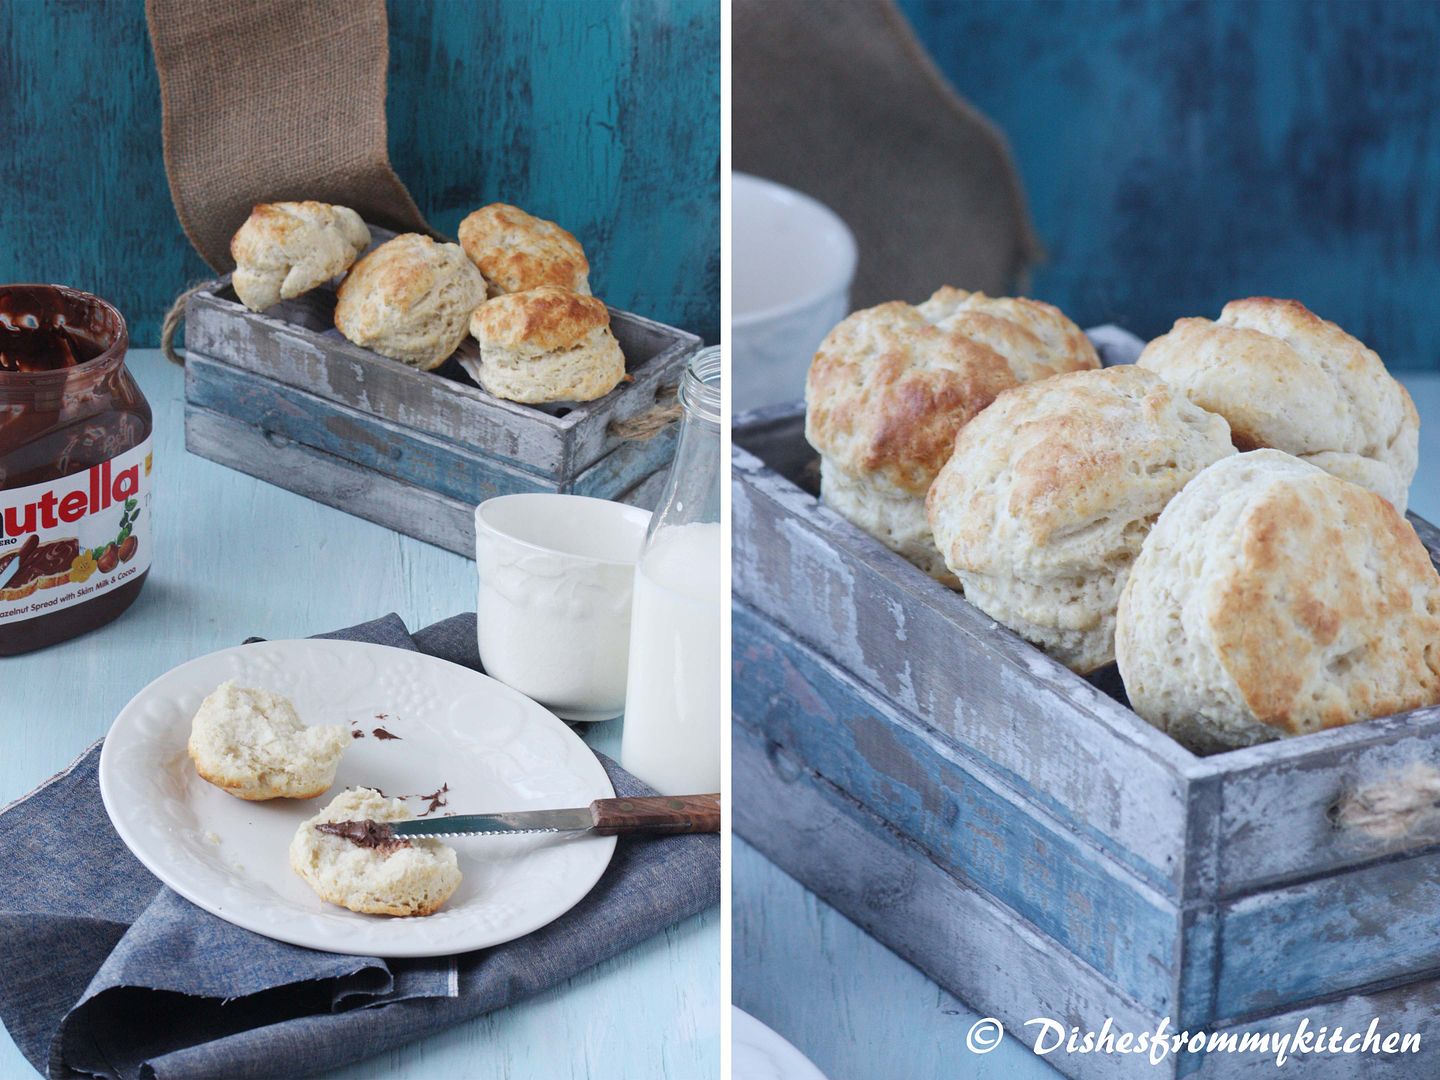
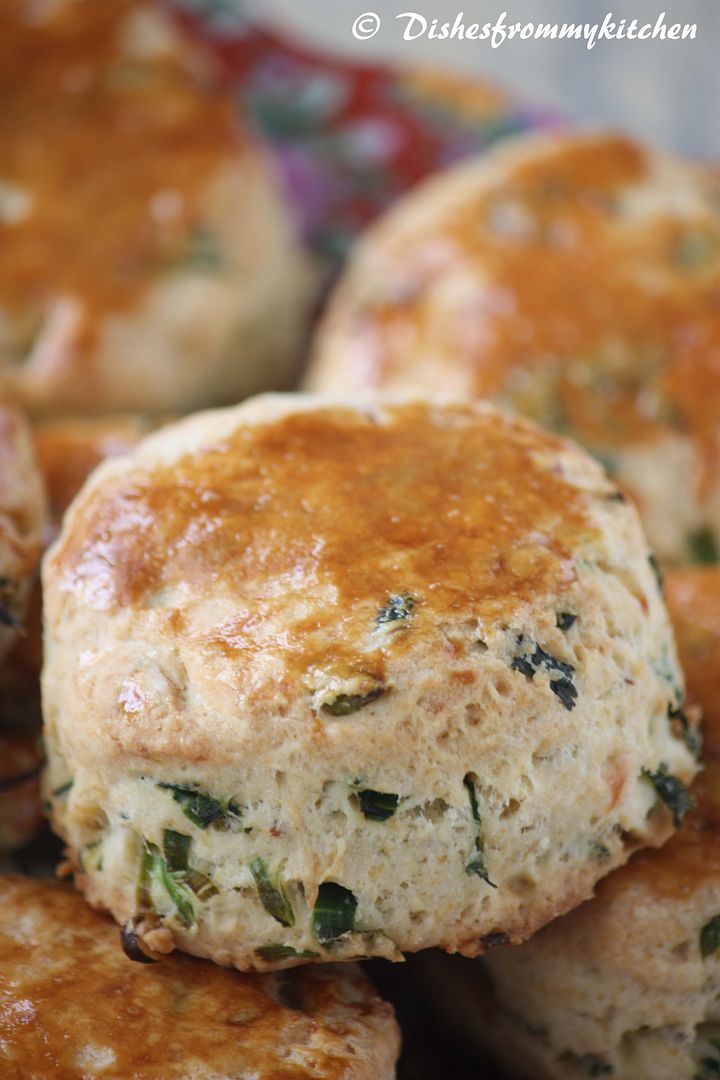
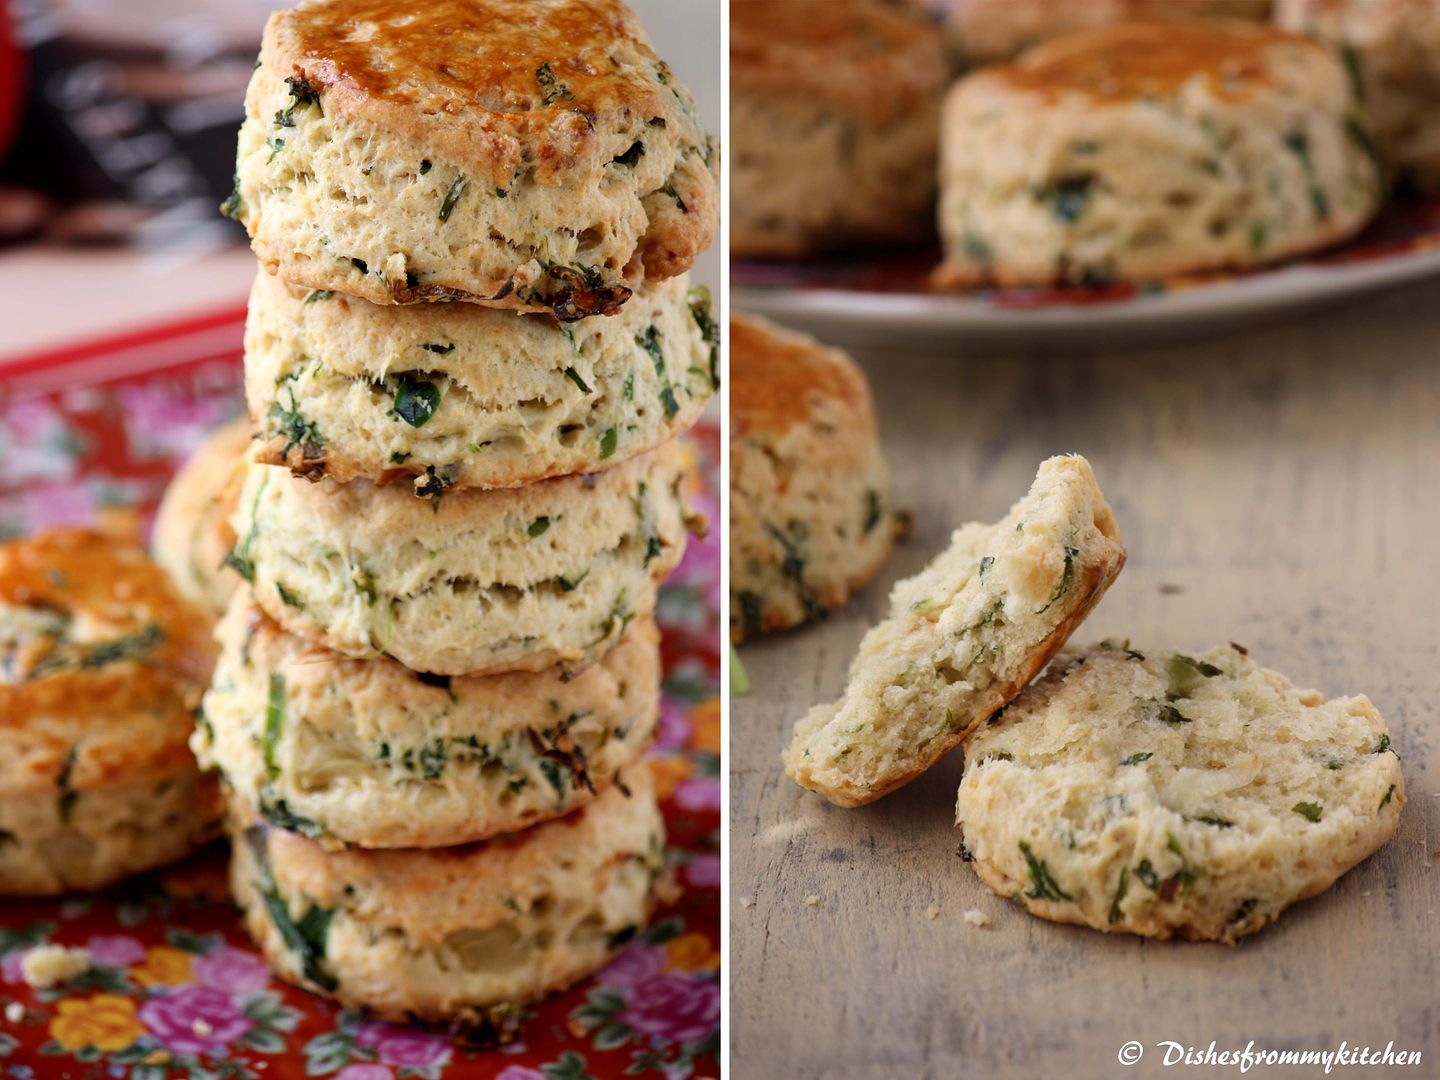
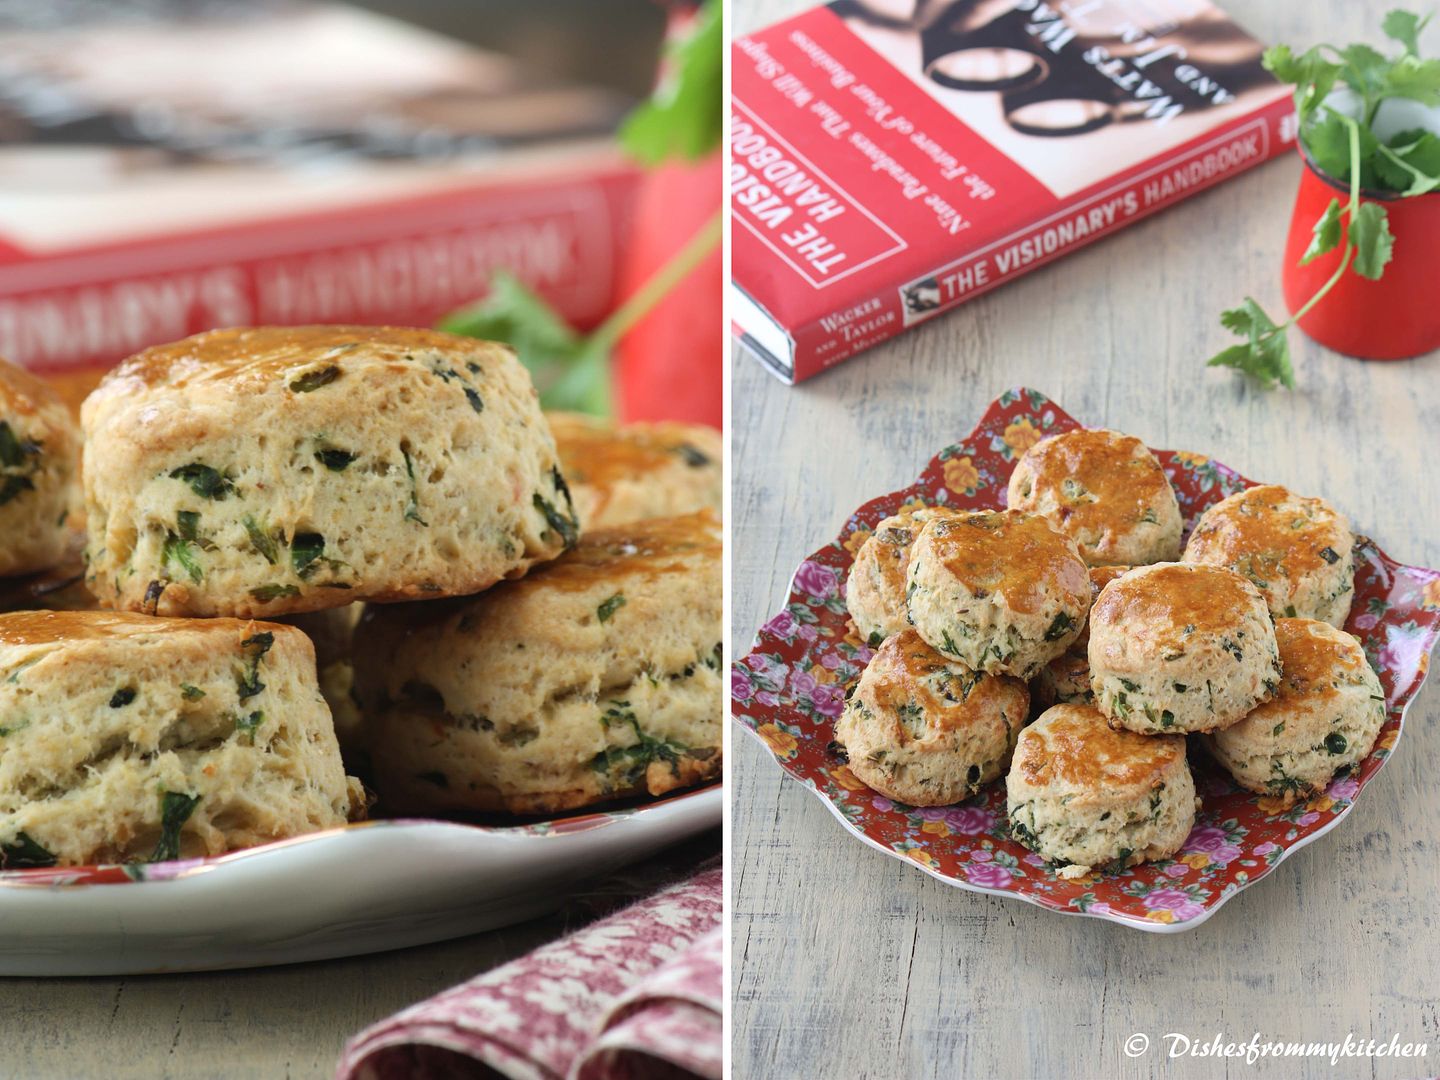
Here are my plain scones which we enjoyed with nutella and mini scones with Indian touch. It includes caramelized onion, finely chopped green chilies, Scallions, lots of coriander leaves with hint of whole cumin. I have also used whole wheat flour and half all purpose flour to the basic recipe.  Hope you all enjoy my treat as much as I enjoyed baking in the gloooooomy and lazy day!!!

The scone is a small Scottish quick bread. They are usually made of wheat, barley or oatmeal, with baking powder as a leavening agent. The scone is a basic component of the cream tea or Devonshire tea.

The original scone was round and flat, usually the size of a medium size plate. It was made with unleavened oats and baked on a griddle (or girdle, in Scots), then cut into triangle-like quadrants for serving. British scones are often lightly sweetened, but may also be savory. They frequently include raisins, currants, cheese or dates. Round-shaped British scones can resemble North American biscuits in appearance, but scones rely on cold butter for their delicate, flaky texture, while biscuits are more often made with animal fat or vegetable shortening and are crumbly rather than flaky.

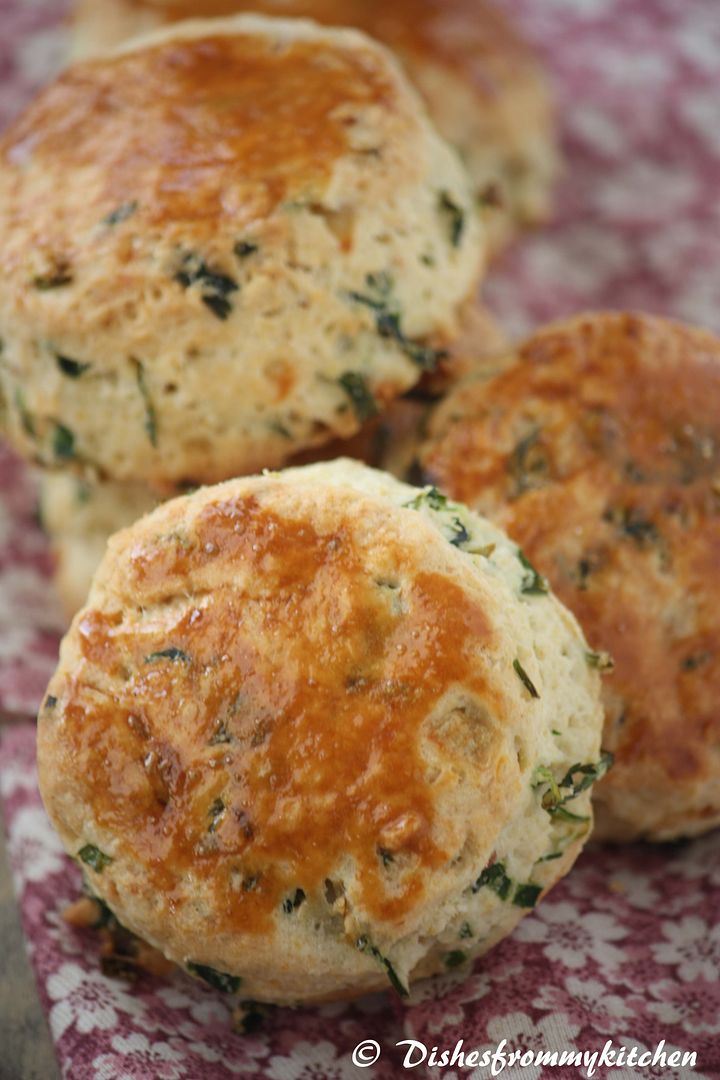
Here are my mini scones with Indian touch. It includes caramelized onion, finely chopped green chilies, Scallions, lots of coriander leaves with hint of whole cumin. I have also used whole wheat flour and half all purpose flour to the basic recipe.  Hope you all enjoy my treat as much as I enjoyed baking in the gloooooomy and lazy day!!!


BASIC SCONE RECIPE

Ingredients:

Plain (all-purpose) flour - 1 cup
Fresh baking powder - 2 teaspoons
Salt - ¼ teaspoon
Frozen grated butter - 2 tablespoons
Cold milk - ½ cup approximately
Optional 1 tablespoon milk, for glazing the tops of the scones


Method:

1. Preheat oven to very hot 475°F/240°C/gas mark 9.
2. Triple sift the dry ingredients into a large bowl. (If your room temperature is very hot refrigerate the sifted ingredients until cold.)
3. Rub the frozen grated butter (or combination of fats) into the dry ingredients until it resembles very coarse bread crumbs with some pea-sized pieces if you want flaky scones or until it resembles coarse beach sand if you want tender scones.
4. Add nearly all of the liquid at once into the rubbed-in flour/fat mixture and mix until it just forms a sticky dough (add the remaining liquid if needed). The wetter the dough the lighter the scones (biscuits) will be!
5. Turn the dough out onto a lightly floured board, lightly flour the top of the dough. To achieve an even homogeneous crumb to your scones knead very gently about 4 or 5 times (do not press too firmly) the dough until it is smooth. To achieve a layered effect in your scones knead very gently once (do not press too firmly) then fold and turn the kneaded dough about 3 or 4 times until the dough has formed a smooth texture. (Use a floured plastic scraper to help you knead and/or fold and turn the dough if you wish.)


6. Pat or roll out the dough into a 6 inch by 4 inch rectangle by about ¾ inch thick (15¼ cm by 10 cm by 2 cm thick). Using a well-floured 2-inch (5 cm) scone cutter (biscuit cutter), stamp out without twisting six 2-inch (5 cm) rounds, gently reform the scraps into another ¾ inch (2 cm) layer and cut two more scones (these two scones will not raise as well as the others since the extra handling will slightly toughen the dough). Or use a well-floured sharp knife to form squares or wedges as you desire.
7. Place the rounds just touching on a baking dish if you wish to have soft-sided scones or place the rounds spaced widely apart on the baking dish if you wish to have crisp-sided scones. Glaze the tops with milk if you want a golden color on your scones or lightly flour if you want a more traditional look to your scones.
8. Bake in the preheated very hot oven for about 10 minutes (check at 8 minutes since home ovens at these high temperatures are very unreliable) until the scones are well risen and are lightly colored on the tops. The scones are ready when the sides are set.
9. Immediately place onto cooling rack to stop the cooking process, serve while still warm.


Note :


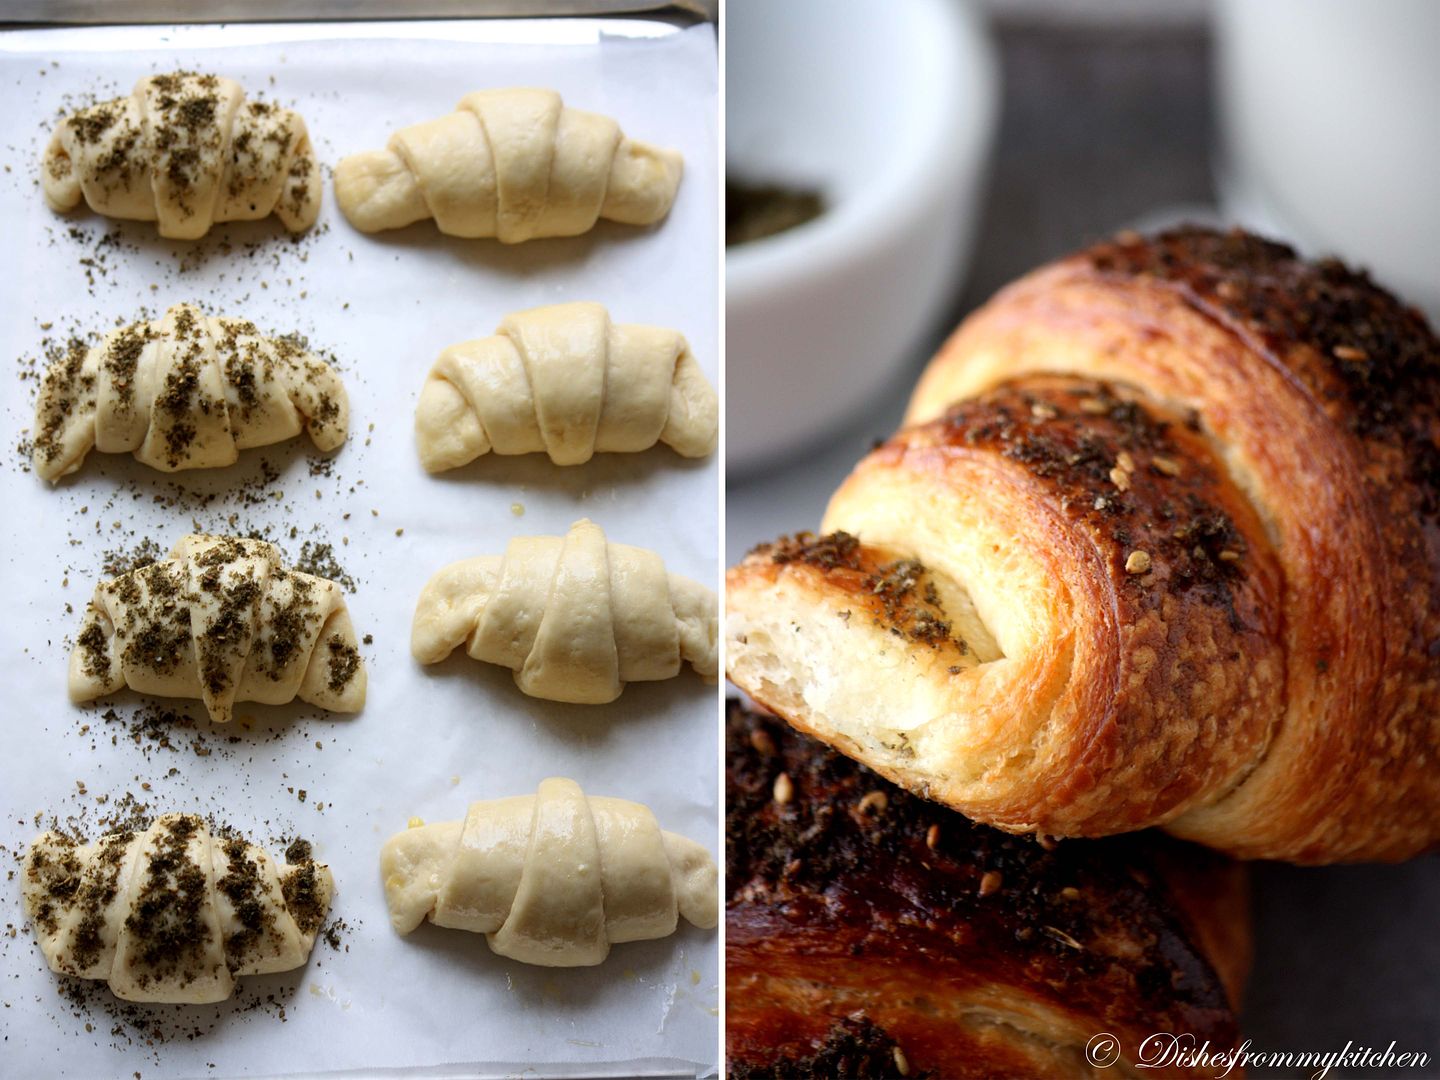
For the Herb and Caramalized onion scone 


Onion - 1 finely chopped
Green chillies - 3 very very finely chopped
Scallions/chives - 4 only green part finely sliced
Cumin seeds - 1/2 tsp
Cilantro - 1/4 cup very finely chopped
Oil - 1/2 tbsp
salt - little


Method :

1. Heat oil in the pan . Add the cumin once it splutters. Add the green chillies.
2. Add the onion to brown color in low flame.
3. Now once it is done add other ingredients and give it a stir and put off the flame.
4. Let them cool and add this cooled mixture after step 3 in the above scone recipe.
5. And follow remaining steps.  


Enjoy the Scone with Indian touch !!!!

I used egg wash for my Herb scone but if you want to avoid egg , just substitute with milk like the basic scone.


Storage and Freezing Instructions/Tips:

Scones are best eaten warm. Scones (biscuits) are really easy to store – bag the cooked and cooled scones and freeze until needed then reheat in a moderate hot for a few minutes.

Read more...

CROISSANTS (PLAIN AND SOME SPRINKLED WITH ZATAR) - DARING CHALLENGE FOR SEPTEMBER 2011

The Daring Bakers go retro this month! Thanks to one of our very talented non-blogging members, Sarah, the Daring Bakers were challenged to make Croissants using a recipe from the Queen of French Cooking, none other than Julia Child!


A croissant is a buttery flaky bread named for its distinctive crescent shape. It is also sometimes called a Crescent. Croissants are made of a leavened variant of puff pastry. The yeast dough is layered with butter, rolled and folded several times in succession, then rolled into a sheet, a technique called laminating.


The most difficult part of making croissants is that they take a veeeeery long time. About 12 hours total, with resting and rising periods. I made few plain croissants and other sprinkled with Za'atar(Zatar) middle eastern spice...yummm... here you go for virtual treat.


PLAIN BUTTERY CROISSANTS & WITH ZATAR

Recipe source : Mastering the Art of French Cooking, Volume Two. Julia Child and Simone Beck
Ingredients :

¼ oz (7 gm) of fresh yeast, or 1¼ teaspoon (6¼ ml/4 gm) of dry-active yeast (about ½ sachet)
3 tablespoons (45 ml) warm water (less than 100°F/38°C)
1 teaspoon (5 ml/4½ gm) sugar
1 3/4 cups (225 gm/½ lb) of strong plain flour (I used  Bread flour)
2 teaspoons (10 ml/9 gm) sugar
1½ teaspoon (7½ ml/9 gm) salt
½ cup (120 ml/¼ pint) milk
2 tablespoons (30 ml) tasteless oil ( vegetable oil)
½ cup (120 ml/1 stick/115 gm/¼ lb) chilled, unsalted butter
1 egg, for egg wash


Directions:

1. Mix the yeast, warm water, and first teaspoon of sugar in a small bowl. Leave aside for the yeast and sugar to dissolve and the yeast to foam up a little.
2. Measure out the other ingredients.
3. Heat the milk until tepid (either in the microwave or a saucepan), and dissolve in the salt and remaining sugar.
4. Place the flour in a large bowl.
5. Add the oil, yeast mixture, and milk mixture to the flour
6. Mix all the ingredients together using the rubber spatula, just until all the flour is incorporated
7. Turn the dough out onto a floured surface, and let it rest a minute while you wash out the bowl
8. Knead the dough eight to ten times only. The best way is as Julia Child does it in the video (see below). It’s a little difficult to explain, but essentially involves smacking the dough on the counter (lots of fun if you are mad at someone) and removing it from the counter using the pastry scraper.
9. Place the dough back in the bowl, and place the bowl in the plastic bag.
10. Leave the bowl at approximately 75°F/24°C for three hours, or until the dough has tripled in size. 


11. After the dough has tripled in size, remove it gently from the bowl, pulling it away from the sides of the bowl with your fingertips.
12. Place the dough on a lightly floured board or countertop, and use your hands to press it out into a rectangle about 8 by 12 inches (20cm by 30cm).
13. Fold the dough rectangle in three, like a letter (fold the top third down, and then the bottom third up).
14. Place the dough letter back in the bowl, and the bowl back in the plastic bag.
15. Leave the dough to rise for another 1.5 hours, or until it has doubled in size. This second rise can be done overnight in the fridge.
16. Place the double-risen dough onto a plate and cover tightly with plastic wrap. Place the plate in the fridge while you prepare the butter.
17. Once the dough has doubled, it’s time to incorporate the butter.
18. Place the block of chilled butter on a chopping board.
19. Using the rolling pin, beat the butter down a little, till it is quite flat.
20. Use the heel of your hand to continue to spread the butter until it is smooth. You want the butter to stay cool, but spread easily.


21. Remove the dough from the fridge and place it on a lightly floured board or counter. Let it rest for a minute or two.
22. Spread the dough using your hands into a rectangle about 14 by 8 inches (35 cm by 20 cm).
23. Remove the butter from the board, and place it on the top half of the dough rectangle.
24. Spread the butter all across the top two-thirds of the dough rectangle, but keep it ¼ inch (6 mm) across from all the edges.
25. Fold the top third of the dough down, and the bottom third of the dough up.
26. Turn the dough package 90 degrees, so that the top flap is to your right (like a book).
27. Roll out the dough package (gently, so you don’t push the butter out of the dough) until it is again about 14 by 8 inches (35 cm by 20 cm).
28. Again, fold the top third down and the bottom third up.
29. Wrap the dough package in plastic wrap, and place it in the fridge for 2 hours.
30. After two hours have passed, take the dough out of the fridge and place it again on the lightly floured board or counter.


31. Tap the dough with the rolling pin, to deflate it a little.
32. Let the dough rest for 8 to 10 minutes.
33. Roll the dough package out till it is 14 by 8 inches (35 cm by 20 cm).
34. Fold in three, as before.
35. Turn 90 degrees, and roll out again to 14 by 8 inches (35 cm by 20 cm).
36. Fold in three for the last time, wrap in plastic, and return the dough package to the fridge for two more hours (or overnight, with something heavy on top to stop it from rising).
37. It’s now time to cut the dough and shape the croissants.
38. First, lightly butter your baking sheet so that it is ready.
39. Take the dough out of the fridge and let it rest for ten minutes on the lightly floured board or counter.
40. Roll the dough out into a 20 by 5 inch rectangle (51 cm by 12½ cm).


41. Cut the dough into two rectangles (each 10 by 5 inches (25½ cm by 12½ cm)).
42. Place one of the rectangles in the fridge, to keep the butter cold.
43. Roll the second rectangle out until it is 15 by 5 inches (38 cm by 12½ cm).
44. Cut the rectangle into three squares (each 5 by 5 inches (12½ cm by 12½ cm)).
45. Place two of the squares in the fridge.
46. The remaining square may have shrunk up a little bit in the meantime. Roll it out again till it is nearly square.
47. Cut the square diagonally into two triangles.
48. Stretch the triangle out a little, so it is not a right-angle triangle, but more of an isosceles.
49. Starting at the wide end, roll the triangle up towards the point, and curve into a crescent shape.
50. Place the unbaked croissant on the baking sheet.
51. Repeat the process with the remaining squares of dough, creating 12 croissants in total.
52. Leave the tray of croissants, covered lightly with plastic wrap, to rise for 1 hour
53. Preheat the oven to very hot 475°F/240°C/gas mark 9.
54. Mix the egg with a teaspoon of water.
55. Spread the egg wash across the tops of the croissants.
56. Put the croissants in the oven for 12 to 15 minutes, until the tops are browned nicely.
57. Take the croissants out of the oven, and place them on a rack to cool for 10 minutes before serving.

Read more...

VEGAN MAPLE MOUSSE WITH COFFE CINNAMON JELLO - DARING CHALLENGE APR 2011

The April 2011 Daring Bakers’ challenge was hosted by Evelyne of the blog Cheap Ethnic Eatz. Evelyne chose to challenge everyone to make a maple mousse in an edible container. Prizes are being awarded to the most creative edible container and filling, so vote on your favorite from April 27th to May 27th at  http://thedaringkitchen.com!


I did mine few hours ago and this was absolutely last minute work.  Could not spend much time.  Its  because I am just getting ready for my vacation :) Happily held up with so many works like shopping.  But sadly not good with my health :(.....Ok coming to this month challenge, I choose to do the vegan Maple which tasted so delicious, easy to do and I had all the ingredients in hand.  And the container is coffee cinnamon Jell-O (using agar agar) which worked wonderfully with creamy vegan maple mousse. Hope you all enjoy the virtual treat!!!  I am also posting the nuts bowl and the Maple mousse using egg yolks you can give it a try as well.


VEGAN MAPLE MOUSSE

Ingredients:

Soft silken tofu - 1 package
Pure maple syrup - 3/4 cup
Agar-agar - 2 tsp 


Directions:

1. Let tofu come to room temperature. Using a food processor, blender, or hand mixer, blend tofu until just smooth. (But I did not blend very smooth)
2. Sprinkle agar-agar on the maple syrup and let it rest for 10 minutes. Heat maple syrup on the stove to a boil and then let it simmer 5 minutes until the agar-agar has dissolved.
3. In a food processor, blender, or a large bowl, blend the tofu with the maple syrup until creamy(I like little bit grainy).
4. Refrigerate for at least one hour. Remove from the fridge and divide among your edible containers.


MY EDIBLE CONTAINER - COFFEE CINNAMON JELLO
 

Ingredients:

Instant coffee - 1 tbsp
Water - 3 1/4 cup
Sugar - 1 /2 cup
Cinnamon stick - 2
Agar agar - 1 1/2 tsp


Method:

1. Place the water, coffee, Cinnamon, sugar in a small saucepan and bring to gentle boil.
2. Heat until sugar dissolves.
3. Add the agar agar powder in the boiling water until it dissolves.
4. Pour it in the moulds and let it set.
5. Then fill it with the mousse.


NUT BOWLS

Ingredients:

Crushed nuts of your choice such as almonds, hazelnuts or walnuts - 1 1/2 cups
Egg - 1 beaten room temperature
Sugar - 2 tbsp
Dark chocolate pieces - 1/2 cup 


Directions:

1. Use a food processor or a zip-lock back with a rolling pin to crush your nuts if whole, use about 1 cup of whole nuts to get 3/4 cups crushed. You want it somewhat coarse.
2. In a bowl mix the nuts with the beaten egg and the sugar.
3. Take 6 small ½ cup capacity Pyrex cups or a similar container and line the inside with aluminum foil. Spread ¼ cup of the mixture in the bowl, all the way up to the sides making sure you have a thin and even clean layer all around.
4. Bake at 350 degrees F/175 degrees C. until the nuts are golden and fragrant (about 15 minutes). Let cool completely before unmolding.
5. Melt chocolate (either in the microwave or over a double boiler). Dip the rims of the cooled nut bowls in the chocolate. Place in the freezer for at least 15 minutes or until the chocolate has hardened and is set.

MAPLE MOUSSE
 

Ingredients:

Pure maple syrup (not maple-flavored syrup) - 1 cup
Egg yolks -  4 large
Unflavored gelatin - 1 package
Whipping cream (35% fat content) - 1 1/2 cups

Directions:

1. Bring maple syrup to a boil then remove from heat.
2. In a large bowl, whisk egg yolks and pour a little bit of the maple syrup in while whisking (this is to temper your egg yolks so they don’t curdle).

Read more...

YEASTED MERINGUE COFFEE CAKE - DARING BAKERS FOR MARCH 2011

Its Daring Bakers time for March.  Wonderful challenge as always... This time it was Yeasted Meringue Coffee Cake.  Don't they sound delicious..yes it was!!!.  Totally loved the challenge.  I did not make much changes to the original recipe other than the filling.  The filling which I made was the combination of dried Cranberry+ Zest of Orange and crunchy  Pecans which I love love love a lot. The recipe can easily be halved to make one round coffee cake.  I just halved the recipe.  If your making the wreath shape the baking time would be as suggested.  But if you wishing make single serving like I posted the baking time is 15 to 18 minutes.  Enjoy the virtual treat as much as I enjoyed making and eating.

Blog-checking lines: The March 2011 Daring Baker’s Challenge was hosted by Ria and Jamie
. Ria and Jamie challenged The Daring Bakers to bake a Yeasted Meringue Coffee Cake.


Recipe Source: Jamie found this recipe on a piece of yellowed paper in her dad’s collection of clipped out and hand-written recipes from the 1970’s, no source, no date, and she tried the recipe and it was brilliant!


YEASTED MERINGUE COFFEE CAKE

Makes 2 round coffee cakes, each approximately 10 inches in diameter.


Ingredients:

For the yeast coffee cake dough:

Flour - 4 cups
Sugar - ¼ cup
Salt - ¾ teaspoon
Active dried yeast - 1 package
Whole milk - ¾ cup
Water - ¼ cup  (doesn’t matter what temperature)
Unsalted butter  - ½ cup at room temperature
Eggs - 2 large at room temperature


For the Meringue:

Egg whites - 3 large at room temperature
Salt - ¼ teaspoon
Vanilla - ½ teaspoon
Sugar - ½ cup

For the filling Which I used :


Chopped pecans - 1/2 cup
Dried cranberries - 1/2 cup
Granulated sugar - 2 Tablespoons
Orange Zest - 1 1/2 teaspoon

Egg wash: 1 beaten egg

Confectioner’s sugar (powdered/icing sugar) for dusting cakes


Directions:

Prepare the dough:

1. In a large mixing bowl, combine 1 ½ cups of the flour, the sugar, salt and yeast.
2. In a saucepan, combine the milk, water and butter and heat over medium heat until warm and the butter is just melted.
3.With an electric mixer on low speed, gradually add the warm liquid to the flour/yeast mixture, beating until well blended. Increase mixer speed to medium and beat 2 minutes. Add the eggs and 1 cup flour and beat for 2 more minutes.
4.Using a wooden spoon, stir in enough of the remaining flour to make a dough that holds together. Turn out onto a floured surface (use any of the 1 ½ cups of flour remaining) and knead the dough for 8 to 10 minutes until the dough is soft, smooth, sexy and elastic, keeping the work surface floured and adding extra flour as needed.
5.Place the dough in a lightly greased (I use vegetable oil) bowl, turning to coat all sides. Cover the bowl with plastic wrap and a kitchen towel and let rise until double in bulk, 45 – 60 minutes. The rising time will depend on the type of yeast you use.
6.Prepare your filling:In a small bowl, combine the cinnamon and sugar for the filling if using. You can add the chopped nuts to this if you like, but I find it easier to sprinkle on both the nuts and the chocolate separately.

Once the dough has doubled, make the meringue:

In a clean mixing bowl – ideally a plastic or metal bowl so the egg whites adhere to the side (they slip on glass) and you don’t end up with liquid remaining in the bottom – beat the egg whites with the salt, first on low speed for 30 seconds, then increase to high and continue beating until foamy and opaque. Add the vanilla then start adding the ½ cup sugar, a tablespoon at a time as you beat, until very stiff, glossy peaks form.


Assemble the Coffee Cakes:

1. Line 2 baking/cookie sheets with parchment paper.
2. Punch down the dough and divide in half. On a lightly floured surface, working one piece of the dough at a time (keep the other half of the dough wrapped in plastic), roll out the dough into a 20 x 10-inch (about 51 x 25 ½ cm) rectangle. Spread half of the meringue evenly over the rectangle up to about 1/2-inch (3/4 cm) from the edges. Sprinkle half of your filling of choice evenly over the meringue (ex: half of the cinnamon-sugar followed by half the chopped nuts and half of the chocolate chips/chopped chocolate).
3.Now, roll up the dough jellyroll style, from the long side. Pinch the seam closed to seal. Very carefully transfer the filled log to one of the lined cookie sheets, seam side down. Bring the ends of the log around and seal the ends together, forming a ring, tucking one end into the other and pinching to seal.


4.Using kitchen scissors or a sharp knife (although scissors are easier), make cuts along the outside edge at 1-inch (2 ½ cm) intervals. Make them as shallow or as deep as desired but don’t be afraid to cut deep into the ring.
5.Repeat with the remaining dough, meringue and fillings.
6.Cover the 2 coffee cakes with plastic wrap and allow them to rise again for 45 to 60 minutes.
7.Preheat the oven to 350°F (180°C).
8.Brush the tops of the coffee cakes with the egg wash. Bake in the preheated oven for 25 to 30 minutes until risen and golden brown. The dough should sound hollow when tapped.
9.Remove from the oven and slide the parchment paper off the cookie sheets onto the table. Very gently loosen the coffee cakes from the paper with a large spatula and carefully slide the cakes off onto cooling racks. Allow to cool.
10.Just before serving, dust the tops of the coffee cakes with confectioner’s sugar as well as cocoa powder if using chocolate in the filling. These are best eaten fresh, the same day or the next day.


Enjoy !!!

Read more...

VANILLA PANNA COTTA WITH MOCK KIWI GLEE - DARING CHALLENGE FEB 2011 !!!

The February 2011 Daring Bakers’ challenge was hosted by Mallory from A Sofa in the Kitchen. She chose to challenge everyone to make Panna Cotta from a Giada De Laurentiis recipe and Nestle Florentine Cookies.
I have done Panna cotta couple of times before.. and we love it. Its rich and creamy dessert which melts in your mouth. Here is the another Panna cotta recipe of both Chocolate and Vanilla which I have posted long time back.  But I followed the below recipe this time using Honey which came out so delicious as well.  I usually do Florentines using almond meal but this is the first time I am making using Oats, it was just awesome.  This Recipe is sure a Keeper and will keep doing it often, it came out lacy, crispy and it was so yummy :)

Creamy Dreamy Crunchy Sweet challenge...


VANILLA PANNA COTTA

Ingredients :

Whole milk - 1 cup
Unflavored powdered gelatin - 1 tablespoon
Whipping cream - 3 cups
Honey - 1/3 cup
Granulated sugar - 1 tablespoon
Vanilla Extract - 1 tsp


Directions:

   1. Pour the milk into a bowl or pot and sprinkle gelatin evenly and thinly over the milk (make sure the bowl/pot is cold by placing the bowl/pot in the refrigerator for a few minutes before you start making the Panna Cotta). Let stand for 5 minutes to soften the gelatin.
   2. Pour the milk into the saucepan/pot and place over medium heat on the stove. Heat this mixture until it is hot, but not boiling, about five minutes. (I whisk it a few times at this stage).
   3. Next, add the cream, honey, sugar, and pinch of salt. Making sure the mixture doesn't boil, continue to heat and stir occasionally until the sugar and honey have dissolved 5-7 minutes.
   4. Remove from heat, allow it to sit for a few minutes to cool slightly. Then pour into the glass or ramekin.
   5. Refrigerate at least 6 hours or overnight. Add garnishes and serve.


GREEN PART - MOCK KIWI GLEE :)

For the Green part I Used the Green Apple Jell-O mixture and to give the Kiwi effect just I sprinkled with Black Poppy seeds, the tart of this Jell-O and the Creamy Panna cotta tasted awesome.

NESTLE FLORENTINE COOKIES

I just quartered this recipe.

Ingredients:

Unsalted butter - 2/3 cup
Quick oats - 2 cups (But I used Rolled oats)
Granulated sugar - 1 cup
Plain (all purpose) flour - 2/3 cup 
Liquid Glucose - 4 tbsp
Whole milk - 1/4 cup 
Vanilla extract - 1 tsp
Pinch of salt
Dark or milk chocolate- 1½ cups


Directions:

Preheat oven to moderately hot 375°F (190°C) (gas mark 5). Prepare your baking sheet with silpat or parchment paper.

   1. Melt butter in a medium saucepan, and then remove from the heat.
   2. To the melted butter add oats, sugar, flour, corn syrup, milk, vanilla, and salt. Mix well. Drop a tablespoon full, three inches (75 mm) apart, onto your prepared baking sheet. Flatten slightly with the back of your tablespoon, or use a spatula.
   3. Bake in preheated oven for 6-8 minutes, until cookies are golden brown. Cool completely on the baking sheets.
   4. While the cookies are cooling melt your chocolate until smooth either in the microwave (1 1/2 minutes), or stovetop (in a double boiler, or a bowl that fits atop a saucepan filled with a bit of water, being sure the water doesn't touch the bottom of the bowl).
   5. Peel the cookies from the silpat or parchment and place face down on a wire rack set over a sheet of wax/parchment paper (to keep counters clean).
   6. Spread a tablespoon of chocolate on the bottom/flat side of your cookie, sandwiching another (flat end) cookie atop the chocolate.

This recipe will make about 2 1/2 - 3 dozen sandwiched Florentine cookies. You can also choose not to sandwich yours, in which case, drizzle the tops with chocolate (over your wax paper).

I just drizzled chopped Pistachio before baking and drizzled some white chocolate after the cookies are cooled completely.

Read more...


Page copy protected against web site content infringement by Copyscape

Visit Great Cooks Community
All recipes are on Petitchef