Search This Blog

Showing posts with label Cookies. Show all posts

HAPPY NEW YEAR 2017 !

Last couple of year’s blog has taken a back seat because of my family priorities. Heartfelt thanks to all those who messaged/emailed me during my absence, truly appreciate your love & Support in every way.  Looking forward to do more posts going forward.  See you all soon with lots of refreshing posts in the blog.  I wish everyone a Wonderful, healthy and amazing year ahead, “HAPPY NEW YEAR 2017". This is my last post for 2016 and I am sharing some of my Christmas and New Year packages I did for my family and friends.  Thanks y'all for stopping by.  C'ya.


Read more...

COFFEE CHOCOCHIP MUFFIE

Muffie, do you wonder what it is??? Here is the formula Muffin+ Cookie -> Muffie.  This has muffin texture inside and outside is crisp like cookie.  I have tried few other muffies too.. will post it when possible.  This is lovely combination of Coffee and Chocolate.  Who doesn't love chocolate and coffee in the morning or as a snack in the evening ?  These are perfect brunch Muffies, as well as  tea time snack.   The best part is this has no butter and no egg.  I promise you that the flavor of coffee with bite of chocolate chip absolutely yumm:) that you will enjoy throughly with a glass of cold milk.  Have a dip here....


COFFEE CHOCOCHIP MUFFIE

I made big muffies.. its just upto your choice.  Sometime I make small bite size muffies too.  Only the oven timings varies.


Ingredients :

This yields - 110 to 12 muffies

All purpose flour - 2 cup
Sugar - 1/2 cup ( This is not so sweet, since we are using more chocochip that was good enough for us, but if you want really sweet add 1 tbsp extra)
Canola oil - 1/2 cup
Chocolate chip or chunks ( semi sweet ) - 1/2 cup
Instant Coffee granules - 1 heaped tbsp
Vanilla extract - 1 tsp
Milk - 1 cup (room temperature) ( 1 tbsp extra if the batter is too thick for mixing)
Apple cider Vinegar - 1 tsp ( you can use white vinegar too)
Baking powder - 1 tbsp
Salt - 1/2 tsp


Method :

1. Preheat the oven to 375° F.  Line the tray with the parchment.
2.Measure 1/2 cup of milk. Stir in the coffee granules, mix to dissolve.
3.Stir in the rest of the milk with vinegar and keep aside.
4. In a large mixing bowl, stir together the flour, sugar, baking powder and salt.
5. Mix well with the whisk, Now in the centre of the flour mixture, make a well.
6. Add the milk mixture, milk vinegar mixture, oli and vanilla.
7.Mix togetheruntil the batter is just moistened.
8. Don't overmix it. Now fold the chocolate chip or chunks.
9. Use the ice cream scoop and scoop it in the parchment sheet.
10. Leaving gap between each muffie.  Bake it for 20 to 25 minutes. (Mine was ready in 20 minutes)
11. It should be nice golden color in the bottom and the top.
12. Immediately transfer to the cooling rack.
13. You can store in the plastic airtight container.


Note:

1.You can also refrigerate for 2 to 3 days too.  When needed just keep in the preheated oven for 5 minutes.
2. If your making small muffies you can just bake for 10 to 15 minutes.  But keep an eye on them.

Enjoy the Yummilicious Muffie with a cup of milk !!!


Read more...

VANILLA PANNA COTTA WITH MOCK KIWI GLEE - DARING CHALLENGE FEB 2011 !!!

The February 2011 Daring Bakers’ challenge was hosted by Mallory from A Sofa in the Kitchen. She chose to challenge everyone to make Panna Cotta from a Giada De Laurentiis recipe and Nestle Florentine Cookies.
I have done Panna cotta couple of times before.. and we love it. Its rich and creamy dessert which melts in your mouth. Here is the another Panna cotta recipe of both Chocolate and Vanilla which I have posted long time back.  But I followed the below recipe this time using Honey which came out so delicious as well.  I usually do Florentines using almond meal but this is the first time I am making using Oats, it was just awesome.  This Recipe is sure a Keeper and will keep doing it often, it came out lacy, crispy and it was so yummy :)

Creamy Dreamy Crunchy Sweet challenge...
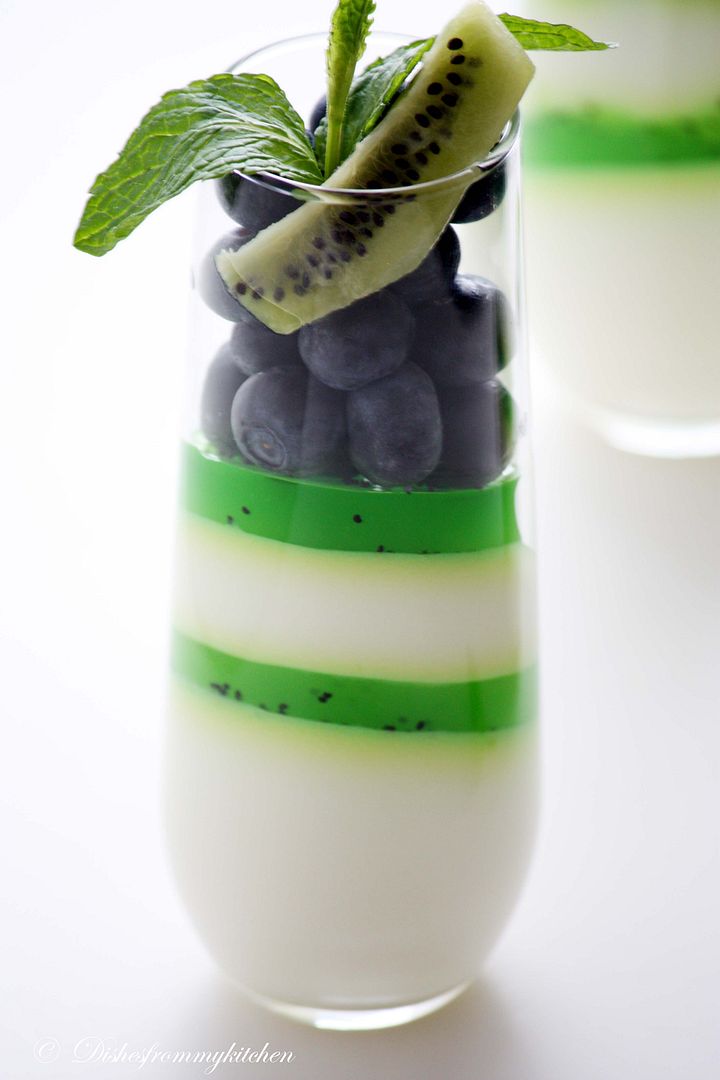


VANILLA PANNA COTTA

Ingredients :

Whole milk - 1 cup
Unflavored powdered gelatin - 1 tablespoon
Whipping cream - 3 cups
Honey - 1/3 cup
Granulated sugar - 1 tablespoon
Vanilla Extract - 1 tsp


Directions:

   1. Pour the milk into a bowl or pot and sprinkle gelatin evenly and thinly over the milk (make sure the bowl/pot is cold by placing the bowl/pot in the refrigerator for a few minutes before you start making the Panna Cotta). Let stand for 5 minutes to soften the gelatin.
   2. Pour the milk into the saucepan/pot and place over medium heat on the stove. Heat this mixture until it is hot, but not boiling, about five minutes. (I whisk it a few times at this stage).
   3. Next, add the cream, honey, sugar, and pinch of salt. Making sure the mixture doesn't boil, continue to heat and stir occasionally until the sugar and honey have dissolved 5-7 minutes.
   4. Remove from heat, allow it to sit for a few minutes to cool slightly. Then pour into the glass or ramekin.
   5. Refrigerate at least 6 hours or overnight. Add garnishes and serve.


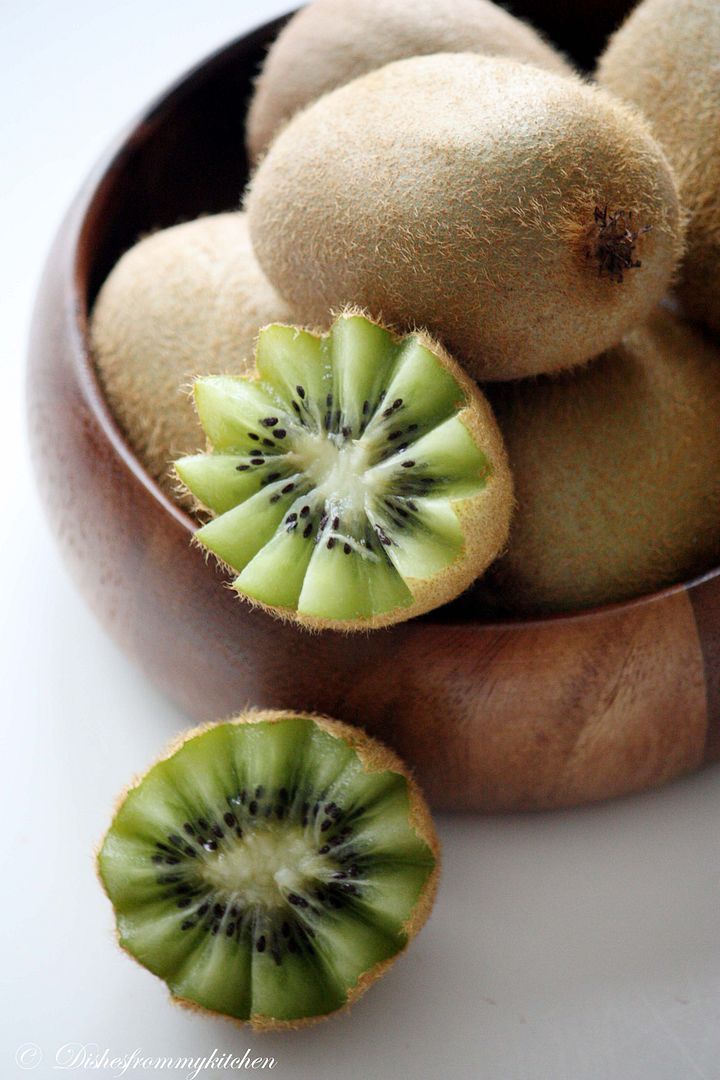
GREEN PART - MOCK KIWI GLEE :)

For the Green part I Used the Green Apple Jell-O mixture and to give the Kiwi effect just I sprinkled with Black Poppy seeds, the tart of this Jell-O and the Creamy Panna cotta tasted awesome.

NESTLE FLORENTINE COOKIES

I just quartered this recipe.

Ingredients:

Unsalted butter - 2/3 cup
Quick oats - 2 cups (But I used Rolled oats)
Granulated sugar - 1 cup
Plain (all purpose) flour - 2/3 cup 
Liquid Glucose - 4 tbsp
Whole milk - 1/4 cup 
Vanilla extract - 1 tsp
Pinch of salt
Dark or milk chocolate- 1½ cups


Directions:

Preheat oven to moderately hot 375°F (190°C) (gas mark 5). Prepare your baking sheet with silpat or parchment paper.

   1. Melt butter in a medium saucepan, and then remove from the heat.
   2. To the melted butter add oats, sugar, flour, corn syrup, milk, vanilla, and salt. Mix well. Drop a tablespoon full, three inches (75 mm) apart, onto your prepared baking sheet. Flatten slightly with the back of your tablespoon, or use a spatula.
   3. Bake in preheated oven for 6-8 minutes, until cookies are golden brown. Cool completely on the baking sheets.
   4. While the cookies are cooling melt your chocolate until smooth either in the microwave (1 1/2 minutes), or stovetop (in a double boiler, or a bowl that fits atop a saucepan filled with a bit of water, being sure the water doesn't touch the bottom of the bowl).
   5. Peel the cookies from the silpat or parchment and place face down on a wire rack set over a sheet of wax/parchment paper (to keep counters clean).
   6. Spread a tablespoon of chocolate on the bottom/flat side of your cookie, sandwiching another (flat end) cookie atop the chocolate.

This recipe will make about 2 1/2 - 3 dozen sandwiched Florentine cookies. You can also choose not to sandwich yours, in which case, drizzle the tops with chocolate (over your wax paper).

I just drizzled chopped Pistachio before baking and drizzled some white chocolate after the cookies are cooled completely.

Read more...

CHEQUERED SHORTBREAD(Cookies)


Shortbread or Cookie, this is a conversational topic. The majority classifies shortbread as a cookie, but there are some who consider it a biscuit or even a cake. One would be hard pressed, though, to find someone willing to classify it by its given name-bread. First, shortbread calls for a large percentage of shortening thus the name shortbread. Second, short refers to the desired crispness or "shortness" of the final product. Historically, the namesake shortbread was defended by early Scottish bakers who fought to prevent shortbread from being classified as a biscuit to avoid paying a government tax on biscuits.

Shortbread originated in Scotland. In Scotland one can find regional shortbread variations. Shortbread is frequently eaten around Christmas and the New Year; it is consumed year round in many countries. With its centuries old history, it is the "Granddaddy of all butter cookies" and a mainstay in Europe.

The Shortbread cookies can be made in different patterns using the chocolate and vanilla flavors, you can make different flavors by adding the nuts flour,
zest according to your wish. This is a basic shortbread cookies of chocolate and Vanilla. Have fun in making different patterns with your kids and enjoy.....


CHEQUERED SHORTBREAD

White Dough

Ingredients :

All purpose Flour - 1 1/2 cup
Butter - 3/4 cup
Icing Sugar - 1/3 cup
Egg yolk - 1
Vanilla essence- little


Chocolate Dough

Ingredients :


All purpose Flour - 1 1/4 cup
Cocoa - 1/4 cup
Egg yolk -1
Butter - 3/4 cup
Icing Sugar - 1/3 cup
Pinch of salt


Method :

1. For this cookies its really very important to use cold butter.
2. Mash the butter and sift the icing sugar on top of it.
3. Chop and scrape the butter with a dough scraper until the icing sugar is perfectly mixed in.
4. Add the egg yolk and continue scraping.
5. Sift onto the butter. Mix with the fork or dough scraper like a bread crumbs.
6. Knead the dough gently with your hands and work it into a ball.( Don't give more pressure like chapathi dough)
7. Repeat the above steps for the Cocoa dough.
8. Wrap the 2 doughs in plastic wrap and put them into the fridge for 30 minutes.
9. Make rolls using 100g of dough for each roll. ( This 100g + 100 g is only for one pattern)
10. Also make some rolls with rectangular profile.
11. Put all rolls into the freezer for 30 minutes.
12. For cutting the rolls, the rolls need to be firm enough but not as hard as a stone.
13. Here comes the most interesting and fun part to make the chequered pattern.
14. Cut the frozen rolls into halves, quarters and so on. You should be very care full when cutting it.
15. Brush the sides with water and recombine the pieces to interesting patterns.
16. After combining roll them on the table to make sure that all pieces stick together firmly.
17. Cut the rectangular rolls into four slices. Then cut two slices of each color into four stripes.
18. Recombine the stripes to slices ( four stripes each) with alternating color. After that layer four slices to one rectangular roll.
19. If you need to make make covers for the rolls.
20. Make a sheet of white or black dough with a roll.
21. Brush the sheet with water. Place the roll on the sheet and roll it until full roll is covered with the dough. Cut the excessive part.
22. Put them in freezer for 1 hr. Before baking bring back to room temperature and cut into thick circles.
23. Bake in the baking sheet in 350 f for 13 minutes.


Note :

1. For spiral pattern using the rolling pin just roll them to 1/4" thickness, repeat with another color. Keep one on top of other.
2.Roll it tightly and put in the freezer for 1 hr. Then You can proceed the same procedure from 28 and 29.
3. Mix all the scrap doughs to make marbled cookies.
4. Cut to different patterns and bake.
5. Its really important to put it in the freezer for a while, each and every time you make different patterns.
6. Brush with water when you make patch works and press slightly so that they stick to each other.
7. For making wheel pattern make cylindrical and cut to quarters, repeat with both colors and fix colors alternatively to form a wheel.
8. The above measurement yields about 200 small cookies. Again this depends on the pattern, size you make.


Try different patterns and enjoy the fun.

Read more...


Page copy protected against web site content infringement by Copyscape

Visit Great Cooks Community
All recipes are on Petitchef